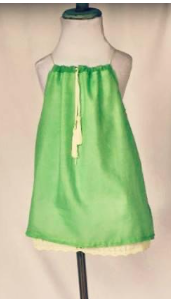
Pillow Case Dress

What you need
- Serger or Overlock Machine
- 4 Cones Serger Thread
- 2 yards fabric of your choice
- 1 yard of ⅞” wide satin ribbon
- Fray blocking liquid
Let's do some prep work:
From one of the fabrics cut two casing strips 3” long x 13” wide
Time to sew!
1. Set your Serger or Overlock machine for 4-thread overlock according to the machine instructions.
2. Place the fabric right sides together with the side panels. Stitch to create the front and backs as shown.
3.Fold the pieces in half, wrong sides together.

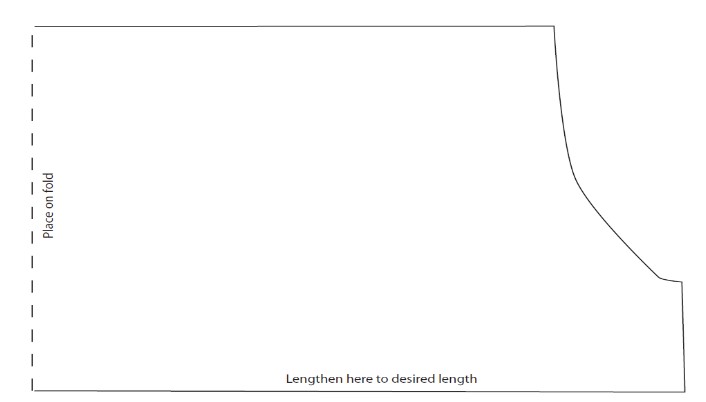
4.Place the armhole template on the fold as indicated and cut out, tapering the side to create an a-line silhouette.
5. Serge around the arm holes.
6. Press under the serged edges and then fold over once more for a seamless finish. We will topstitch these later.
7. Place the dress front and back right sides together and stitch the side seams.
8..Press under each short end of the casing strips until the strip equals the dress width.
9.Fold in half lengthwise with wrong sides together. Press.

10. Take your casing strip fabric and press under each short end of the casing strips until the strip equals the dress width
11. Place one of the casing strips along the top edge of the dress matching the raw edges and serge in place leaving long thread tails. Repeat with the other casing strip.
12.Press the seam allowances away from the casing.
13.Thread the two ties through the casings and tie in a bow. Trim any excess and apply fray blocking liquid to the ends to prevent fraying.
14. Now is the time for a fitting and to adjust the length if necessary. Serge in place and press seams up twice for a seamless finish.
15. Using either the chain stitch on your serger or straight stitch on your sewing machine, topstitch the armholes and the bottom hem.
Yay you're done! Go deliver this 👗 to the cutie in your life!


 Denmark