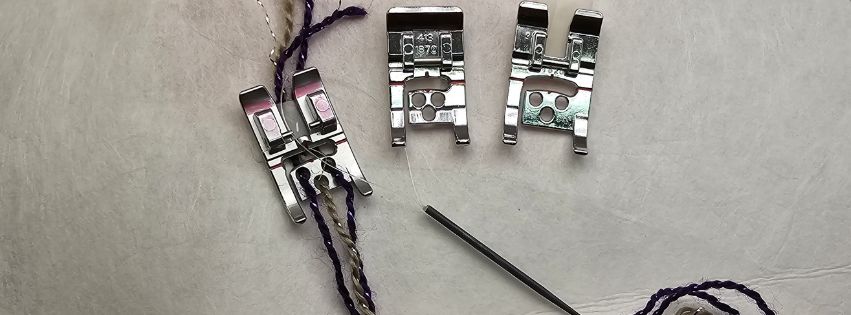
Exploring the 3-Hole Yarn Foot: Enhancing Your Sewing Projects

The 3-Hole Yarn Foot opens up new design possibilities for your sewing projects, allowing you to explore techniques you may not have tried before. With the right accessory foot, adding professional-looking details becomes a simple and rewarding process.
Materials You'll Need:
- 3-Hole Yarn Foot
- Fabric
- Stabilizer
- Yarn or decorative cord
- Thread
Preparation Steps:
- Threading the Foot: Before attaching the foot, use a threading lasso to guide the yarn or decorative cord through the three holes in the foot, from top to bottom. Once threaded, tie the yarns together underneath the foot.


- Attaching the Foot: Secure the 3-Hole Yarn Foot to the ankle of your sewing machine.
- Preparing the Fabric: Place a stabilizer beneath your fabric to ensure smooth stitching.
- Positioning the Yarn: Gently pull the knotted yarn behind the foot, making sure the knot is positioned away from your fabric to avoid stitching over it.
Selecting the Right Stitch:
To achieve the best results, choose a stitch designed specifically for the 3-Hole Yarn Foot. If your sewing machine doesn’t include built-in stitches for this foot, opt for a stitch that spans the width of the foot, such as a multi-step zigzag, bridging stitch, or stretch stitch.
Experimenting with Color:
Experimenting with different thread and yarn color combinations can dramatically alter the final look of your project. In the example provided, the same stitch and yarn were used across three lines of stitching, with only the thread color changing:
- Left Line: Thread color matches the fabric.
- Center Line: Thread color matches the outer yarn.
- Right Line: Thread color matches the center yarn.
This simple change in thread color can produce strikingly different effects, adding depth and dimension to your work.
Embrace Creativity:
Remember, every day spent at your sewing machine is an opportunity to play and experiment. Don’t hesitate to try new combinations and techniques—the results may surprise you!


 Denmark