Perfect Piping Made Easy: Tips & Tools for Adding Wow to Your Sewing Projects!

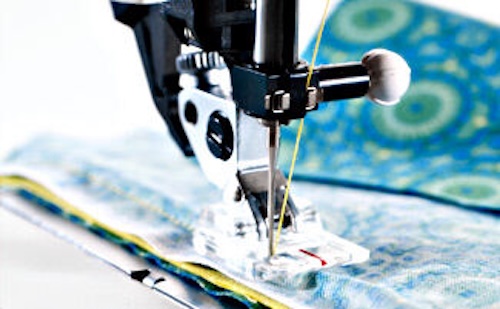
Piping is a great addition to any sewing or quilting project. It adds the perfect wow! Learn the simple tips and tools to make the piping pop on your next sewing endeavor. There are different size piping feet and different sizes and kinds of cording. In this lesson a 1.8mm cording and a narrow piping foot were used. The technique will be the same regardless of the size of cording you use, the only thing that will change will be the needle position. When using a polyester cording, use a steam iron to help reduce shrinking.
What you need:
- Cording
- Piping foot
- Stiletto
- Piping ruler
- Fabric 2 pieces by desired size
- Contrast fabric for piping -cut 1 ½” wide strip by the length needed
Preparation
- Start by attaching your piping foot to your machine
- Place the cording in the middle of your 1 ½” wide strip on the wrong side.
- Fold in half and place under the piping foot. It is very important that the cord fits exactly in the groove on the foot, directly to the left of the red line on the foot.
- Move your needle position to a 1.5
- Stitch down the length, using a stiletto to hold the cording next to the fold of the fabric
- Trim to a ¼” seam allowance using the piping ruler. (Trim to wider seam allowance if needed)
- Attach the piping strip to the right side of your piece of fabric matching the edge of the fabric
- Move your needle position to a 0.8 and sew to the length of the strip. You should be able to see 2 rows of stitching, with the last stich being closer to the edge of the cording
- Add your other piece of fabric, right sides together, covering the piping and pin if necessary
- Turn all three layers over and line up the cording into the groove of the foot (you will not be able to see it but you will be able to feel it.)
- Move the needle over to 0.3 and stitch inside the previous stitching line. Move the needle closer if needed.
- Open and press.


 Italy
Italy