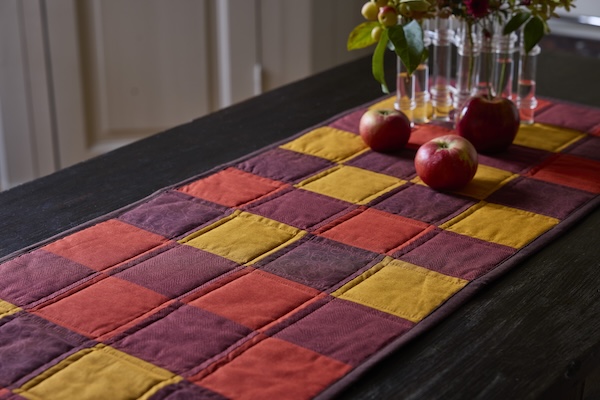
Fall Table Runner: Easy Beginner-Friendly Project

Add a cozy touch to your autumn decor with this DIY Fall Table Runner! Perfect for beginners, this project uses simple square shapes and is ideal for Fat Quarters, making it an affordable and accessible craft. If you have a Momento cutting machine, you can save time by using pre-made cut files available in the mySewnet Library. Prefer cutting by hand? No problem! We include step-by-step cutting instructions to guide you. Create a warm, handmade table runner that brings fall colors and charm to your dining table with ease.
Materials needed
- Five fat quarters of quilting cotton fabric. One is for the binding, the other ones for the blocks. A fat quarter is 18x22” (45x56cm)
- Fabric for backing 20x52” (50x130cm)
- Fusible thin batting (e.g., H630 or 640) 20x52” (50x130cm)
- Sewing thread
Cutting out the pieces:
- Momento cut file can be found HERE
Below is the cutting list If you do not have a Momento cutting machine.
- From the four fat quarters cut 12 squares 5x5" (12x12cm)
- From the fat quarter for the binding cut 8 strips 2” (5cm) wide.
Making the blocks:
- Start by laying out the different fabrics in four piles, 12 squares in each pile.
- Put one fabric piece from each pile on the table in front of you, right side up.
- Put the fabric pieces in the right row on top of the left row pieces, right side facing. Sew together with a 3/8” (1cm) seam allowance.
- Open up and lay the pieces on an ironing board right side down. Press the seam allowances together but in different directions to make piecing easier in later steps. See image below
- Repeat 11 more times and arrange the 12 sewn blocks as shown below, right side up.
- Take one block from each row and place it in front of you. Fold the top row down on the bottom row, right sides facing. Sew at the top edge using a 3/8” (1cm) seam allowance.
- Open up the block and press the seam allowances together towards the top of the block. Put the block right side up on the table. Make two more blocks in the same way.
- Arrange the three blocks in a row as shown in the image below. The middle one is rotated 180 degrees.
- Sew them together matching the squares to each other. press the seam allowances together at either side. Now it will look like this:
Adding backing and batting.
- Lay out the backing in front of you on an ironing board, wrong side up.
- Put the batting on top. Fusible side down and iron it to the backing.
- Put the quilt on top, right side up and pin in place.
- Quilt the layers together by using a straight stitch with 3mm (about 0.1 in) length and use the presser foot as a guide. Quilt on both sides of the seams. Also, topstitch close to the outer edge of the quilt to hold the edges together. This will make the binding process easier.
- The finished result will look like this:
- Cut away excess batting and backing close to the edge of the quilt. Now it will look like this:
Making and adding the quilt binding:
- To make the binding we need to join all the binding strips into one long strip. The easiest way to do this is simply to bring the short edges together and sew a straight seam. I will show you a neater way that reduces bulk when sewing the binding to the quilt.
- Draw a diagonal line from left to right as shown below:
- Sew on top of the line and cut away excess fabric leaving about ¼" (6mm) seam allowance.
- Press the seam allowance apart and cut away excess fabric (“dog ears”)
- Repeat the steps to make one long strip.
Attaching the binding to the quilt:
- Place the quilt with the backing up. Start pinning the strip somewhere in the middle of a long side. Start sewing about 4” (10cm) from the edge of the strip. This makes it easier to sew the ends together later. Stop sewing 3/8” (1cm) from the corner. Tie off the thread. See image below for clarity.
- Time to make the first corner: fold the strip at a right angle in the corner. It will look like this:
- Now fold the strip over with the raw edge matching next side of the quilt. It will look like this:
- Sew together starting at the edge of the quilt and stop 3/8” (1cm) from the next edge fold as you did before and continue stitching on next side. When you have made the last corner stop sewing about 8” (20cm) from where you started to add the binding.
- To join the ends, you need to let the edges overlap by 2” (5cm) cut away excess binding strip.
- Draw a diagonal line (45 degrees)
- Bring the opposite corners up and sew together.
- Cut away excess fabric, leaving av ¼" (6mm) seam allowance.
- Press the seam allowances apart and sew the last part of the binding in place
- Press the binding towards the edge, making mitered corners (45-degree angle)
- Turn the quilt right side up. Fold the edges of the binding towards the edge of the quilt.
- Turn the binding in over the edge of the quilt. Fold the corners into a 45-degree angle.
- Pin in place and topstitch close to the inner edge of the binding.
Your quilt is now finished! Well Done!


 Finland