Cutting Out The Patches
Cutting out the Patches for your Quilt
This instruction will show you how to cut the different patches with a rotary cutter, ruler and cutting mat.
- Click on the Output Panel button

- Click on Quilt overview

- Click on Yardage

Yardage calculation
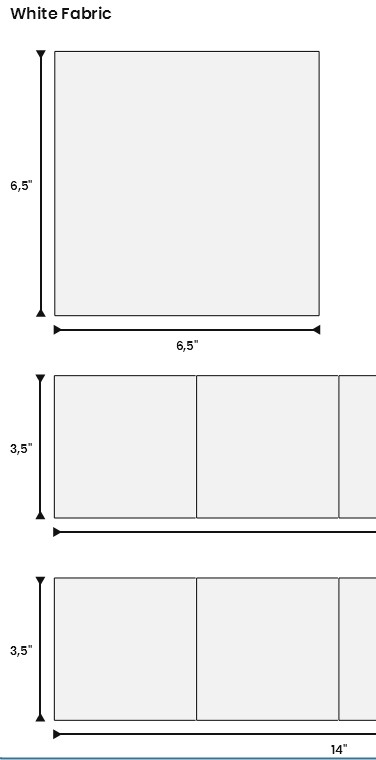
4. In the yardage tab you will see all the measurements needed to cut out the patches for your quilt. To get the total amount of fabric needed for the quilt you just add the measurements shown for each color on the left side. The yardage is calculated for 44” (112cm) wide fabric. The measurements given include the seam allowance you have chosen.
5. In the example below you can see that there is 6.5+3.5+3.5 “needed= at total amount of 13.5”

Cutting out the patches
About the Inch measurements:
Both mm and Inch are shown with decimals (1/100). This makes usage of inch more complicated, but here is a chart on how to round up/down to nearest 1/8”
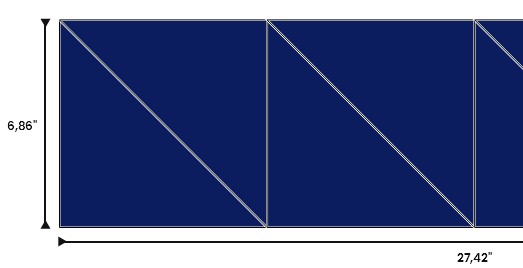
Example: If the yardage shows 6.86”, you should cut the square 6 7/8”
To Cut Half Square Triangles
Use the measurement shown at the left side and cut as many squares as needed, then cut them diagonally to make half square triangles. In this case the Yardage shows 6.86” Use the conversion chart above to see how to translate the decimals to1/8”. In this case it will be 6 7/8”.

To Cut the Diamond Shape
The easiest way to make a diamond shape is to make a template from cardboard or similar and use it as a template.
To Cut Squares
See the height measurement at the left side and cut out the squares 
Cut out all the patches as shown in the yardage tab. In the next step we will sew them together to make the quilt! Find instructions Here


 Spain
Spain