 United Arab Emirates
Craft the Perfect Gift: Create a Stylish Lined Boxy Bag
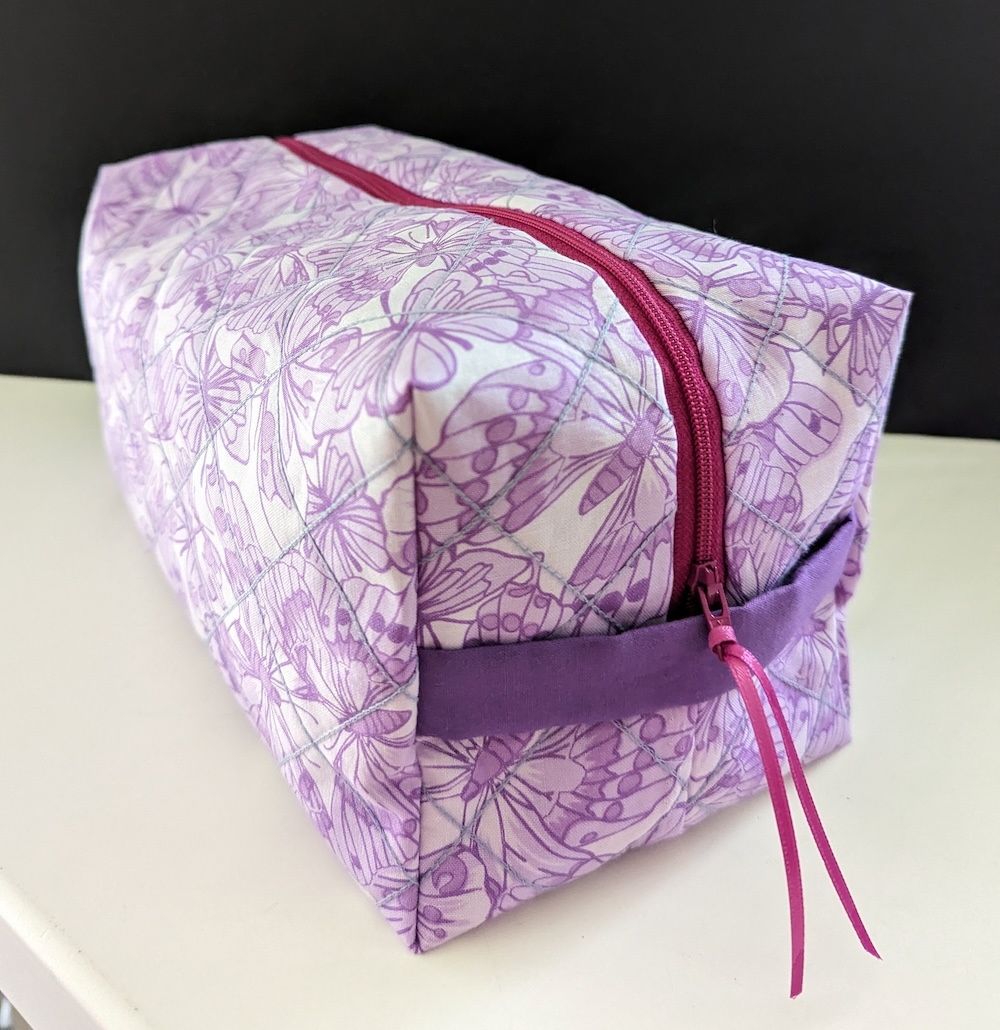
Craft the Perfect Gift: Create a Stylish Lined Boxy Bag
Are you ready to take your sewing skills to the next level? With mySewnet, you can create a practical and stylish lined boxy bag entirely on your serger! This project is perfect for both beginners and seasoned sewists, offering a fully lined bag with no exposed seams. Imagine the joy of gifting these beautiful, handmade bags to your friends and family. Let’s get started on this fun and rewarding sewing adventure!
What you need:
- 2 cones of all-purpose serger thread: Choose two colors that either coordinate or contrast with the fabric.
- 1 fat quarter (18” x 22”) of cotton or cotton blend for the outside of the bag: This can be a print or a solid. The sample used a print.
- 1 fat quarter (18” x 22”) of fabric for the lining: The sample used a solid black.
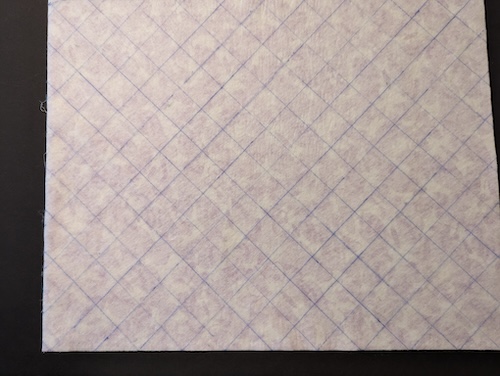
- 1 rectangle of thin, one-sided fusible batting (18” x 22”).
- 2 strips of fabric (7” x 2 ½”): These can be contrasting or coordinating with the outside fabric. The sample used a solid purple.
- Thin, one-sided fusible batting for the back of the strips: Each piece should be 7” x 2 ½”.
- 1/8” wide ribbon (6”) for the zipper pull.
- 1 zipper (22”): Use plastic coils, no metal coils.
- 6” long strip of ½” wide double-sided fusible tape.
- Fabric scraps for practice.
- Ruler for drawing a grid: A small square ruler is also helpful.
- Pins or clips.
- Washaway marking pen or chalk.
- Clear Coverstitch foot from the Coverstitch Feet Kit.
- Fray Check or seam sealant.
Serger Set Up:
- 2 Thread Chain Stitch
- Clear Coverstitch Foot
- Needle in the center position.
Preparation
- Fuse the fleece to the wrong side of the fashion fat quarter and the strips.
- Working with the fat quarter rectangle draw a diamond grid with lines 1 ½” apart on the fleece side.
Construction
- Fleece side up, serge over all the marked rows.
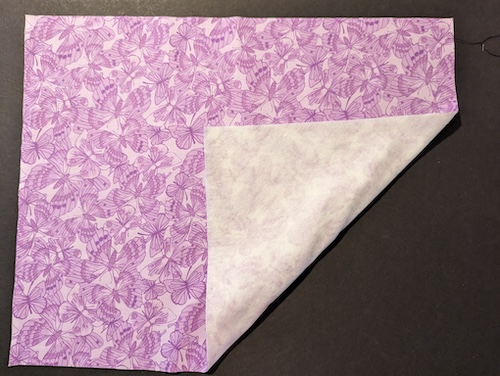
- Press the gridded rectangle.
- Cut it to measure 17” x 22” or as close to 22” as you can get
- Cut the lining fabric to the same measurement.
- Fold both rectangles in half to measure 17” x 11”.
- Cut along the fold of each rectangle. Each piece will measure 17” x 11” or as close to 11” as you can get.
- Place a dab of Fray Check on the end of each stitch line. Allow it to dry.
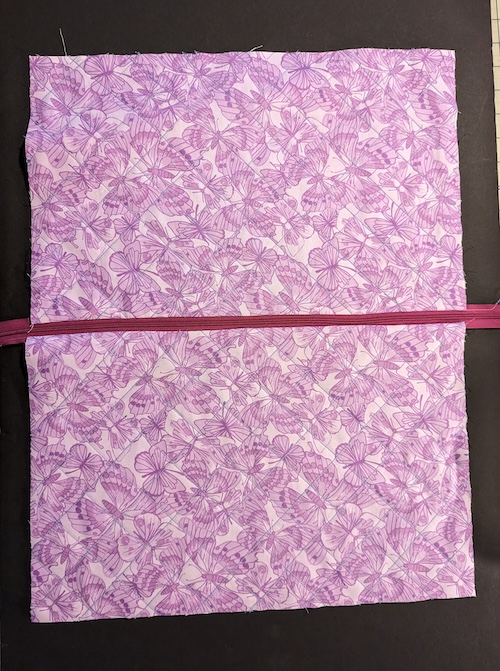
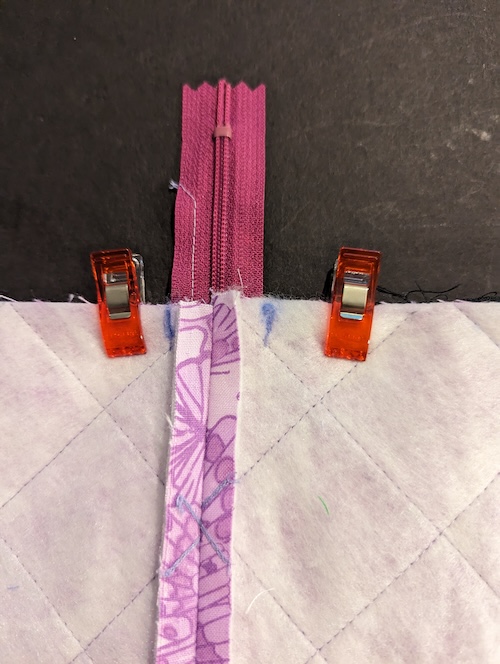
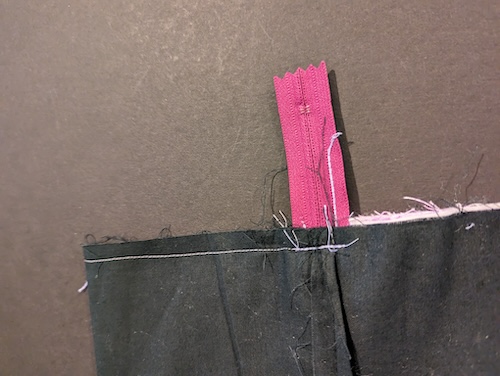
- Working with the 17” edge, pin or clip the right side of the zipper to the right side of the gridded rectangle..
- Use the same pins or clips place the right side of the lining to the wrong side of the zipper tape.
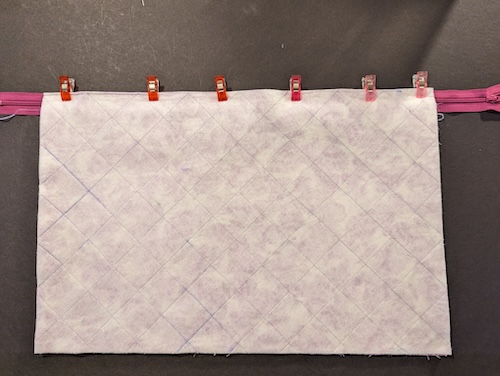
- The zipper will extend beyond both end of the rectangles. The fabrics and the zipper tape should be even.
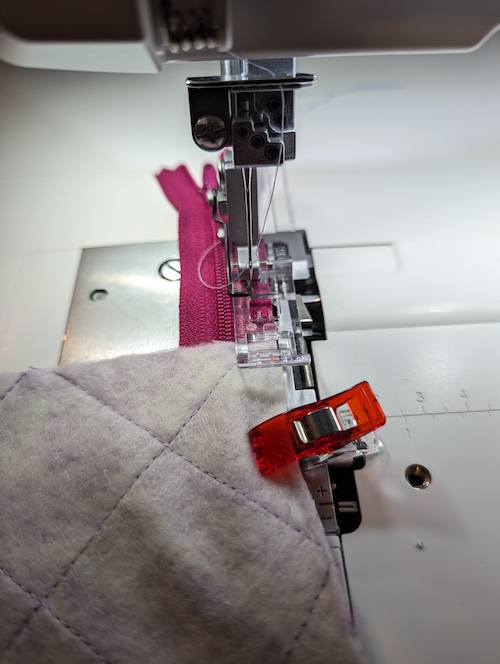
- Move the needle to the front left position.
- Place the clipped/pinned seam under the presser foot so the left edge of the foot is touching where the right side bump of the closed zipper coli can be felt.
- Serge the seam.
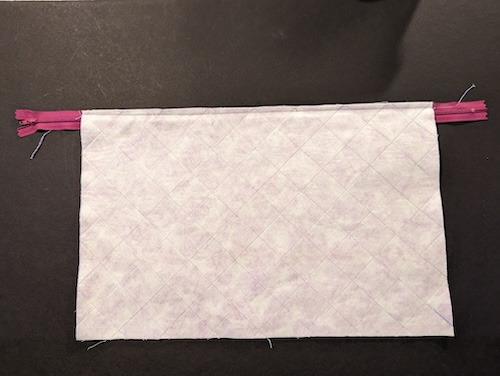
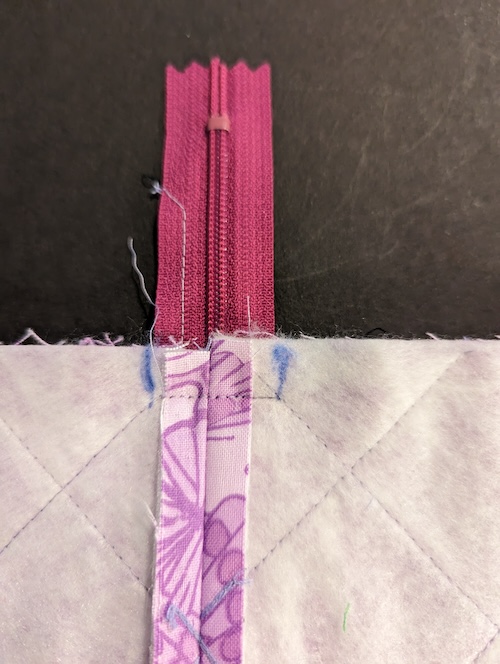
- Open out both fabrics to expose the zipper.
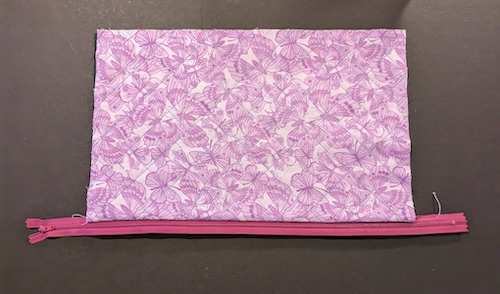
- Lip or pin the other fabric rectangles to the other side of the zipper tape. pin or clip the right side of the zipper to the right side of the gridded rectangle.
- Use the same pins or clips place the right side of the lining to the wrong side of the zipper tape.
- Serge the seam.
- Open out the fabrics and press flat.
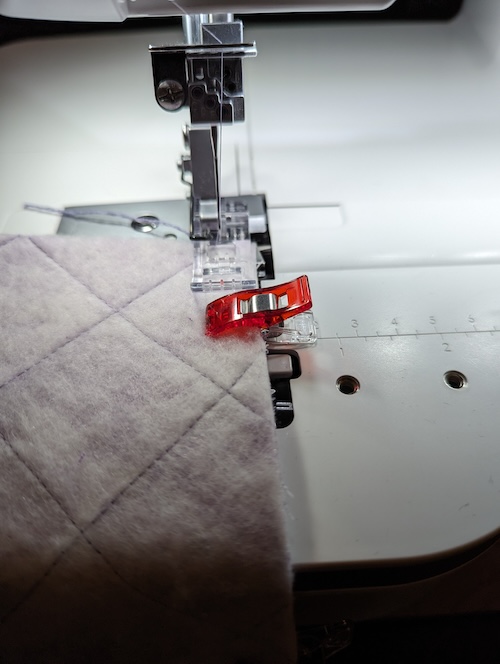
- Place the bottom edges of the gridded rectangles right sides together.
- Pin or clip.
- Keep the raw edges even with the right edge of the presser foot and serge the seams together.
- Press the seam open flat.
- Place the bottom edges of the lining right sides together.
- Pin or clip together.
- Mark a 6” opening in the middle of the bottom edge.

- Serge the bottom edge leaving the space between the marks open.
- Press the seam flat at the ends, not where the opening is.
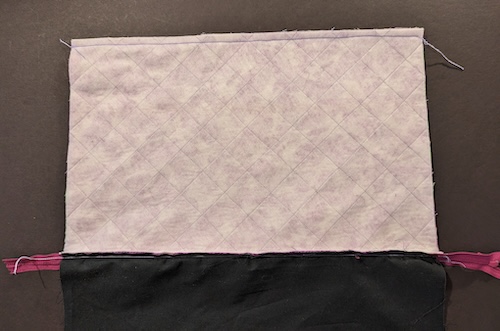
- Working with the gridded section. Open out flat the bottom seam and bring it up to the zipper end, not the pull tab end.
- Repeat for the lining
- Pin or clip them in place and mark the edges of the zipper tape on the gridded section.
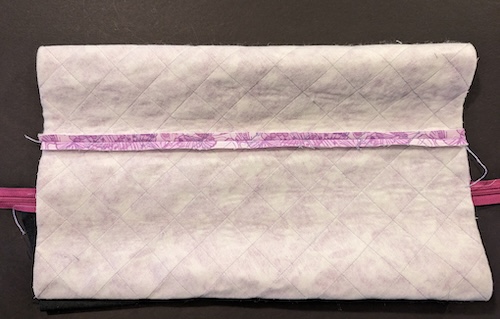
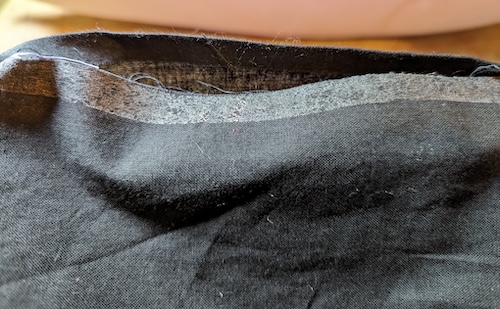
- Serge through all the layers, between the marks, including the zipper teeth. Go slowly, it may be necessary to hand crank the needle through the zipper teeth. The right edge of the presser foot even with the edge of the fabric.

- Repeat for the other end except open the zipper about halfway before serging between the marks.
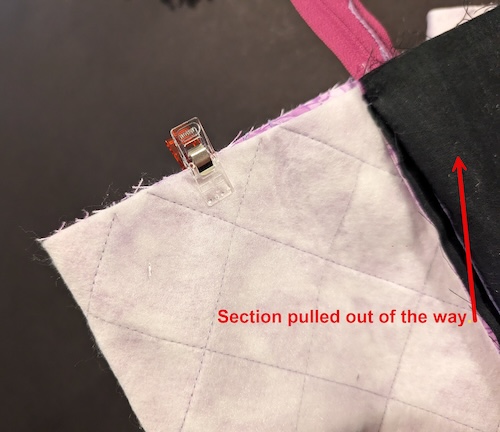
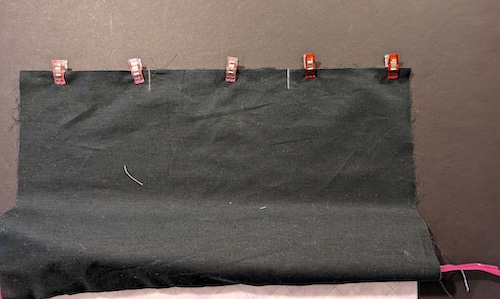
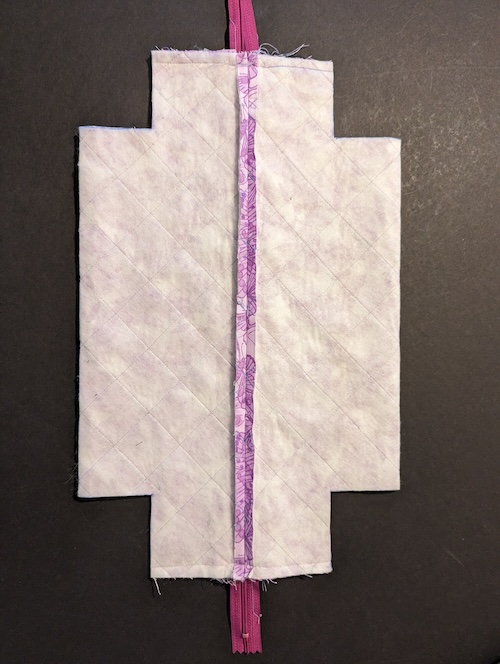
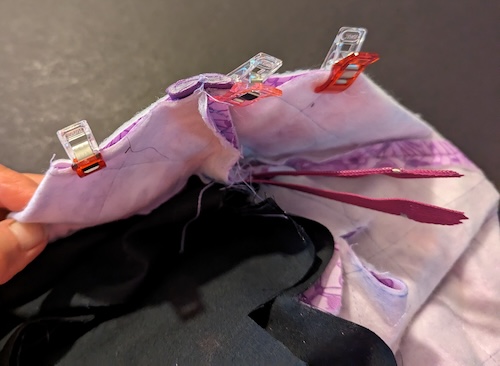
- Working with each of the remaining 4 raw edges. You have 4 separate “wing” sections
- Pin or clip each section separately right sides together.
- Each section will be serged separately. Fold the 2nd or underneath section out if the way and serge from the folded end to the edge of the zipper tape.
- Repeat for each of the gridded sections.
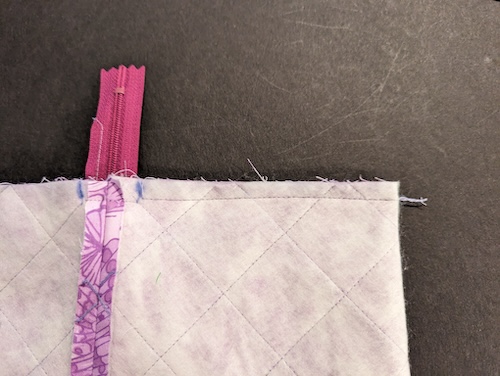
- Repeat for all the lining sections keeping the gridded section out of the way.
- When these sections are all serged only the bottom edge of the lining will have an opening.
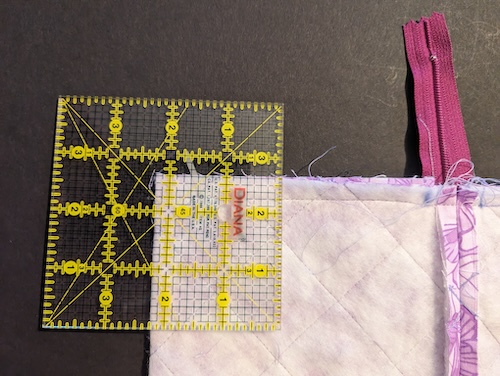
- Working from the corners mark 2 ¼: squares on each of the corners. The 2 ¼” measurement starts from the seam on the edge with the seam.
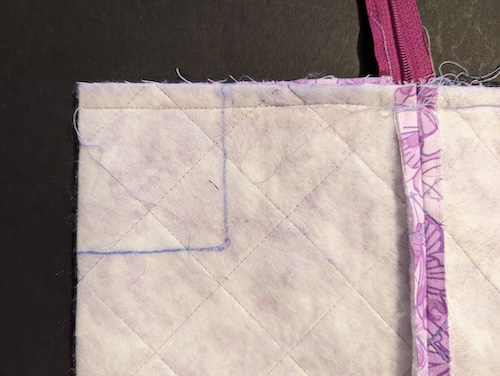
- Cut out all the corners with sharp scissors. Fray Check the cut ends of the stitches.
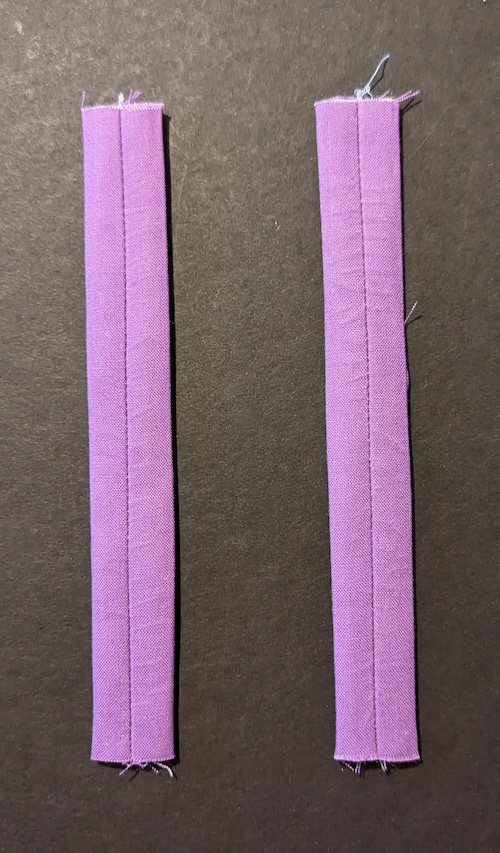
- Serge the strips right sides together.
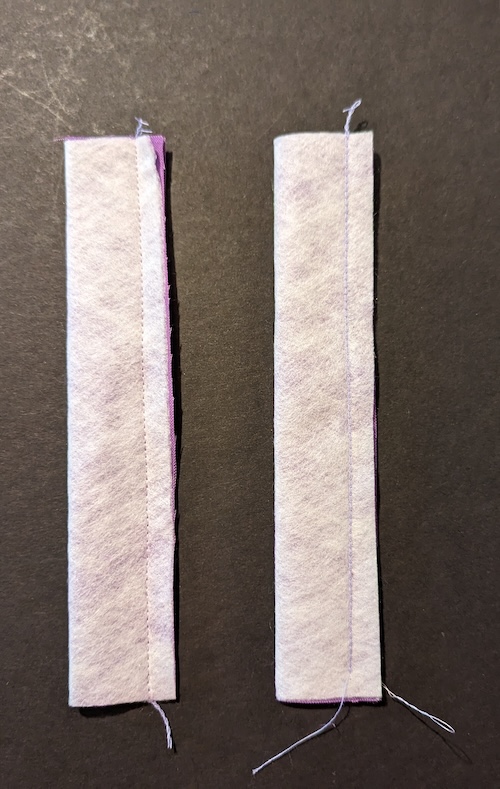
- Turn right side out and press the seam to the center back or to one side.
- Working with a gridded corner.
- Open out the inside corner and pin or clip them so the edge is straight.
- Place one of the strips so it is even with the center seam. It is OK if the strip sticks out a little. The seam of the strip should towards the seam of the bag or to the bottom.
- Serge the seam together.
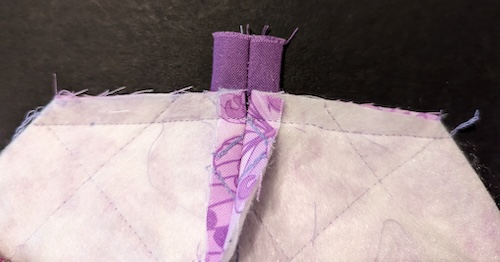
- Trim the strip even with the seam after serging.
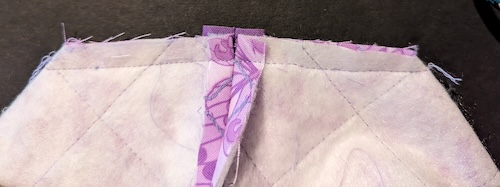
- Repeat for the, opposite side, making sure the strip is caught in the seam and that it is laying flat across the inside of the bag.

- Repeat for the lining edges except they have no strips.
- Trim the zipper tape even with the seam edges.
- Fray Check any seams that were cut.
- When all the corners are serged the bottom of the lining will still be open.
- Turn the bag right side out through the opening and the open zipper.
- Carefully make sure all the corners are poked out.
- Place the fusible strip to one side of the lining opening and fuse in place.
- Overlap the opposite edge of the lining and fuse the opening closed.
- Pull the 1/8” wide ribbon through the zipper pull.
Enjoy your bag!