 Norway
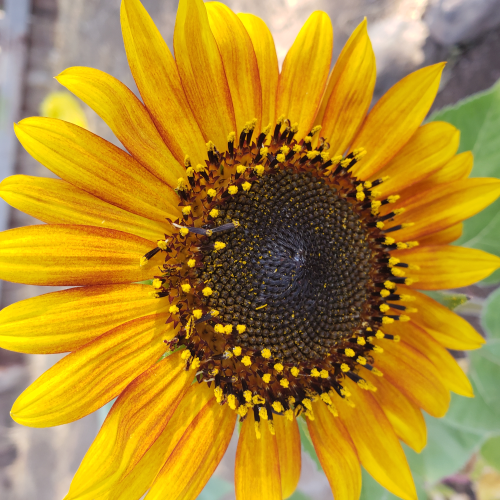
Sunflower PhotoStitch Pillow

This beautiful sunflower was created using the PhotoStitch Wizard that can be found in the mySewnet™ GOLD and PLATINUM Embroidery Software. The embroidered sunflower is perfect for the center of a pillow. At the end of these instructions look for information on making a companion quilt on the overlock machine.
What you need:
Note: Yardage is based on 45” (115cm) wide fabric
- Sewing and Embroidery machine
- Overlock machine
- mySewnet™ Embroidery Software (GOLD or PLATINUM)
- Embroidery Spring Foot
- Embroidery Unit
- Straight Stitch Needle Plate
- Zig Zag Needle Plate
- 260 x 260mm Embroidery Hoop
- Hoop Clips
- ¼" Piecing Foot
- Invisible Zipper Foot
- Stitch-In-Ditch Foot
- Open-toe Appliqué Foot
- Standard Zig Zag Foot
- Extension Table
- ⅔ yd (55cm) Background Cotton Print for Embroidery
- ⅛ yd (10cm) Dark Cotton Print for Narrow Border
- ¼ yd (20cm) Medium Cotton Print for Outer Border
- ⅔ yd (55cm) Light Cotton Print for Pillow Back
- Fusible “No Show” Mesh Stabilizer
- Cut-A-Way Stabilizer
- ⅔ yd (55cm) Cotton Batting
- ⅔ yd (55cm) Fusible Woven Interfacing
- 22” (55cm) Invisible Zipper
- Pillow Form
- Assorted colors of Robison-Anton® 40wt rayon thread
- 60wt bobbin thread
- 30wt cotton thread
- 3 cones overlock polyester thread
- 50wt cotton sewing thread
- Embroidery Titanium needle size 90/14
- Overlock needle size 90/14
- Universal needle 80/12
- Topstitch needle size 90/14
- Water-soluble marker
- Rotary cutter, ruler and cutting mat
- 20½” x 20½” square ruler
- SINGER® Steam Iron
- Pressing surface
- Pressing cloth
- Safety pins or Spray Adhesive
- Thread snips
Cutting Instructions:
Note: use the 20½” x 20½” square ruler to easily cut out the pieces for the pillow.
- Background Cotton Print
1 - 20” x 20” (51 x 51cm) for Embroidery - Dark Cotton Print
2 - 1½” x 42” (4 x 110cm) for Narrow Border - Medium Cotton Print
2 - 3½” x 42” (9 x 110cm) for Outer Border - Light Cotton Print
1 - 20½” x 20½” (53 x 53cm) Pillow Back - Fusible “No Show” Mesh Stabilizer
1 - 20” x 20” (51 x 51cm) - Cut-A-Way Stabilizer
3 - 20” x 20” (51 x 51cm) - Cotton Batting
1 - 20” x 20” (51 x 51cm) - Fusible Woven Interfacing
1 - 20½” x 20½” (53 x 53cm)
Embroidery Design
 ----------->
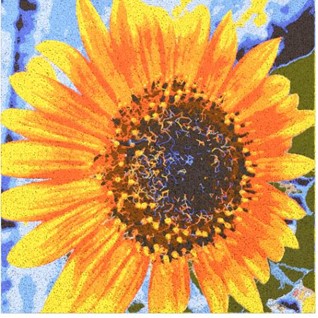
- Make embroideries quickly from photos!
- Use the PhotoStitch Wizard that can be found in the mySewnet™ GOLD and PLATINUM Embroidery Software to create embroideries from photos.
- For instructions on how to create the sunflower embroidery design refer to “PhotoStitch Sunflower” in the mySewnet™ Studio.
- Before you save or stitch out your design you can change the colors of the design using the Color Select Box. This way you can personalize the embroidery to the color scheme you are using for your pillow.
- Transfer your design to your embroidery machine.
Sewing and Embroidery Machine Set-up
- Set up your sewing and embroidery machine for embroidery by attaching the embroidery unit.
- Change the Stitch Needle Plate to the Straight Stitch Needle Plate, which is recommended for embroidery.
- Attach the Embroidery Spring Foot.
- Insert an Embroidery Titanium needle size 90/14 in the machine. Note: Since the length of time to stitch out this embroidery is quite lengthy (it took me 15 hours to stitch out) it is recommended that you change your needle every 6-8 hours of sewing.
- Thread with Robison-Anton® 40wt rayon thread on top and 60wt bobbin thread in the bobbin.
- Fuse Fusible “No Show” Mesh stabilizer onto the wrong side of your background fabric. Place the fusible (shinier) side of the stabilizer onto the wrong side of the fabric. Using a pressing cloth apply the stabilizer to the back of the fabric with a SINGER® iron set on the Silk setting without steam. Press, hold then lift iron (without sliding) until the entire area is fused.
- This type of embroidery is quite dense therefore stabilizing your fabric is very important. Hoop your background fabric with 3 layers of Cut-A-Way Stabilizer.
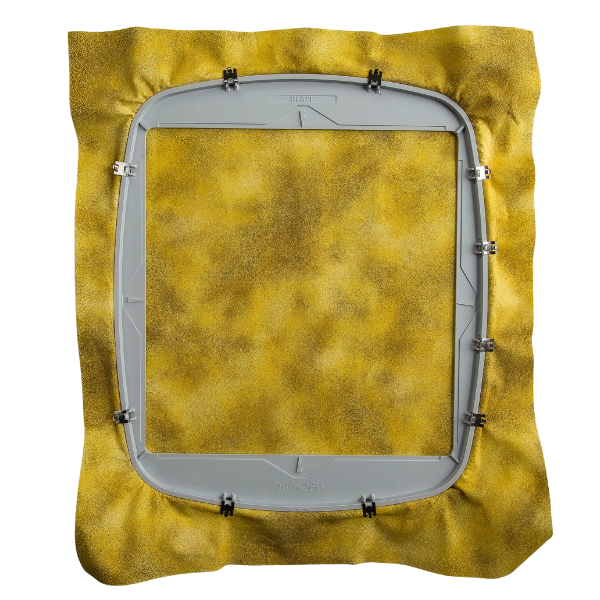
- Be sure to use your hoop clips when hooping.
Embroider Sunflower
- Load your embroidery design. Select the hoop size 260x260mm.
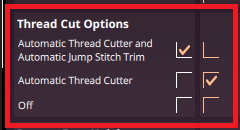
- Make the following change to your Settings in Embroidery Edit: Temporary Settings. In the Thread Cut Options select Automatic Thread Cutter. You do not want to have Automatic Jump Stitch Trim on when embroidering a PhotoStitch embroidery design.
- Touch GO to enter Embroidery Stitch-Out.
- Select basting to add a basting stitch that will secure your fabric to your stabilizer. “Choose Baste Around Design”.
- Embroider your Sunflower design.
Note: PhotoStitch designs take a long time to stitch out because they are so dense. If your machine has an Auto Save option make sure it is active so that it continuously and automatically saves your ongoing embroidery, including the current stitch and stitch settings. This makes it easy to come back to exactly where you left off if you need to stop in the middle of embroidering. 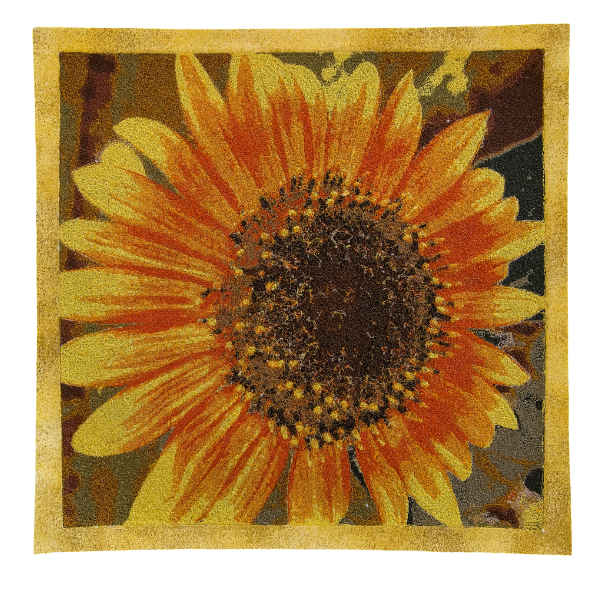
Sewing Machine Set-up
- Remove the embroidery unit and attach the Extension Table.
- Change the Stitch Needle Plate to the Zig Zag Needle Plate.
- Attach the ¼" Piecing Foot.
- Insert a Universal needle size 80/12 in the machine.
- Thread with 50wt cotton sewing thread on top and in the bobbin.
- Select a straight stitch.
Sewing Borders
- Remove the embroidered Sunflower from the hoop.
- Trim the embroidery with an ¼” seam allowance extending past the stitching.
- Measure the length of the embroidery and cut 2 strips of the 1½” x 42” (4 x 110cm) Dark Print to the length measurement.
- Sew with a ¼” seam allowance to the sides of the embroidery.
- Press away from the embroidery.
- Measure the width and cut 2 strips of the 1½” x 42” (4 x 110cm) Dark Print to the width measurement.
- Sew with a ¼” seam allowance to the top and bottom of the embroidery.
- Press away from the embroidery.
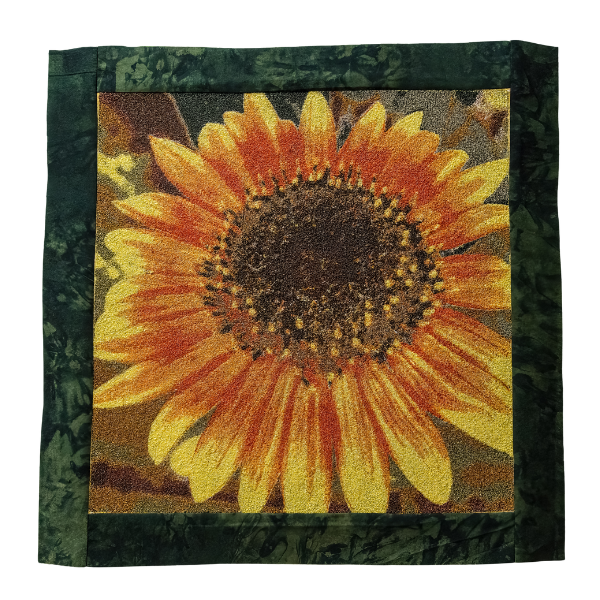
- Measure the length and cut 2 strips of the 3½” x 42” (9 x 110cm) Medium Print to the length measurement.
- Sew with a ¼” seam allowance to the sides.
- Press towards the Medium Print.
- Measure the width and cut 2 strips of the 3½” x 42” (9 x 110cm) Medium Print to the width measurement.
- Sew with a ¼” seam allowance to the top and bottom.
- Press towards the Medium Print.
Sewing Machine Set-up
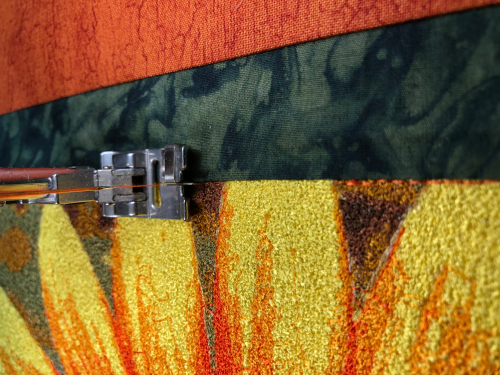
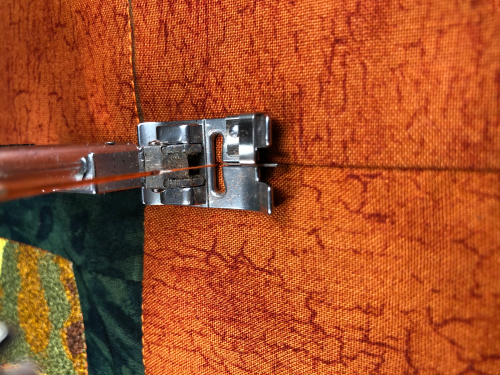
- Attach the Stitch-In-Ditch Foot.
- Insert a Topstitch needle size 90/14 in the machine.
- Thread with 30wt cotton sewing thread on top and 60wt bobbin thread in the bobbin.
- Select a straight stitch and set the stitch length to 3.0.
Quilting Pillow Top
- Using the water-soluble marker, draw your desired quilting design on the outer border.
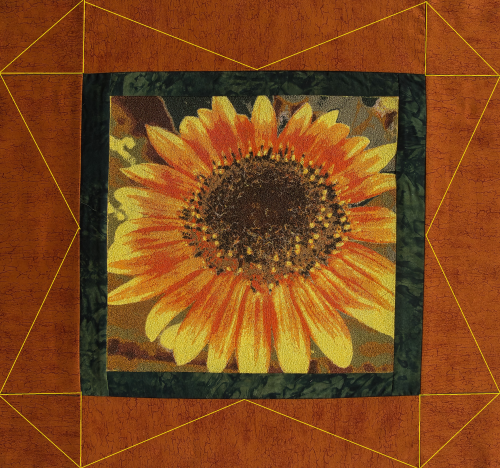
- Place the pieced pillow top right side up on the cotton batting, secure with safety pins or spray adhesive.
- Stitch in the ditch between the embroidery and the Dark Print border.
- For better visibility to follow your drawn quilting lines change the accessory foot to the Open-toe Appliqué Foot.
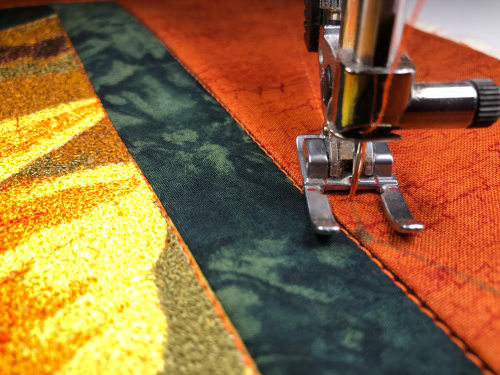
- Continue to quilt the pillow top.
- Select a Three-step zigzag stitch and stitch around the perimeter of the pillow top.
- Trim away the excess batting.
Overlock Set-up
- Set your overlock machine for a 3-thread wide overlock stitch according to your User’s Guide.
- Insert a size 90/14 Overlock needle into your overlock machine.
- Thread with polyester overlock thread.
- Test sew using 2 pieces of cotton fabric, adjust to get a balanced 3-thread wide overlock stitch.
Pillow Back
- Fuse the 20½” x 20½” (53 x 53cm) piece of Fusible Woven Interfacing to the wrong side of the Light Print 20½” x 20½” (53 x 53cm) Pillow Back following the Manufacturer's fusing instructions.
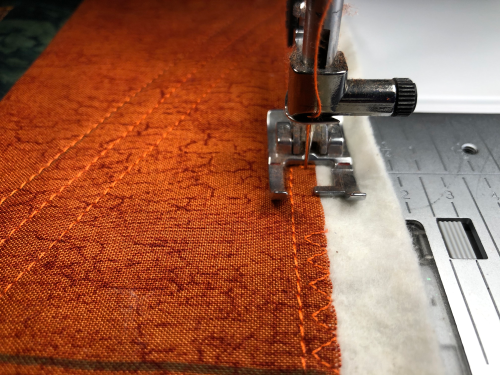
- Measure and cut 4” (10cm) down on the 20½” x 20½” (53 x 53cm).
- Serge along the cut edges as shown.
Sewing Machine Set-up
- Attach the Invisible Zipper Foot.
- Insert a Universal needle size 80/12 in the machine.
- Thread with 50wt cotton sewing thread on top and in the bobbin.
- Select a straight stitch.
- Tip: Deactivate the Automatic Presser Foot Lift in the Temporary Settings, so the invisible zipper foot will stay down and hold the coils in place while you are sewing.
Inserting Invisible Zipper
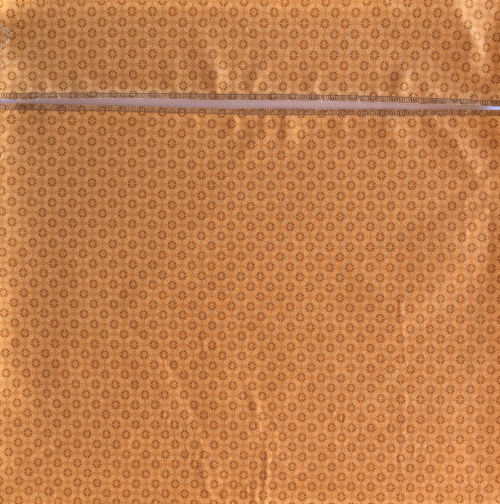
- Open the zipper and flatten the coil slightly with your thumb, so that the seam line between the tape and the coil becomes visible. Never iron the zipper.
- Place the right half of the zipper onto the right side of the
4” x 20½” (10 x 53cm) piece of the pillow back, with the right sides of the zipper and the serged fabric edge together. Pin in place. The zipper will extend beyond the ends of the fabric.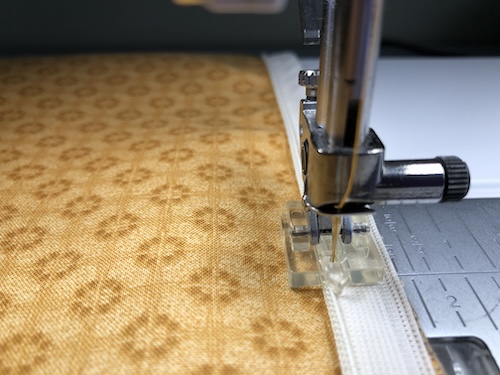
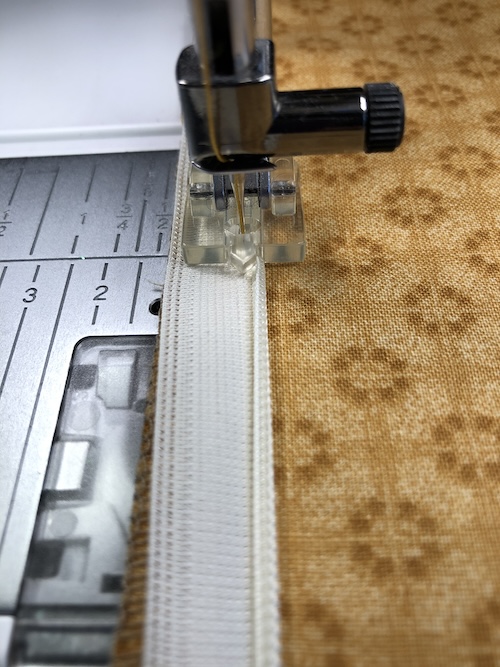
- Carefully press the teeth slightly to the right and lower the zipper foot, so that the coil lies in the groove to the right of the needle.
- Starting at the top, sew the zipper in place. Tie off the end of the seam. Close the zipper.
- Place the second zipper tape on the other serged piece of fabric for the pillow back, on the right side of the fabric. Make sure that both coils are level.
- Pin the zipper in place. Open the zipper.
- Carefully press the teeth slightly to the left and lower the zipper foot, so that the coil lies in the groove to the left of the needle.
- Starting at the top, sew the zipper in place, stopping at the end. Tie off the end of the seam. Close the zipper.
Sewing Machine Set-up
- Attach the ¼" Piecing Foot.
- Select a straight stitch.
Putting Pillow Together
- Pin the pillow front and the pillow back right sides together. The pillow back will be larger than the pillow front, we will trim it to the same size after we stitch the pillow together.
- The zipper we used is longer than the fabric, so be sure to pull the zipper tab within the fabric area before you stitch it.
- Stitch around the pillow using a ¼” seam allowance. Reverse stitch over the zipper ends a couple of times to secure those ends.
- Trim the pillow back to the same size as the pillow front.
- Serge around the perimeter of the pillow with a 3-thread wide overlock stitch to clean finish the seams.
- Turn the pillow right side out through the zipper opening.
- Put a pillow form inside the pillow. Tip: Put a pillow form that is 1” or 2” larger than your sewn pillow to make the pillow look fuller.
Enjoy your Sunflower PhotoStitch Pillow and as an added bonus look for instructions for the companion “Reversible Overlock Quilt” !