Nine-Patch Star: A Beginner’s Guide to Quilting with the Quilt Module
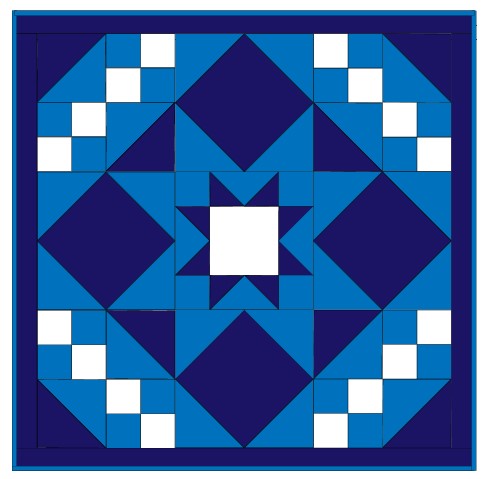
Welcome to your first quilting adventure with the quilt module! This guide is designed to make quilting simple, fun, and approachable for beginners. The Nine-Patch Star is a classic quilt pattern that’s perfect for learning the basics. With the quilt module’s tools and this step-by-step guide, you’ll create a beautiful quilt with ease, mastering both design and sewing techniques along the way. Ready to get started? Let’s stitch together something amazing!
- Open the quilt module You can download the free version Here.
- Click on the first resource tab: designing your quilt and follow the instructions.

- Click on the middle resource tab: Cutting out the patches and follow the instructions.

- Click on the third resource tab: Sewing your quilt together and follow the instructions on how to make the blocks and the quilt top.

Now the quilt top is finished!
Making the Quilt
To complete the quilt, you need to add backing, batting hanging sleeve (optional) and finally bind the edges. Follow these step-by-step instructions:
Add Batting and Backing
- Place the backing fabric on the table wrong side up. The backing should be about 2” (5cm) larger than the quilt top.

- Add batting on top the batting should have the same size as the backing or slightly smaller.

- Put the quilt top on top of the batting and backing, right side up.

- Pin all layers together, you can use pins, Safety pins or baste them together by hand. There should not be more than 3” (7,5cm) between the pins.
Quilting the Layers Together.
- The easiest way to quilt the layers together is to quilt on top of the join between the blocks. This is called “quilting in the ditch” Use your straight stitch and set the stitch length to 1/8” (3mm)
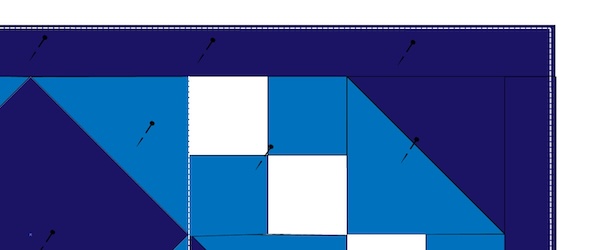
- Start by sewing g on each side of the middle block row, both horizontal and vertical. Of course you can make more quilting of you want to, but this is minimum. The quilting is shown in white on the illustration for clarity, but you should use a thread color that blends with the quilt color.
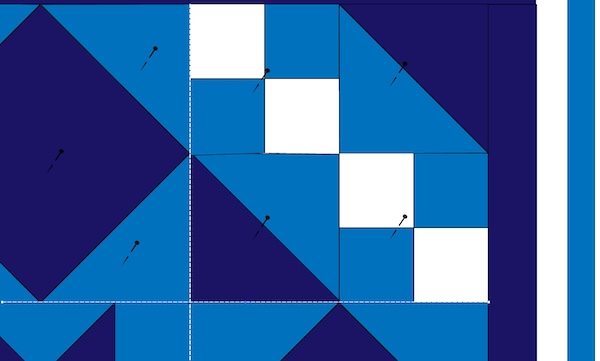
- Topstitch about ¼" (6mm) from the outer edge of the quilt to hold all layers together.
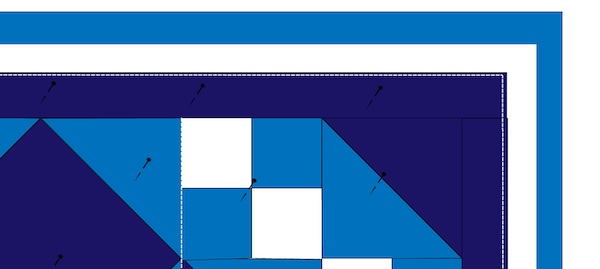
- Cut away excess batting and backing fabric.
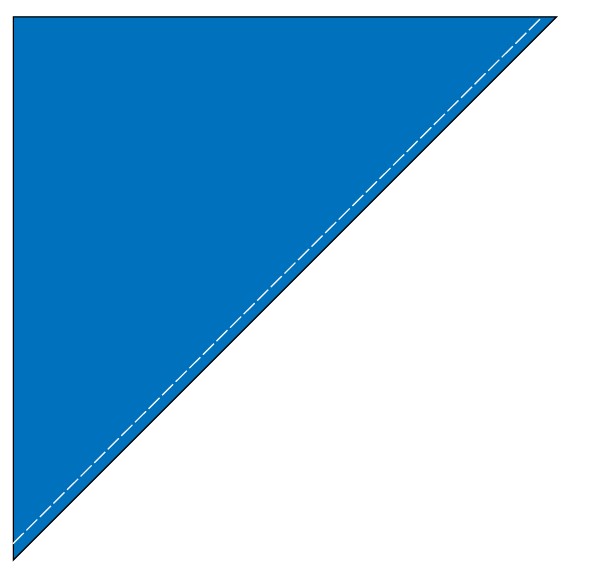
Diagonal Corners for Hanging Rod.
- Cut out four squares 6” (15cm) and fold them diagonally.

- Topstitch close to the diagonal edge.
- Pin one folded square int each corner of the quilt back, the raw edges should be even with the edge of the quilt.
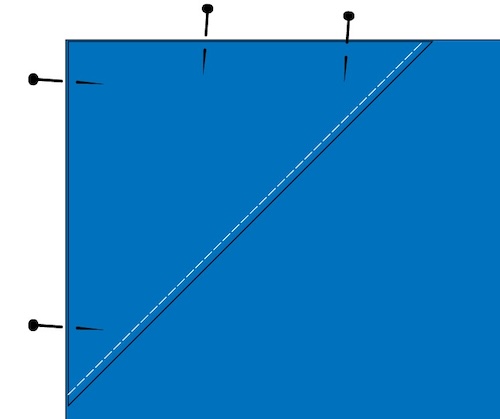
Later, when the binding is added, just measure the distance between the edges of the binding and cut a hanging rod at this length. Now you can easily hang your quilt on the wall. For more stability add a rod at the bottom of the quilt as well.
Binding the edges of the Quilt
The binding of a quilt can be done in many ways; this is just one of them. The finished edge will be 3/8” (1cm). The instructions below are made in a different color scheme since they are generic.- Measure the length and width of the quilt add 10” (25cm), this is the length of the binding strip needed.
- Cut 2” (5cm) strips. The amount needed depends on the finished length of the strip.
- Join all the binding strips into one long strip. The easiest way to do this is simply to bring the short edges together and sew a straight seam but I will show you a neater way that reduces bulk when sewing the binding to the quilt.
Making the binding strip
The binding strips in the illustrations below are shown in red for better visibility. The front of the quilt is shown in gray and the back in a lighter gray.
16. Put two strips on top of each other as shown in the image below, right sides facing. The short ends will go outside as shown to make the next step easier. Pin in place. 
17. Draw a diagonal line from left to right as shown below:
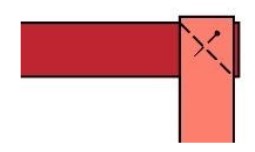
18. Sew on top of the line and cut away excess fabric leaving about ¼" (6mm) seam allowance. 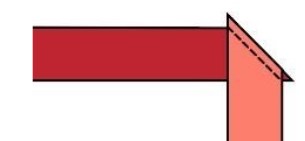
19. Press the seam allowance apart and cut away excess fabric (“dog ears”) 
20. Repeat the steps to make one long strip. 
Attaching the Binding to the Quilt.
21. Place the quilt with the backing up. Start pinning the strip somewhere in the middle of a long side. Start sewing about 4” (10cm) from the edge of the strip. This makes it easier to sew the ends together later. Stop sewing 3/8” (1cm) from the corner. Tie off the thread. See image below for clarity.

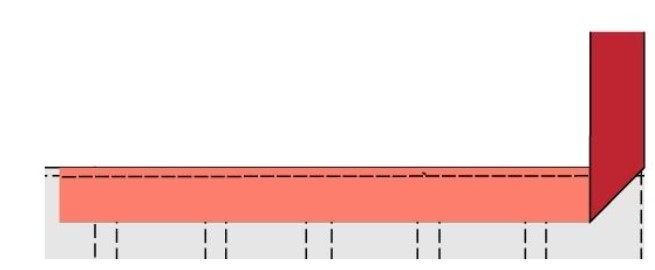
22. Time to make the first corner: fold the strip at a right angle in the corner. It will look like this:
23. Now fold the strip over with the raw edge matching the next side of the quilt. It will look like this: 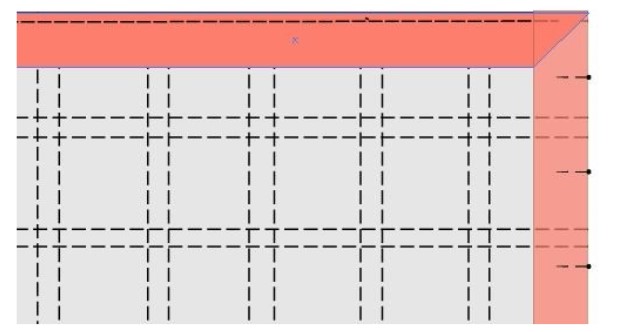
24. Sew together starting at the edge of the quilt and stop 3/8” (1cm) from the next edge fold as you did before and continue stitching on next side. When you have made the last corner stop sewing about 8” (20cm) from where you started to add the binding.
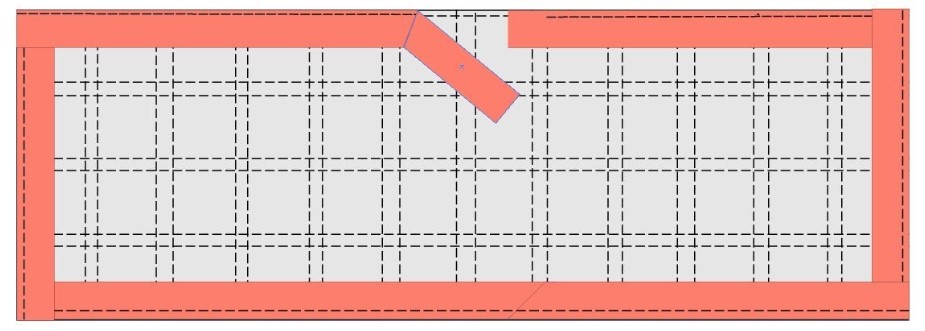
25. To join the ends, you need to let the edges overlap by 2” (5cm) cut away excess binding strip.
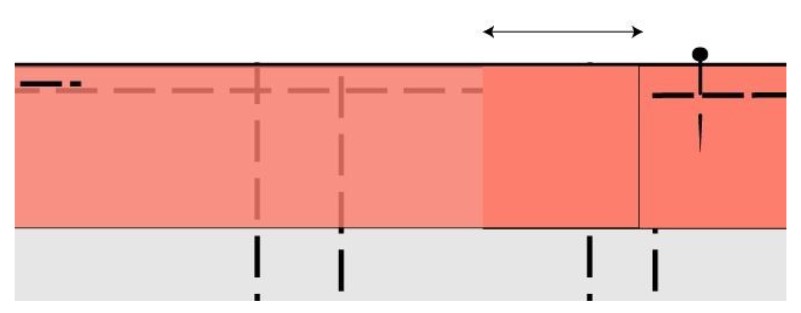
26. Draw a diagonal line (45 degrees)
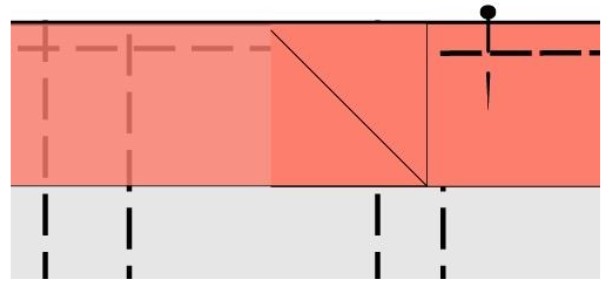
27. Bring the opposite corners up and sew together. 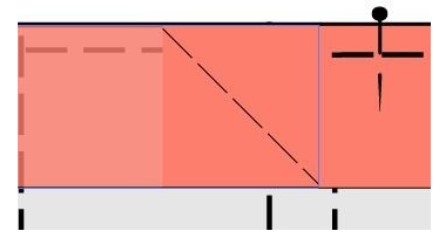
28. Cut away excess fabric, leaving av ¼" (6mm) seam allowance.
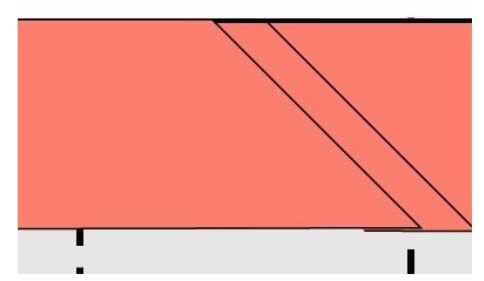
29. Press the seam allowances apart and sew the last part of the binding in place.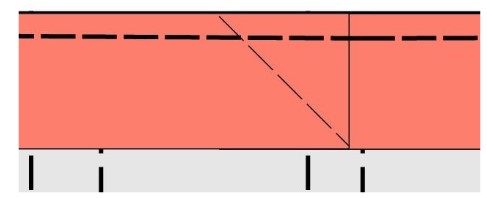
30. Press the binding towards the edge, making mitered corners (45-degree angle)
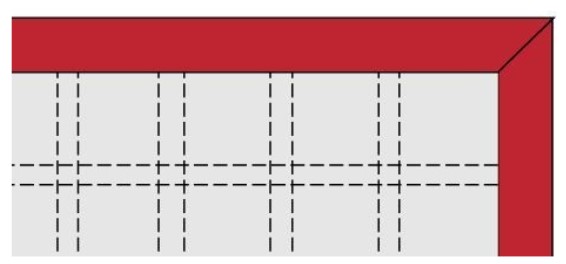
31. Turn the quilt right side up. Fold the edges of the binding towards the edge of the quilt.
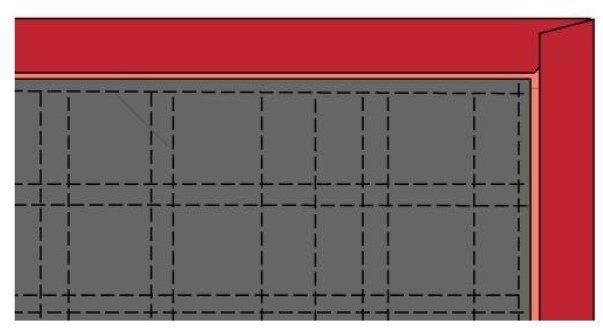
32. Turn the binding in over the edge of the quilt. Fold the corners into a 45-degree angle. Pin in place:
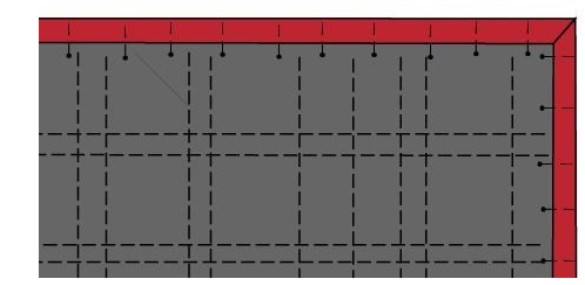
33. Topstitch close to the inner edge of the binding.
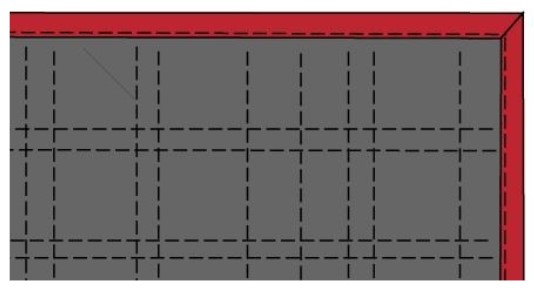
Your quilt is now finished! Well Done!


 Switzerland