 Switzerland
Create Friendly Felt Kids Masks for Halloween: Easy Sewing Fun for the Whole Family!
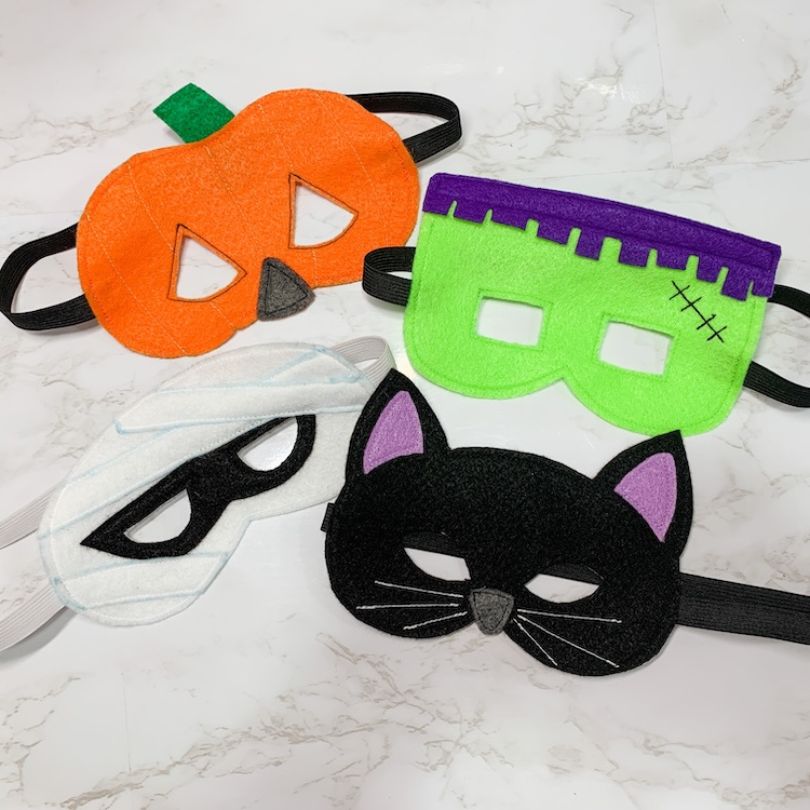
Get ready for Halloween with our 'Friendly Felt Kids Masks' sewing project! Whether you want to make one or all four designs, or even create your own, this project is a creative and easy way to get into the Halloween spirit. Templates, instructions, and supply lists are included—don’t miss out on this hands-on event!
Everything you need :
- Print the included mask patterns. Be sure to adjust the print size in order for the masks to fit the adult or child who will be wearing them.
- Felt in assorted colors. Felt is preferred for this project for a few reasons: felt doesn’t fray making it easy to work with and use a straight stitch, it is soft and comfortable on the skin, it is thick and holds its shape well, and it comes in a large variety of colors.
- Cotton fabric for the backside of the mask. Michaels pre-cut fabrics are plenty to make several masks or you can use a fat quarter or scraps you have on hand.
- Paper Backed, Sewable Iron-On Adhesive (double sided)
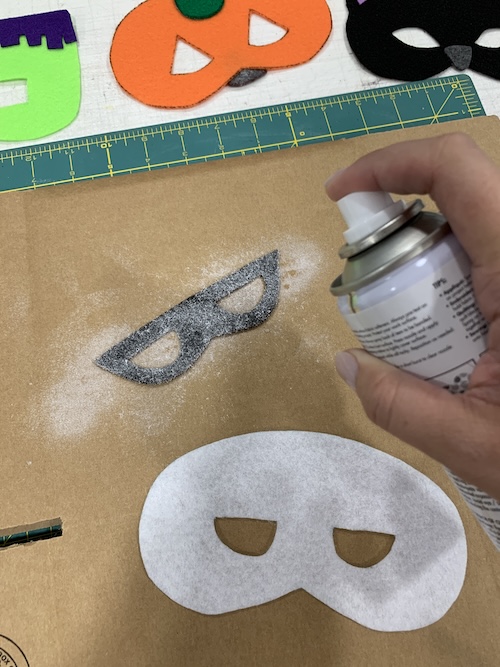
- Spray Basting Adhesive Temporary Bond
- ½” Elastic - measure adult or child’s head for exact measurement and add 1” for seam allowance. (Approximately 15 inches for a child’s mask)
- All purpose Sewing Thread (this can match or contrast your fabric) You can also use rayon thread as well.
- 90/14 Universal Sewing Machine needle
- Straight pins
- Marking Pen
- Fabric scissors
- Iron
Prepare Materials:
- Cut out all four mask patterns and the extra pieces. Don’t forget to cut out the inside of the eyes on your patterns.
- Trace the patterns and pieces onto the felt colors you chose and cut out all the pieces including the inside of the eyes.
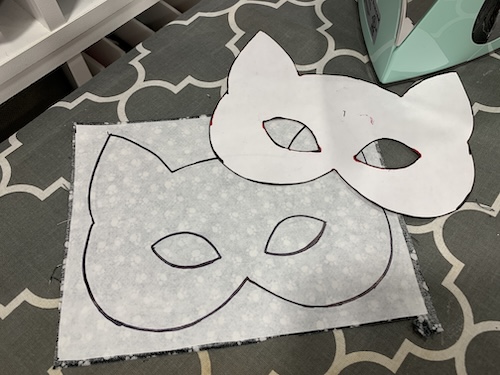
- Using an iron, apply the paper backed iron-on adhesive to the back of the cotton fabric that will be used for the lining of the masks.
- Trace and cut the main face shape for each mask onto the paper backed iron-on adhesive after applying it to the cotton fabric to use as the lining on the backside of your mask.
- PRO-TIP: Applying the adhesive to the entire piece of fabric prior to cutting out your shape makes it a lot easier to trace and cut out all at once.
- Have all of your thread colors and bobbins ready for class.
- Set your machine for a straight stitch 3mm in length.
Put it All Together:
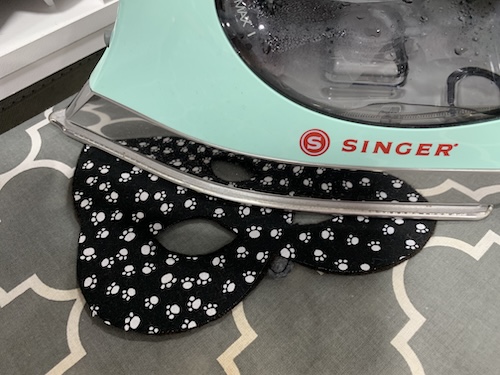
CAT MASK:
- Spray the back of the ears and nose with the spray adhesive and stick to the cat mask. This spray helps hold small pieces in place to easily sew. You can skip the spray and use pins to hold these pieces together for sewing.
-
- When using a spray adhesive be sure to do so in a well ventilated area with a piece of paper or cardboard to protect your surfaces.
- If you have any breathing issues or are allergic to spray adhesives please do not use and instead use pins to attach your felt pieces for sewing.
- Set your sewing machine to a straight stitch with a length of 3mm and sew around the edges of the ear and nose pieces you just attached with spray adhesive. You can use a coordinating or contrasting thread of your choice.
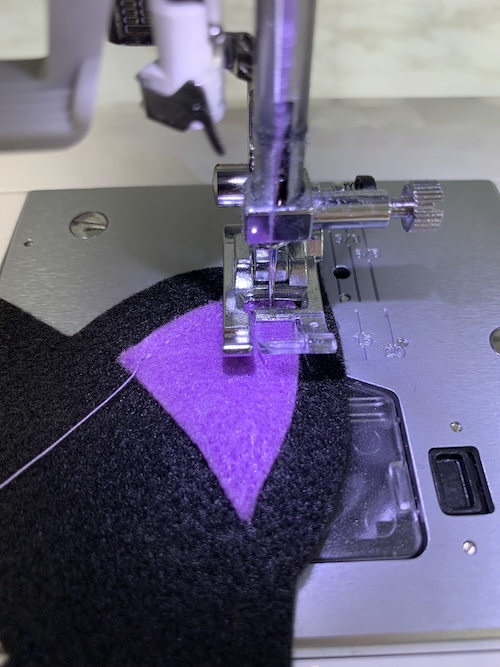
- Optional: Beginning at the nose and going out at a slight angle stitch 3 straight stitches out from each side of the nose to create whiskers. Do not go all the way to the edge of the mask.
- Remove the paper backing off the back of the cotton mask lining. The back of the fabric should now be shiny letting you know that the adhesive properly attached to the fabric is now ready to be attached to the back of the mask.
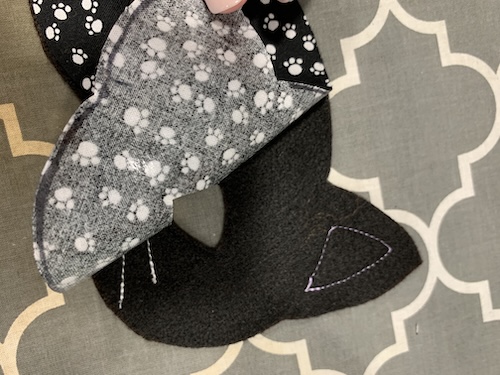
- Line the cotton fabric up with the back of the mask with the shiny backside of the cotton fabric down. Gently press with an iron set to medium-high heat to adhere the fabric to the felt mask.
- Using your sewing machine, stitch around the eye holes of the mask.
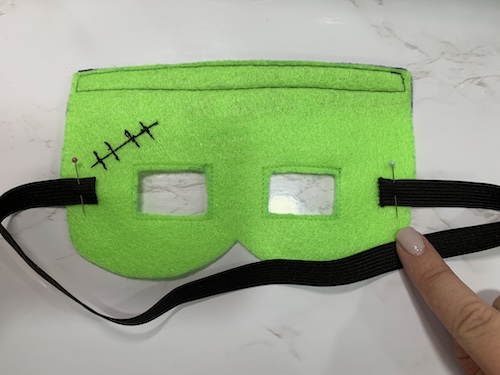
- Pin the elastic to the back of the mask in line with the eye holes leaving about ½” overlap.
- Stitch all the way around the edge of the mask securing the fabric lining in place and the elastic band.
- PRO-TIP: I highly recommend backstitching over the elastic band a few times when sewing around the mask to ensure a tight hold.
MEOW! YOUR CAT MASK IS COMPLETE!
- Repeat these same steps for all of the other mask patterns included in this project.
- For the Mummy mask, attach the black piece around the eyes before the white strips.
- For the Pumpkin mask, use a straight or decorative stitch to create curved lines down the front of the pumpkin to make it look more like the curved sections of a real pumpkin.
- For the Frankenstein mask, sew straight across the purple hair instead of down each section so it stands up and looks more like hair. Use a straight stitch to add the black stitches on the mask.
What other fun characters can you create with these mask shapes? Let your imagination run wild to create your own spooky mask!