United States
Personalized Birthday Bunting
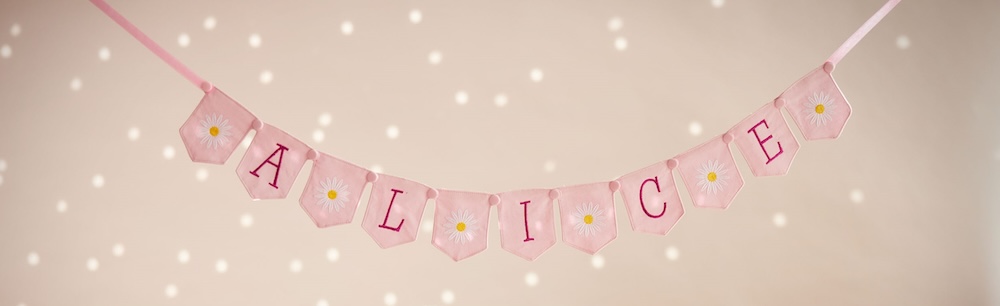
This Bunting is an example of what you can do with the bunting files from mySewnet Library. Of course, you can add any lettering or embroideries, the variations are endless!
With 30-day Free Trial of mySewnet Embroidery Software you will get to try out the most user-friendly and feature rich digitizing software on the market. It works with all embroidery machine brands and is available for both Windows and Mac.
What you need:
- Embroidery files for the bunting flag In-The-Hoop: Bunting - Part A and Bunting - Part B
- Mysewnet embroidery software. Silver or higher if you want add lettering from the program.
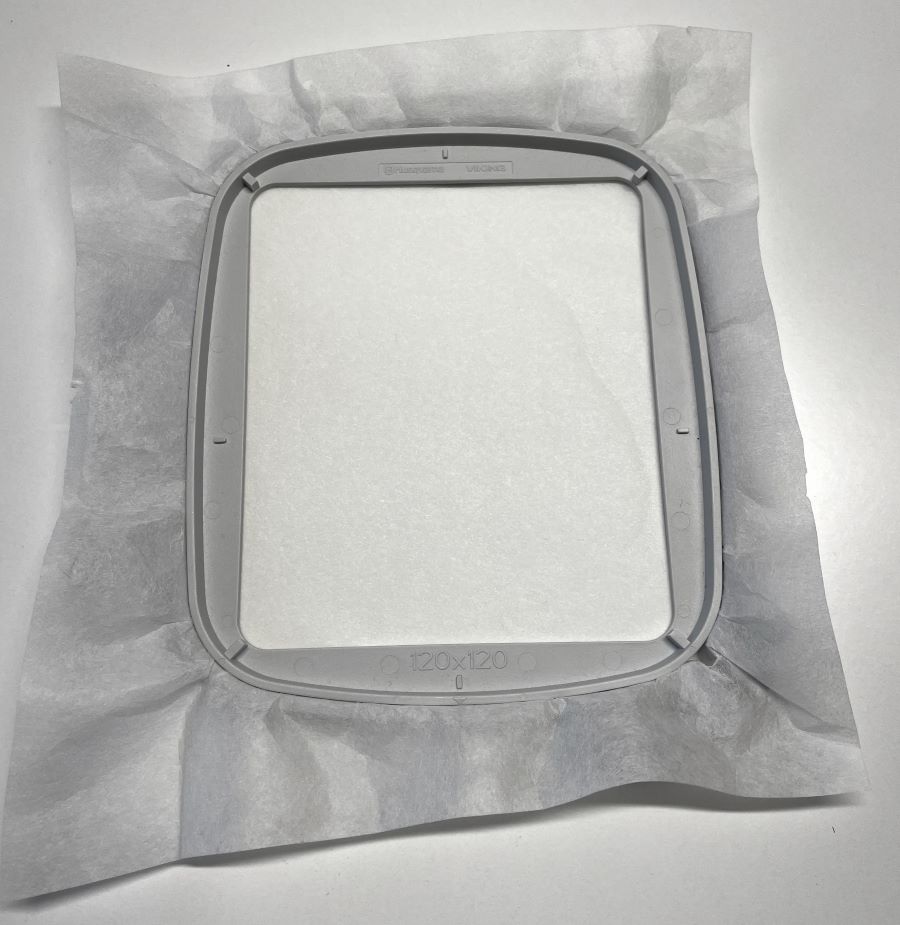
- Embroidery hoop 100x100mm or larger.
- Fabric for the bunting flags.
- Embroidery thread.
- Snap buttons.
Inserting embroidery or Letters in the Bunting File
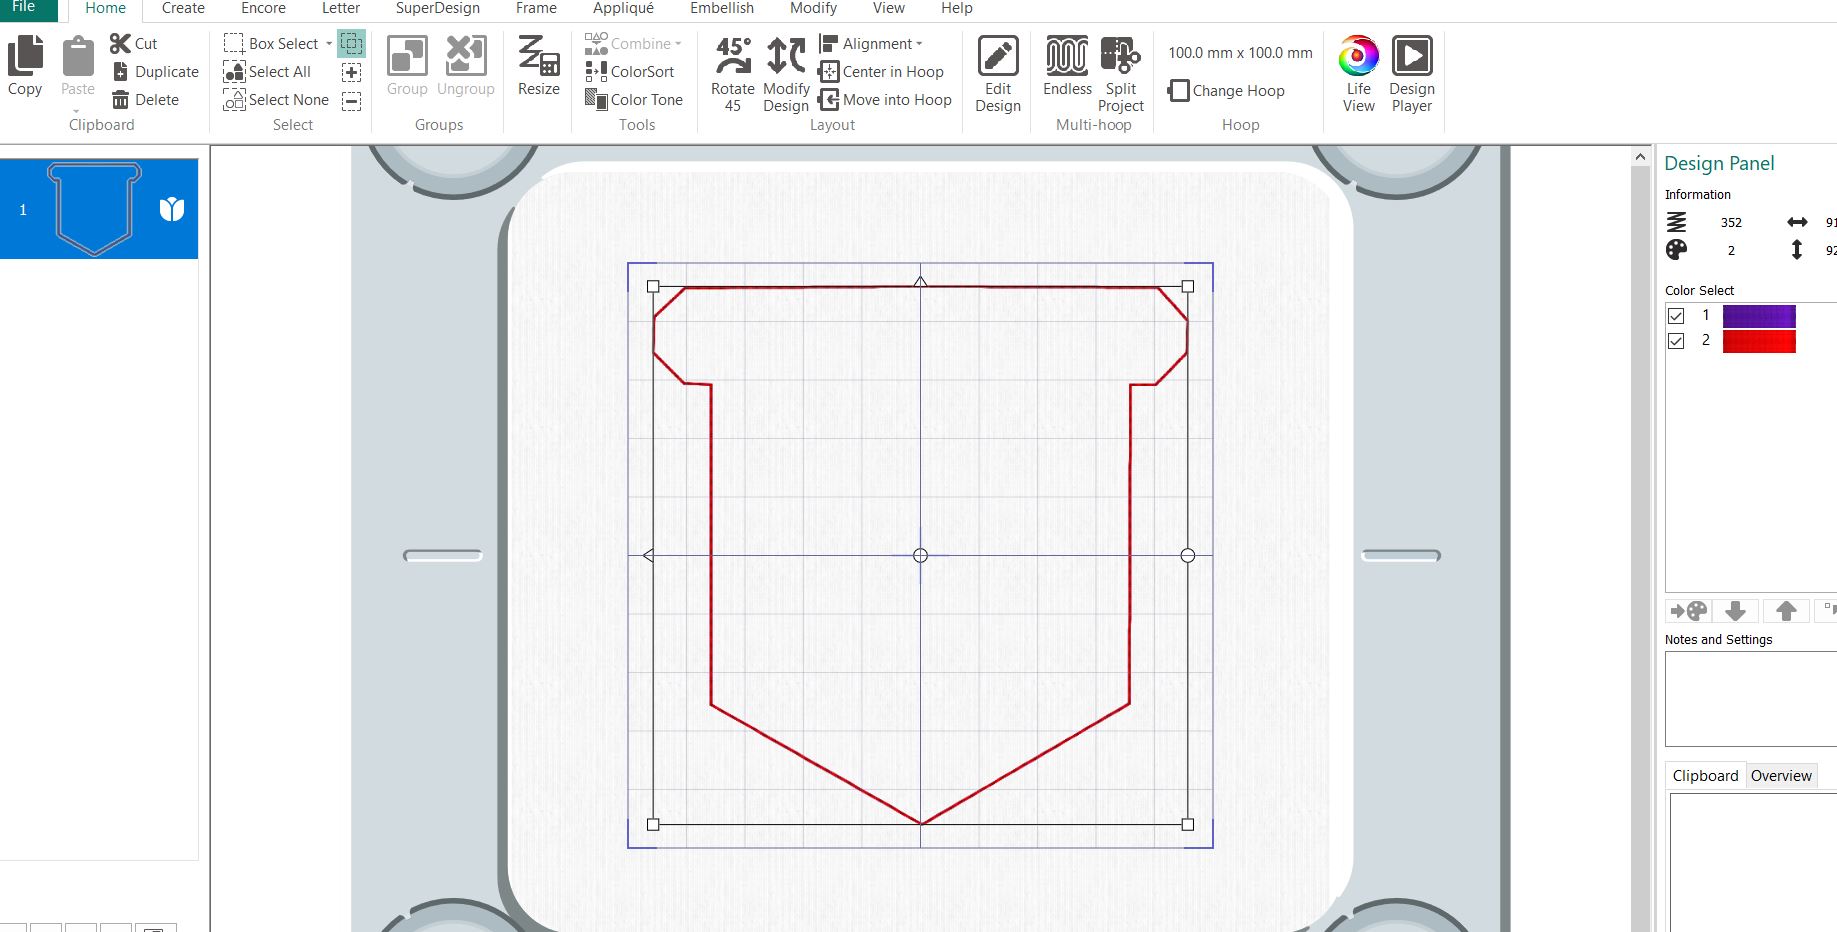
- Open your embroidery program and insert the file “Bunting file A” make sure it is centered in the hoop. I used the 100mm x 100mm SMALL METAL HOOP.
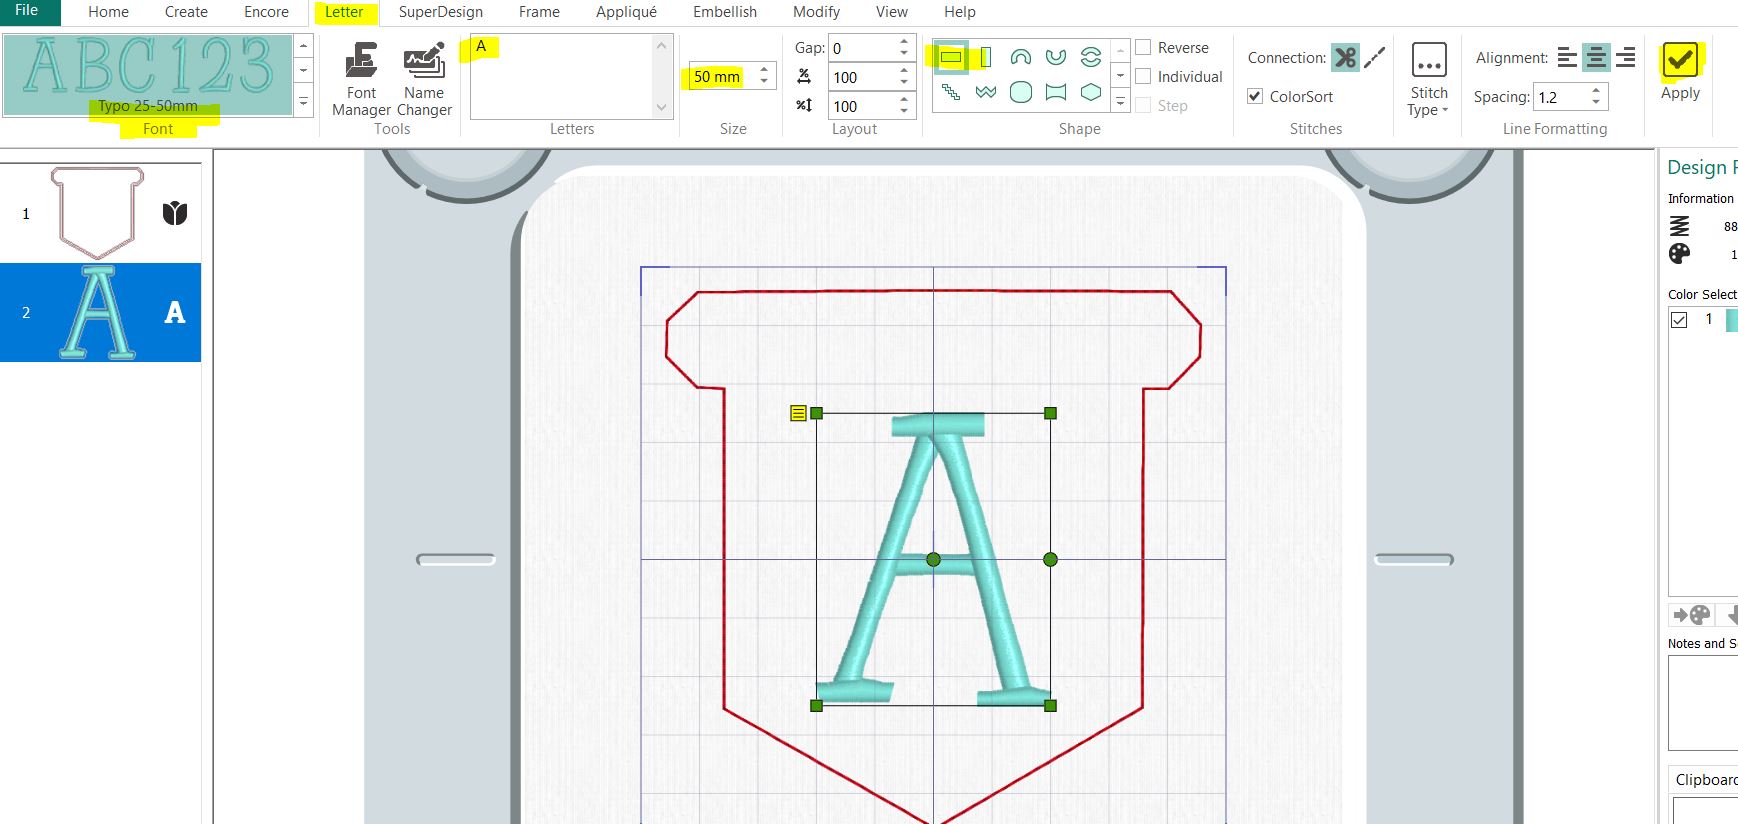
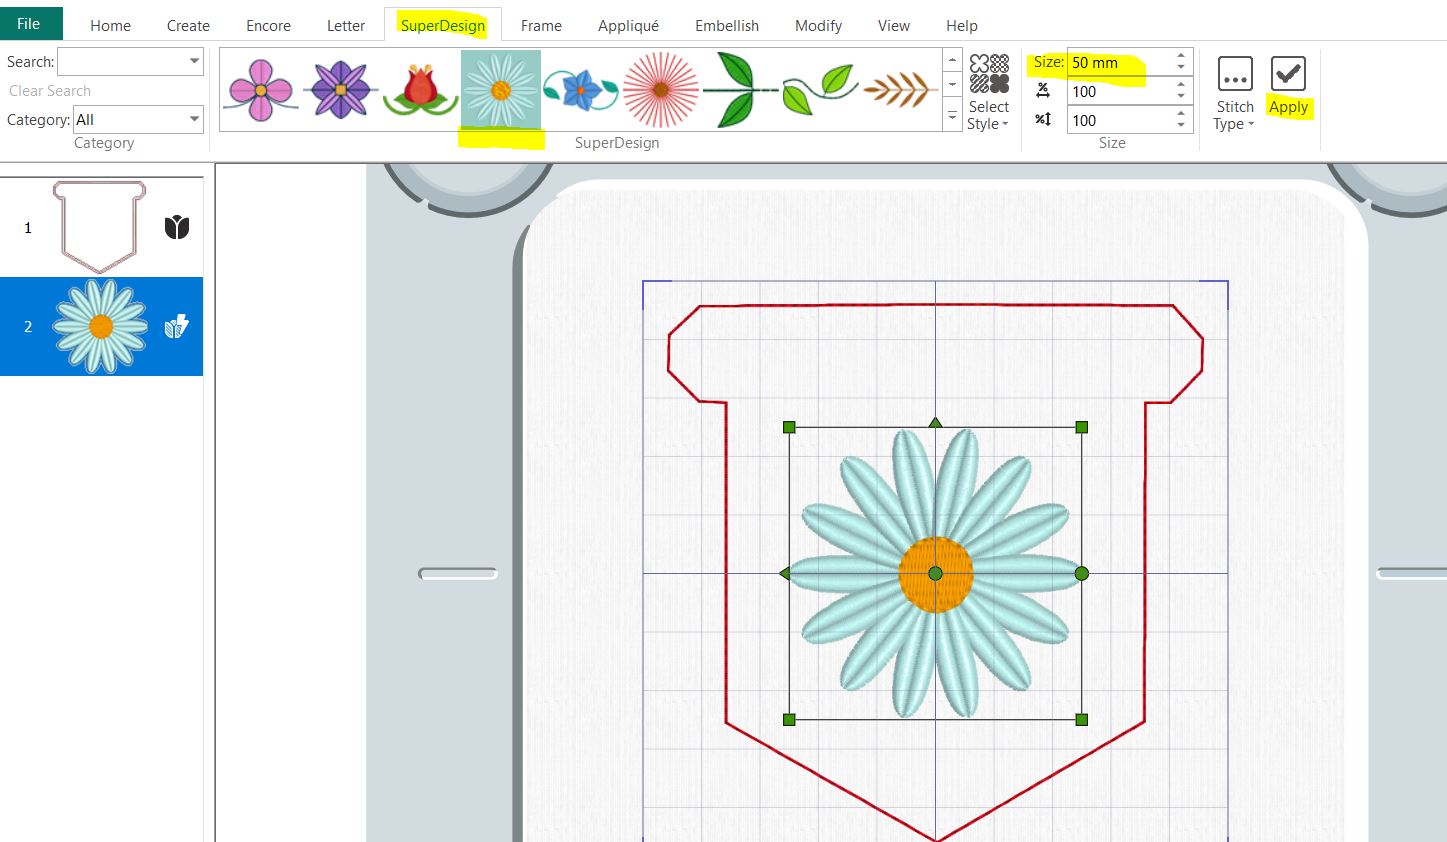
- Insert the embroidery or letter you want to use. Make sure it is centered in the hoop unless you want it to be somewhere else. The blue and red colors show how big the finished bunting will be. I Used Typo 25-50mm from the Children Section and set the size to 50mm.
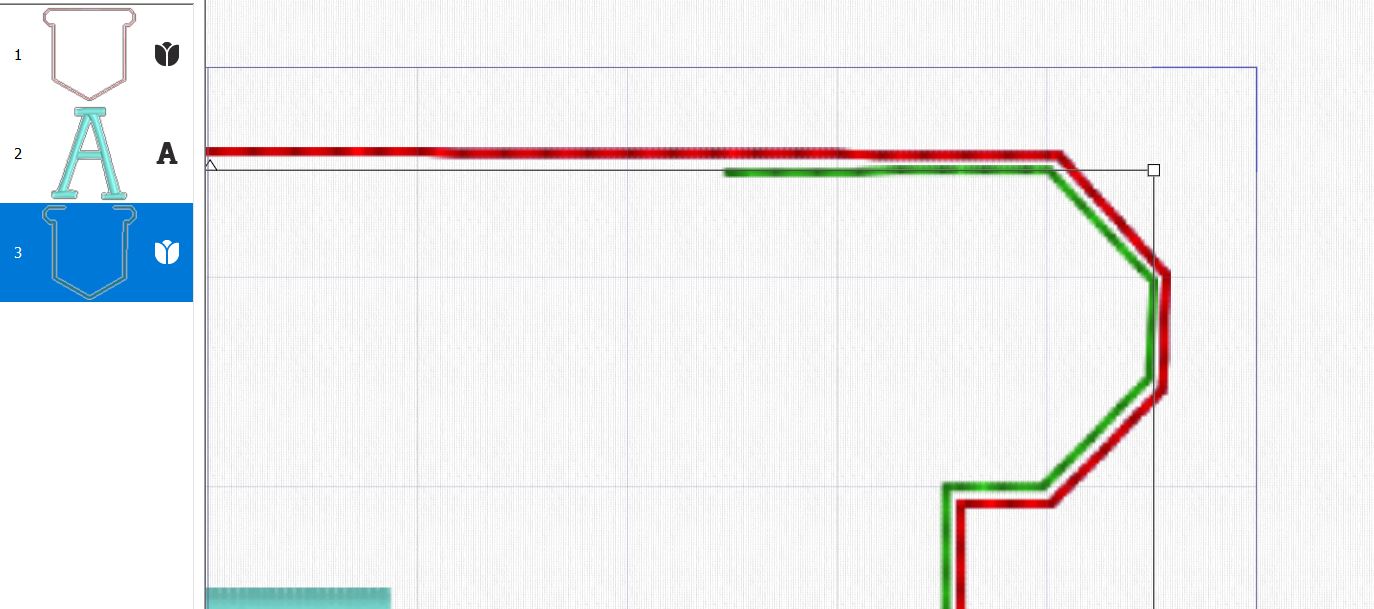
- Go to File Insert and add the file “Bunting file B”. Make sure it is centered in the hoop.
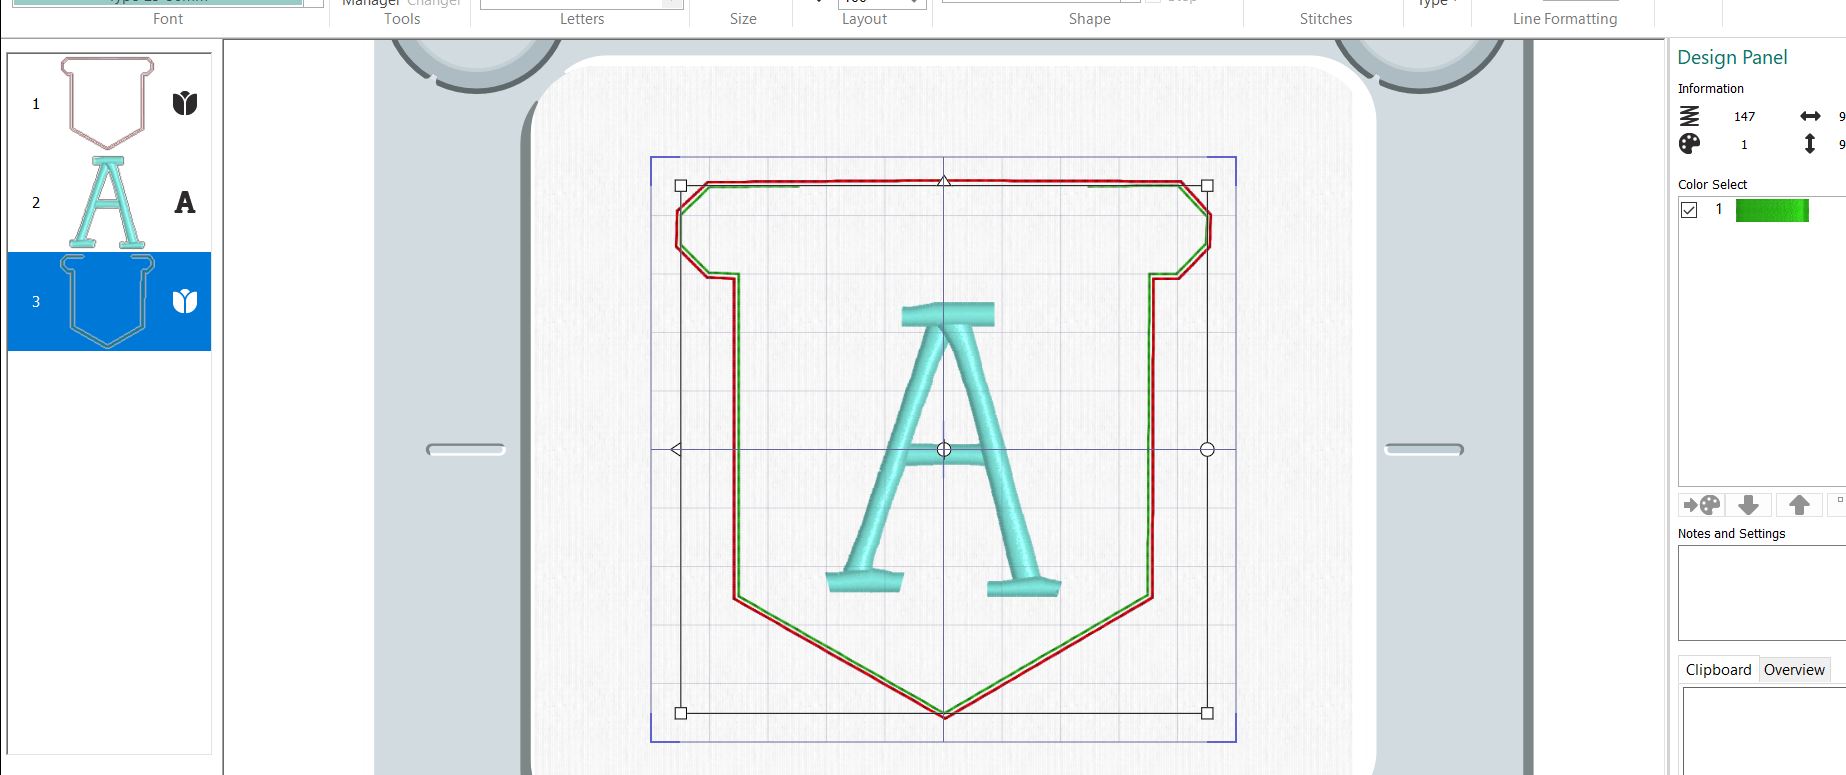
- The green stitch line should be just inside the previous lines (blue and red). This is necessary to get a good result.
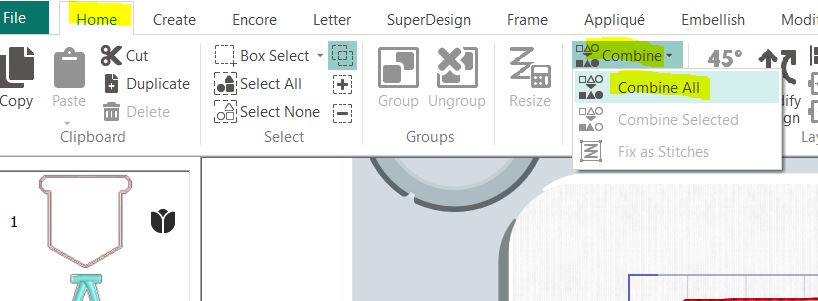
- Click on Combine, Combine all.
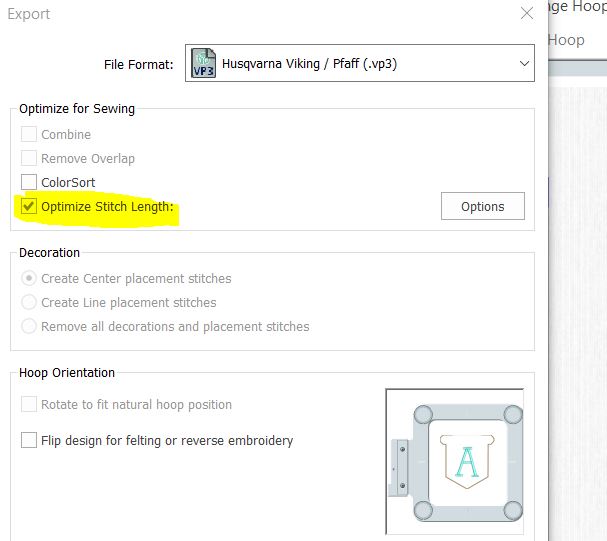
- Save the design using the Save As function. This is to avoid saving the new file with the “Bunting A” name.

- Export the design in your preferred format. Do not ColorSort. This can make the design stitch out in the wrong order.
- If you want to add an embroidery instead of a Letter just follow the same procedure as above. I Used the Daisy from SuperDesign Floral 1, 4-Daisy and set the size to 50mm.
Stitching out the Design:
Note: The following instructions show another embroidery than the ones above, but the procedure is the same.
- Hoop tearaway stabilizer in the hoop.
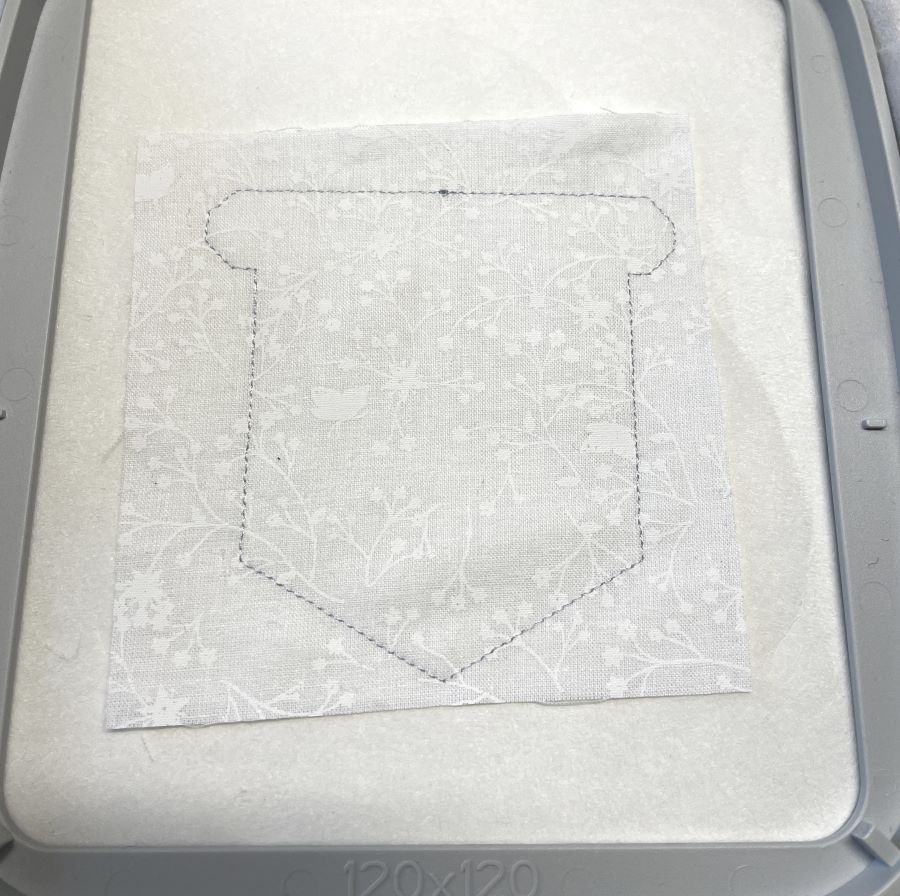
- Stitch out color 1, this is the placement stitch for the fabric.
Place a fabric piece on top of the stitching, make sure it covers the stitch line from step one on all sides.
- Stitch out color 2, it will secure the fabric in the hoop.
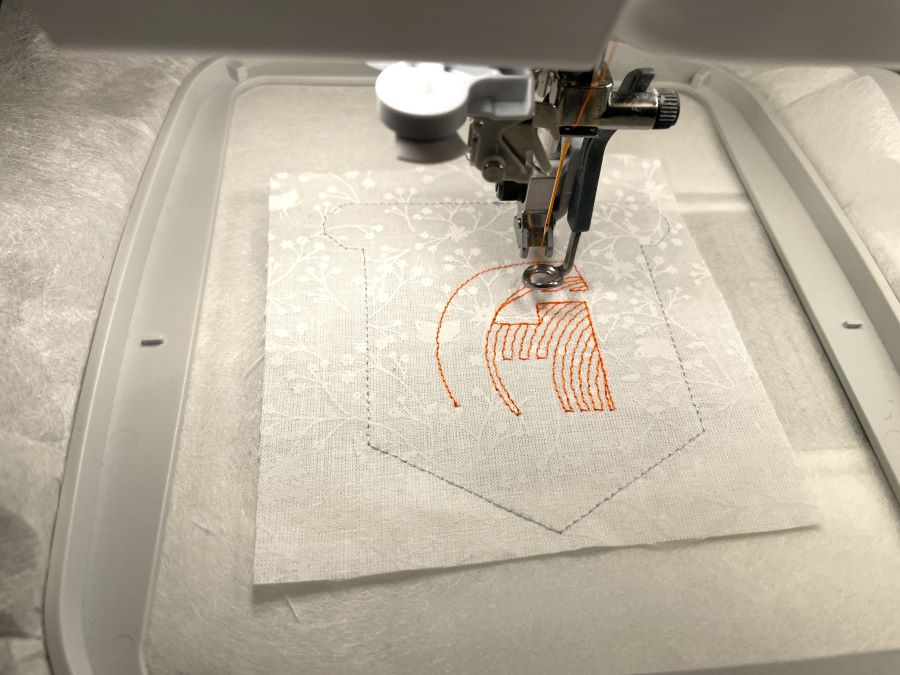
- Stitch out the embroidery design or letter you have chosen.
- Put fabric for the back of the bunting on top of the embroidery in the hoop. Make sure it extends outside the outer edges of the bunting on all sides.
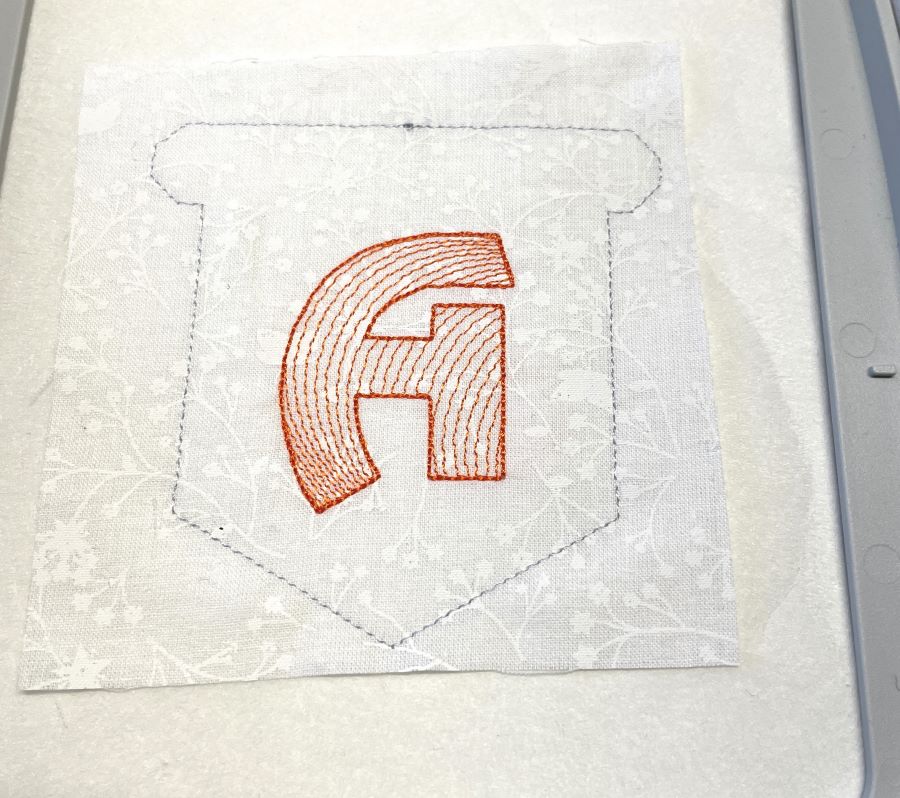

- Stitch out the last color (green), this will secure the fabric piece in the hoop, leaving an opening for turning.
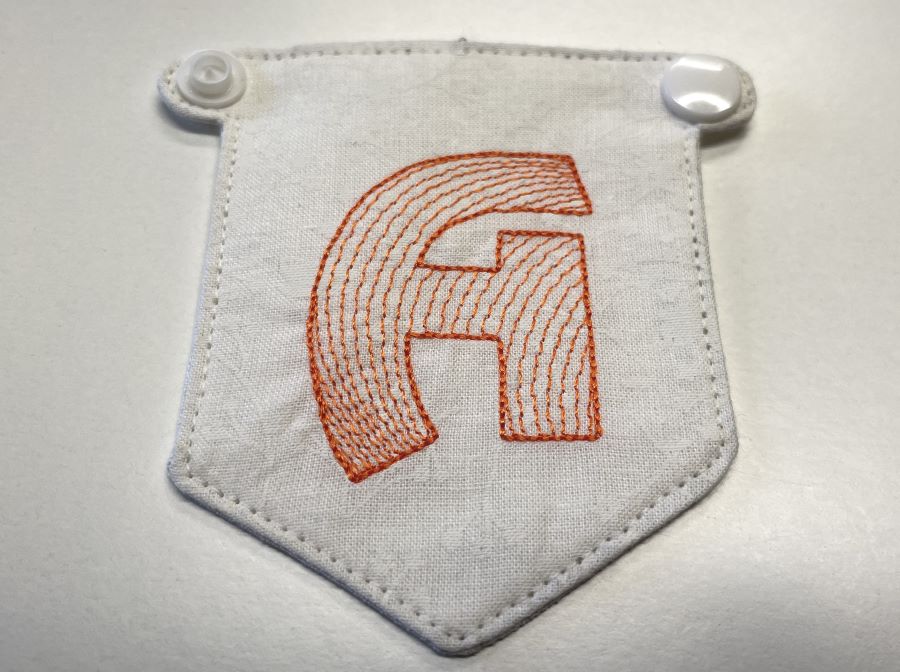
- Your embroidery is now finished, unhoop and cut out about ⅛” (3mm) outside the stitch line. Leave a bigger seam allowance (⅜” (1cm) at the opening.

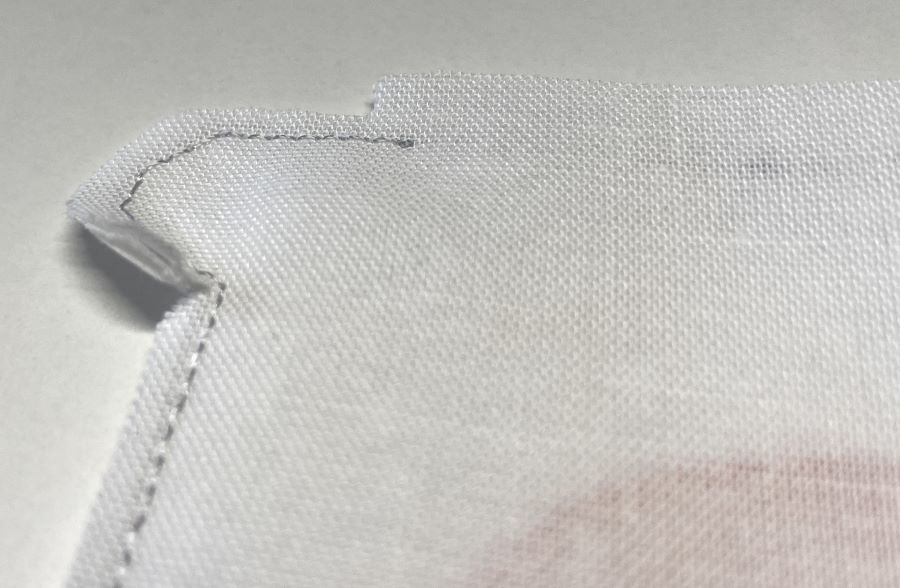
- Turn right side out, make sure it is turned properly in the corners.
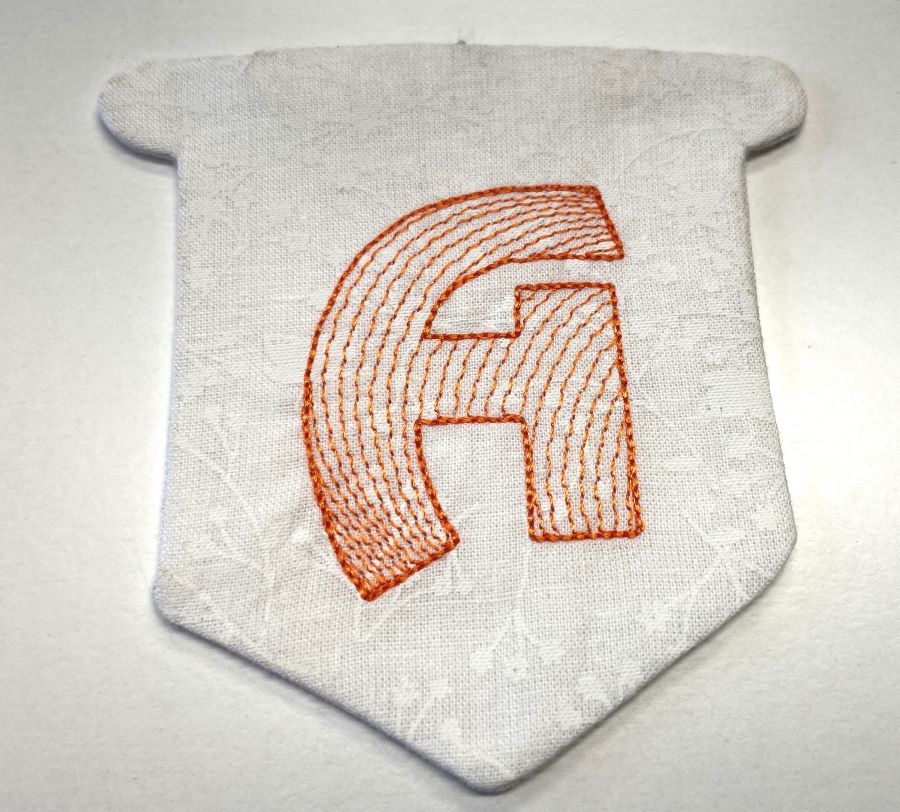
- Fold the seam allowances inside at the opening and press.
- Topstitch around the bunting close to the edge and close the opening at the same time.
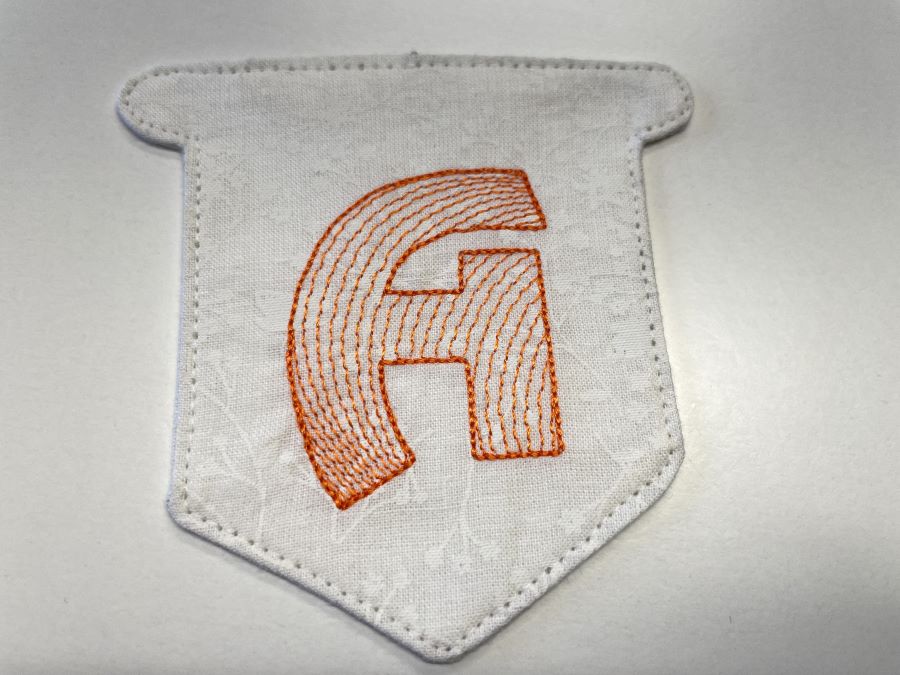
- add a snap button on each side of the bunting. It is important which part you choose to use on the left and right side because we want it to be possible to click the different bunting flags together later!