United States
Perfectly Sized Matching Quilts – Made Easy
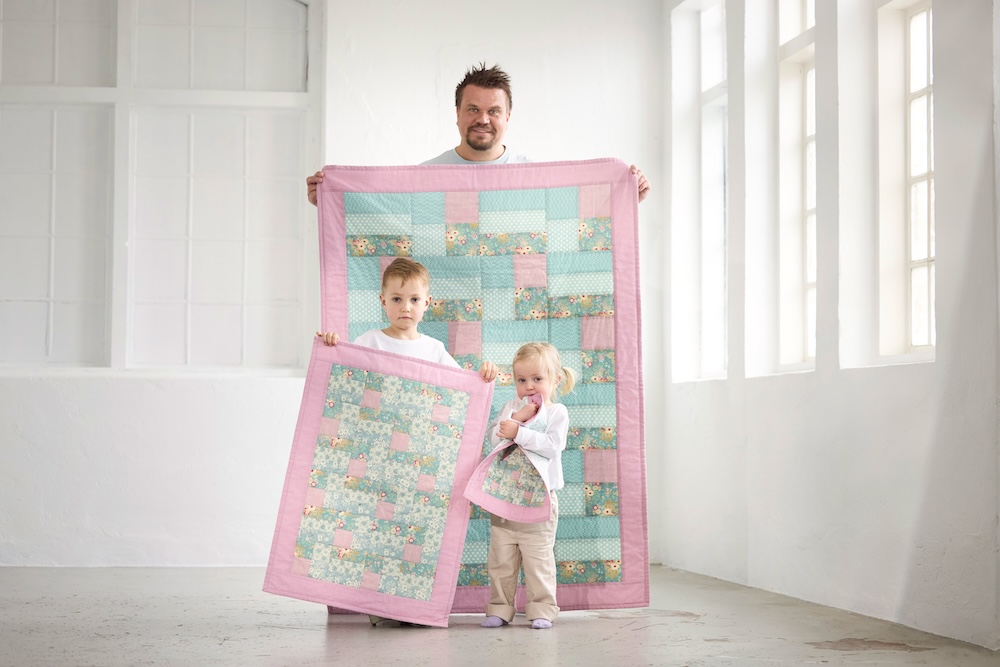
Tired of the math behind resizing quilt blocks divided into halves and thirds? With our quilting software, you can create perfectly sized quilts without the hassle of complex calculations. Whether you're making a throw, twin, or king-size, the software handles the sizing for you in seconds. And while using a Momento cutter makes cutting even faster and more precise, you can still easily set up and create your quilt without it. Follow this step-by-step instruction to design and build beautiful, matching quilts in any size you need—with or without extra tools!
Instructions
- Open the quilting software
- Click on Load a Preset Quilt Layout
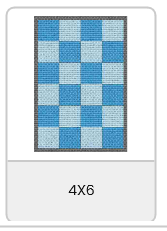
- Load the 4x6 template
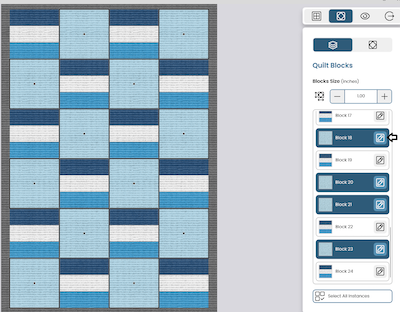
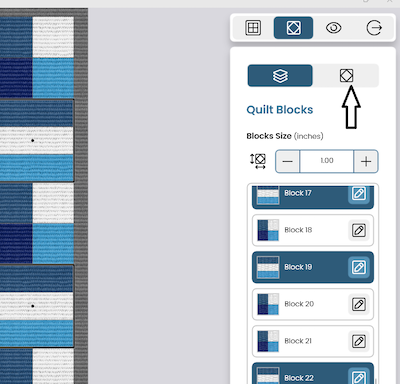
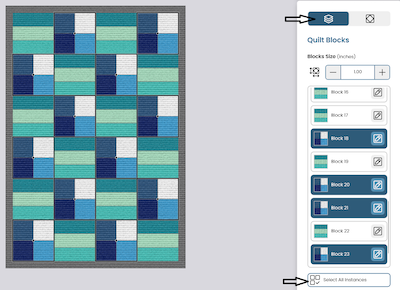
- Click on the upper left block in the quilt (medium blue).
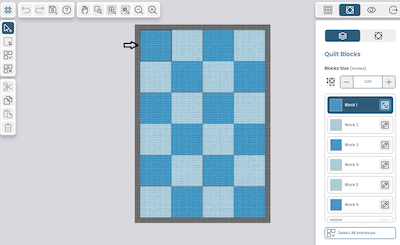
- Click on Select All Instances. All blocks with the same color will be selected.
- Click on the Edit icon on any of the selected blocks in the right panel.
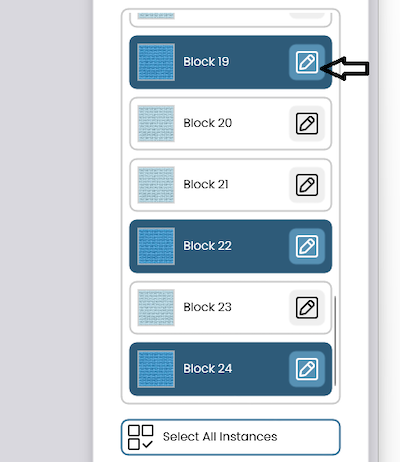
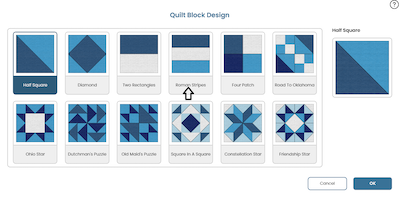
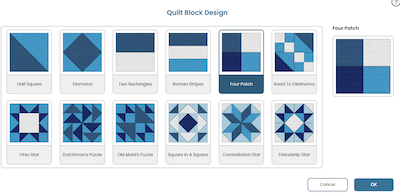
- The Quilt Block Design window opens with the different blocks to choose from. Click on the Roman stripes block.
- The Roman Stripes block now appears in all the selected blocks. As you can see there is a small black dot in all the Roman Stripes blocks. This means they are still selected. Click outside the quilt to deselect them.
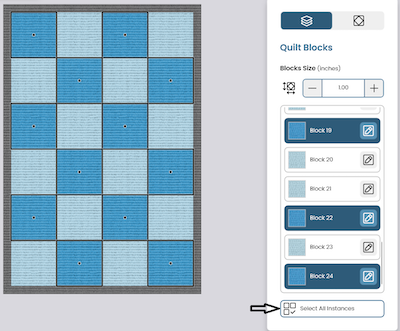
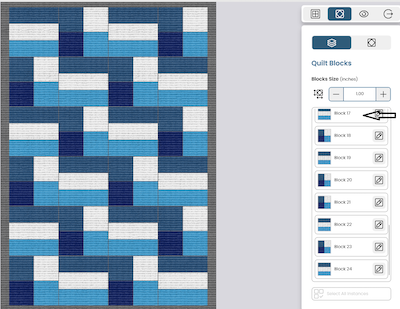
- Click on the light blue block and then click on select all instances again. Now the remaining blocks will be selected.
- Click on the Edit icon on one of the selected blocks in the Quilt Blocks panel on the right side.
- Select the Four Patch Block and click OK.
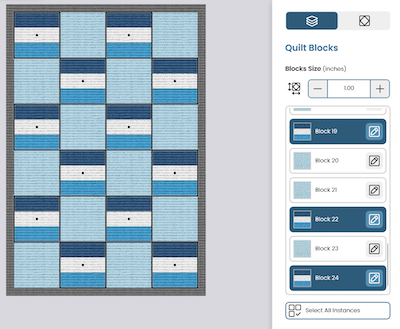
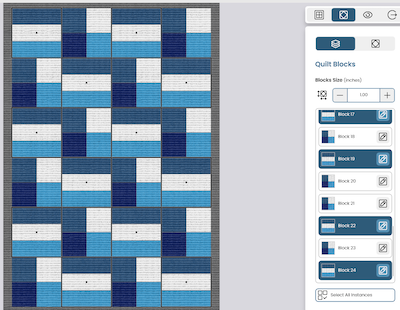
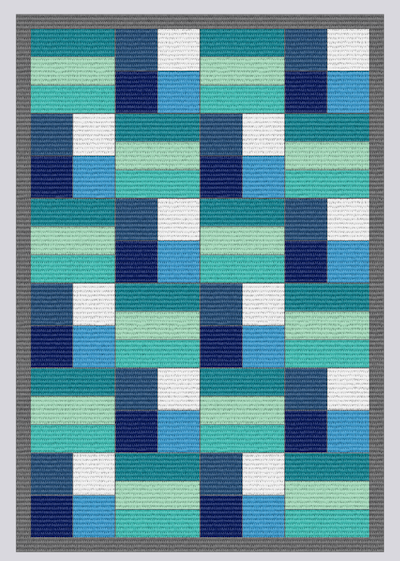
- Now all blocks in the quilt are filled with your selected blocks.

- Click outside the quilt to deselect the blocks. All the blocks in the Quilt Block panel on the right side will have a white background since they are all deselected.
Changing colors
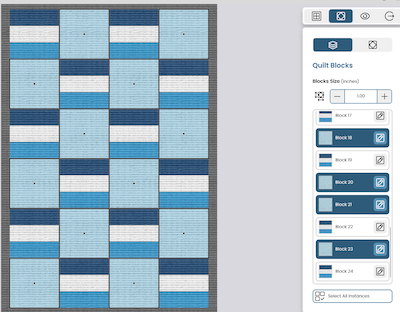
You can change the colors of the blocks by clicking on them individually or by selecting some or all of them. In this example i will show you how to change the colors on the blocks with the same design in one step. - Click on the Romans tripes block in the upper left corner of the quilt. Then click on Select all Instances. Now all the Roman Stripes Blocks will be selected.
- Click on the Quilt design icon.
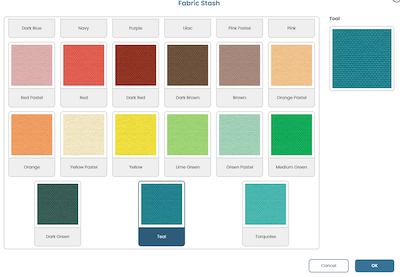
- The panel on the right side now shows the Block Design panel. As you can see the colors are shown on the panel. Click on the Edit icon on the white color.
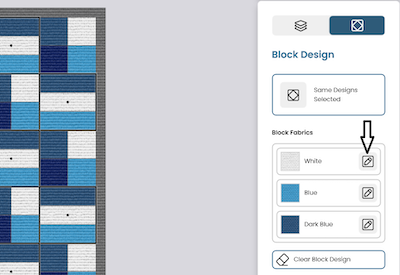
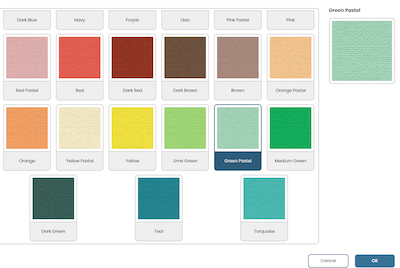
- The Fabric Stash window opens. Scroll down and select the Green Pastel, then click OK.
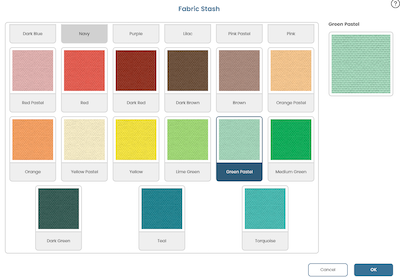
- As you can see the white color in the Roman Stripes block now have been changed to Green Pastel.

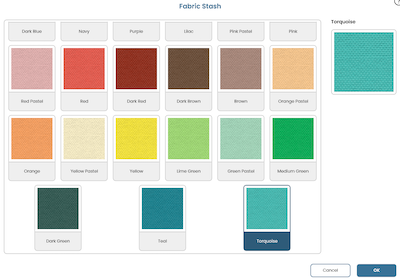
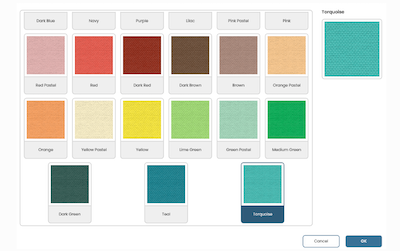
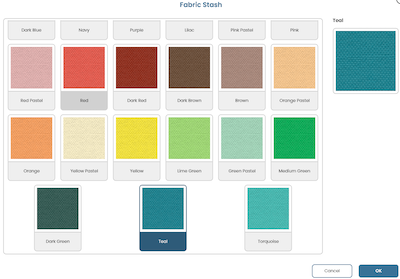
- Click on the Blue color and change it to turquoise.
- Click on the Dark Blue color and change it to Teal.
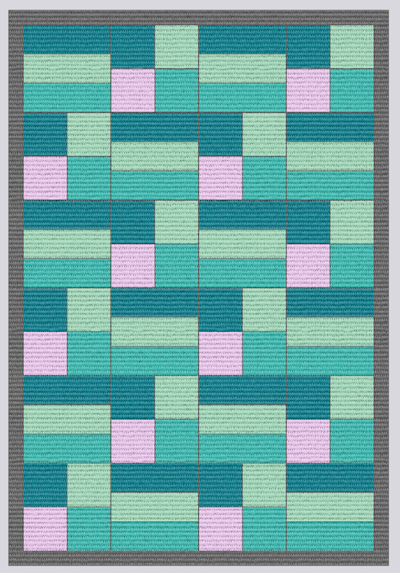
- Now all the roman stripes blocks are changed. Click outside the quilt to deselect the blocks.
- To change the colors of the Four Patch block, go back to the Quilt blocks tab, click on one of the Four Patch blocks and then Select all Instances.
- Click on Block design icon.

- Change navy color to Pink Pastel.

- Change White color to Green Pastel.
- Change the Blue color to Turquoise.
- And finally, Dark Blue to Teal.
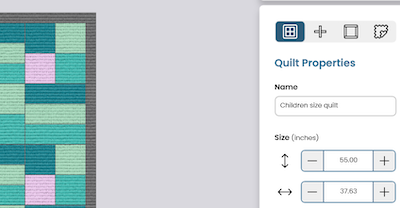
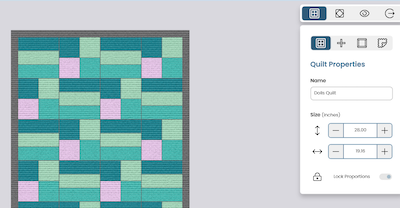
- Your quilt design is now finished. Now we can decide the size and give it a name.
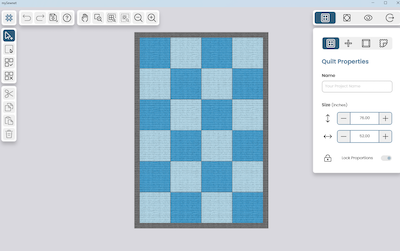
Changing the size of the quilt.
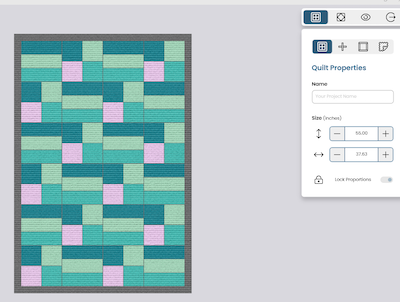
- Click on Quilt properties Icon. Set the height size of your quilt in this case 55” (1400mm). The width will adjust automatically .
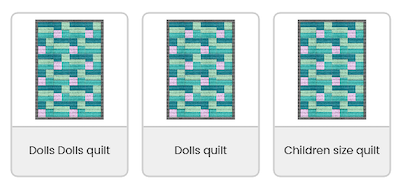
- Give the quilt a name, I choose “Children size quilt”.
- To make the quilt, continue by clicking on the output tab. This will guide you through the process of cutting out the pieces, sewing the blocks together and finishing the quilt top. You can find more instructions on how to do this here.
- If you just want to save the design and make more quilts, click on the Back to Home page icon.
- A dialog box will appear click on Save and in next step OK.
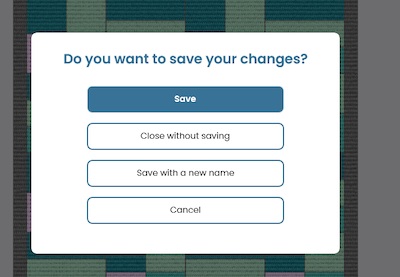
- You are now back on the Start Screen.
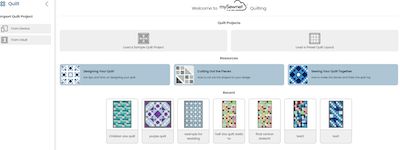
- To change the size of the quilt, double-click on the Childrens size quilt. Now you can change the size and name of the quilt. Set the size to 28” (70cm) and change the name to Dolls Quilt.
- Click on the back to Home page icon again and save the quilt as in steps 32-34. In the save menu, select Save With a New Name and change to Dolls quilt.
- Double click on the Childrens size quilt again. Set the size to 14” (28cm) and rename it Dolls Dolls quilt. Save as before, but with the new name.
- Now you have three different sizes of the same quilt!