 United States
Graphic Patchwork Tote
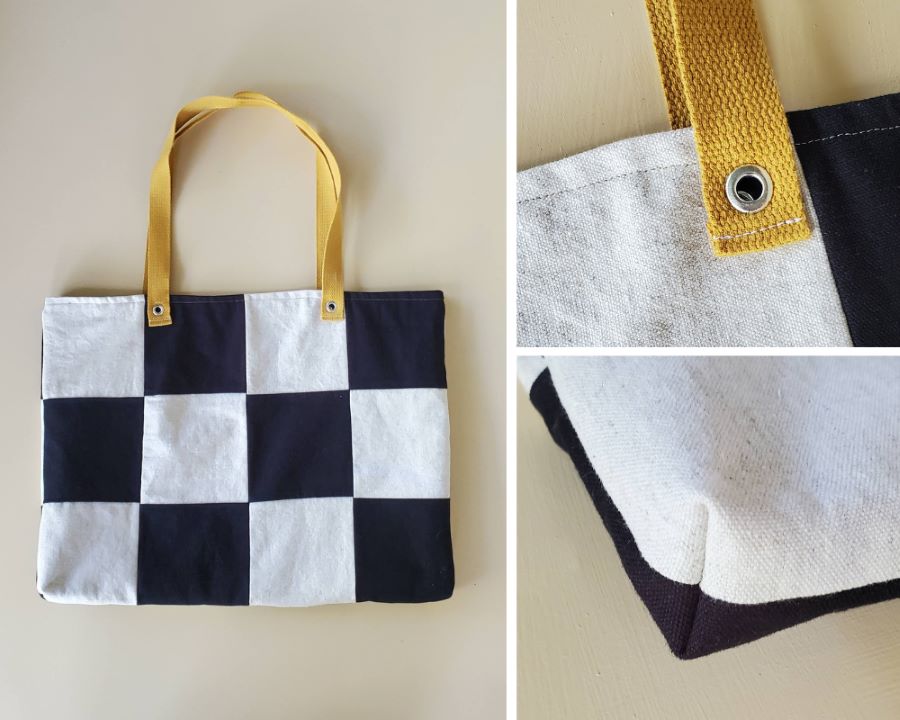
Make a statement with a graphic pieced tote. This tote features large blocks of black and natural canvas created using an easy strip-piecing technique.
What you need:
- Sewing machine
- ¾ yard each of canvas fabric (outer) & 1 yard of fabric (lining)
- 1” cotton webbing, approximately 2 yards
- Chalk or fabric marker
- ½” grommet & setting tool
Cut:
Cut the following pattern pieces from the canvas and lining fabrics:
- Three 26”x 6” strips (each from the black and natural canvas; 6 strips total)
- One 22” x 31” panel (from the lining)
- One 7” x 9” pocket rectangle (from the lining)
Construct:
Create two piles from your strips, one pile with two black strips and one natural strip and one pile with two natural strips and one black strip.
2. Pin and stitch the groups strips together along the long edges, creating one black-natural-black strip and one natural-black-natural strip, using a 1/2” seam allowance.
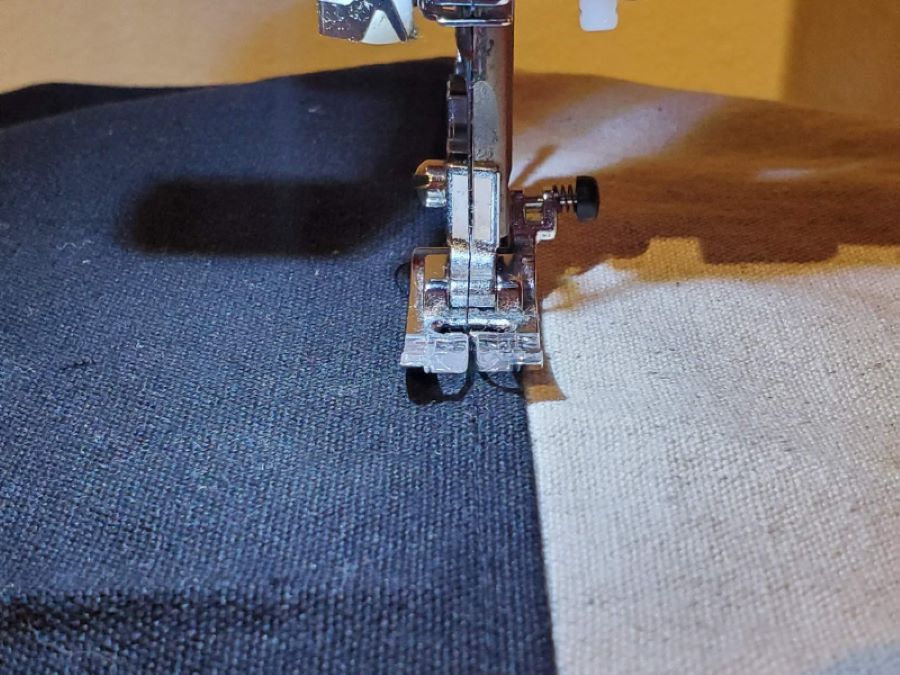
3. Press the seam allowances to the black fabric and topstitch the seams in place with black thread.
4. Cut the strips into 6” sections. You’ll need four 6” sections of each grouping.
5. Piece the strips together, alternating colors and staying precise as possible along the pieced intersections.
6. Press the seams open.
7. Trim the panel to 16” x 22”. Repeat to create the remaining panel.
8. Place the panels with right sides together. Pin along the left, lower, and right edge, aligning the blocks as much as possible.
9. Stitch ½” from the outer raw edge along the left, lower, and right edge. Stitch again using a triple stitch - or another stitch - for reinforcement.
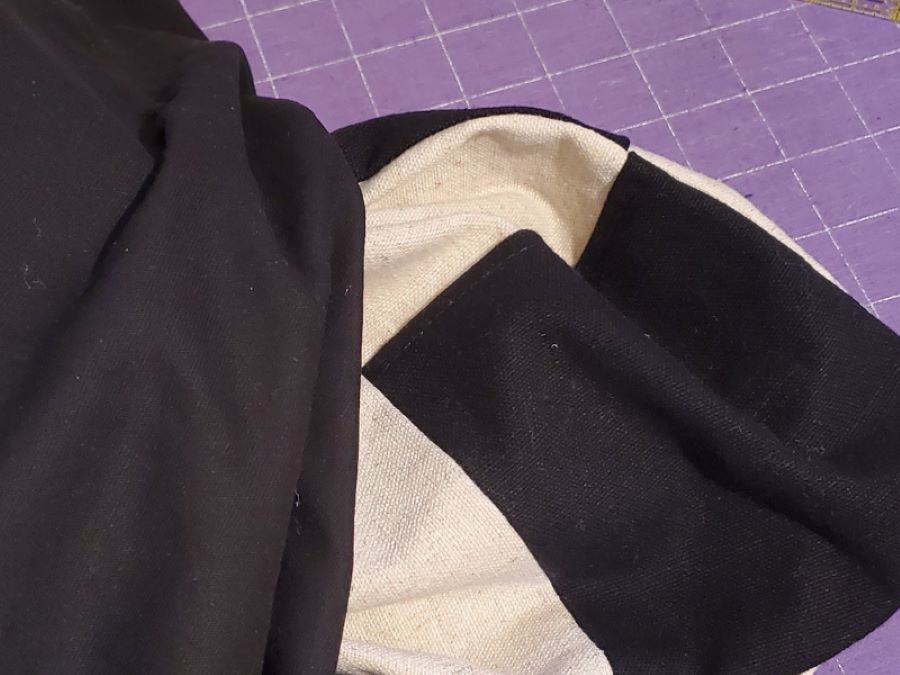
10. On one lower edge, with the bag wrong side out, create a shallow boxed corner. Press the side seam and lower seam together to create a point. Trace ½” in from the point, and stitch across the line. Turn the bag right side out.
11. To create the pocket, press the left, lower and right edges ¼” to the wrong side. Double-fold the upper edge ½” to the wrong side; press well and stitch along the folded edge.
12. Place the lining right side up on a smooth surface. Position the pocket 3 ½” below the upper edge and about 5” away from each side edge. Stitch in place along the left, lower and right edges.
13. Fold the lining panel in half, aligning the side edges. Pin the side edges, leaving a 6” opening for turning; stitch. Box the lower corners using the same steps as for the bag outer.
14. With right sides together, place the bag outer into the lining. Pin around the upper edge and stitch with a ½” seam allowance.
15. Pull the bag right side out through the hole in the lining.
16. Stitch the hole in the lining closed. With the lining inside the bag outer, press the upper edge well and stitch in place, approximately ½” from the bag upper edge.
17. Fold the webbing ends ½” to the wrong side. Place them on the bag front with the folded edge 1 ½” below the bag upper edge. Pin in place and install a grommet through the webbing and the bag layers.
18. Stitch close to the folded webbing edge. Repeat for the remaining webbing ends, attaching the straps to the bag.