 Saudi Arabia
Understanding the Ruffler Attachment: A Timeless Tool for Sewists
Understanding the Ruffler Attachment: A Timeless Tool for Sewists
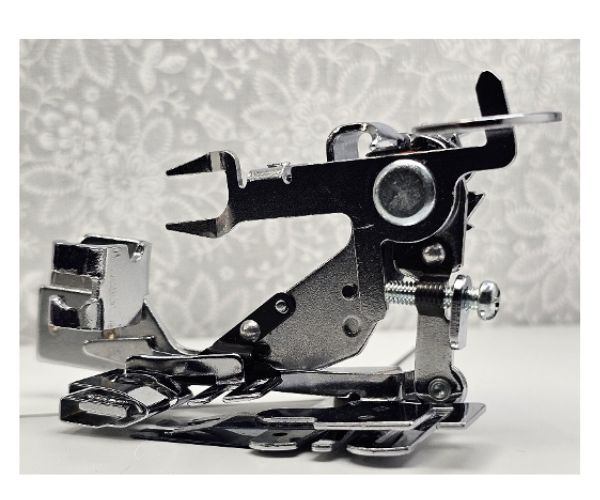
The Ruffler Attachment is a remarkable tool that has been in use for over 135 years, with its origins tracing back to the late 19th century. Although it's difficult to pinpoint the exact date of its invention, numerous patent applications for ruffler improvements emerged in the 1880s. The ruffler was notably included as the No. 12 foot with the 1888 Singer treadle sewing machine.
Over time, the design of the ruffler has evolved, yet its core functionality remains unchanged. Today, as in the past, the Ruffler Attachment connects to the presser bar, is powered by the needle bar, and offers similar adjustable features.
Key Variables of the Ruffler Attachment
The Ruffler Attachment allows you to control two main variables: depth and frequency of the ruffles. Additionally, fabric weight and stitch length are crucial factors that influence the final look of your ruffles.
-
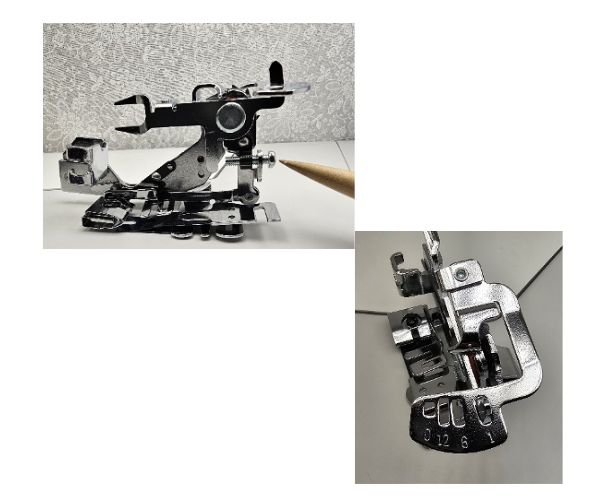
Depth of Ruffle: The depth is controlled by the screw at the front of the ruffler foot. Turning the screw inward increases the depth of the ruffle, while turning it outward reduces the depth. This adjustment allows you to achieve the desired fullness in your ruffles, depending on the project and fabric type.
-
Frequency of Ruffles: The frequency is adjusted using the liftable arm on top of the Ruffler Attachment. Early rufflers offered limited options, such as ruffling at every stitch or not ruffling at all. Modern rufflers provide four settings: 0, 12, 6, and 1. These numbers indicate the number of stitches between each ruffle. For example, setting "1" produces a ruffle at every stitch, while setting "12" spaces the ruffles further apart.
Considerations for Fabric Weight and Stitch Length
-
Heavy Fabrics: For thicker fabrics, which are less pliable, you’ll need a deeper ruffle setting and more stitches between ruffles to achieve a balanced appearance. Adjusting the stitch length can also help to create the desired spacing and fullness.
-
Lightweight Fabrics: Lighter fabrics are easier to manipulate and can result in very full and puffy ruffles, especially when ruffling at every stitch. However, take care with delicate fabrics to avoid snagging on the ruffle blade.
Using the Ruffler Attachment
-
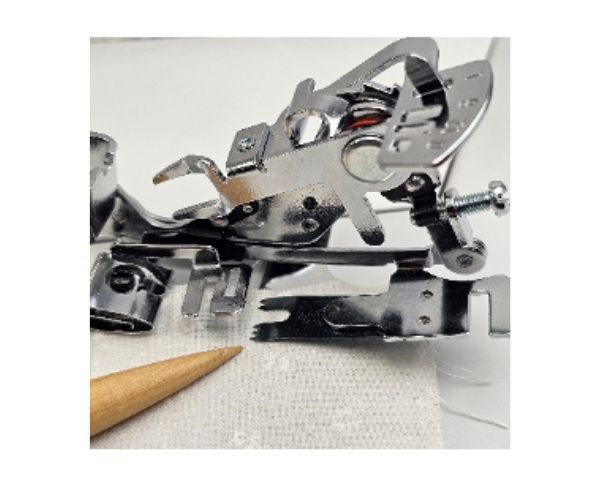
Loading Fabric: To load fabric into the Ruffler Attachment, slide the fabric to be ruffled between the toothed blade and the smooth spring blade at the bottom of the attachment. Ensure the fabric is advanced beyond the needle before starting to sew.
-
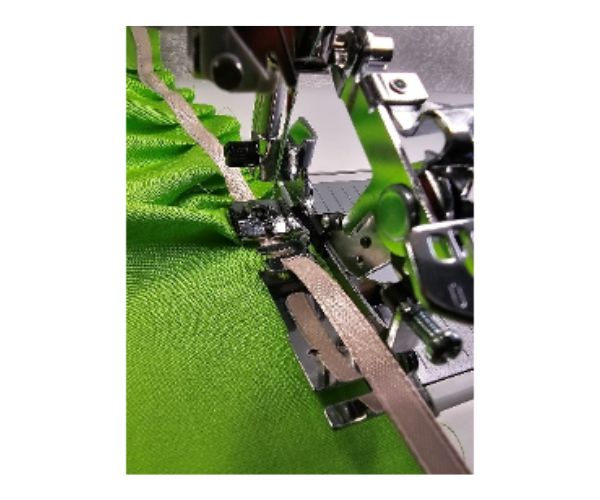
Ruffling Multiple Layers: To ruffle a fabric piece onto a base fabric, position the base fabric right side up under the ruffler, with the fabric to be ruffled right side down between the spring blade and toothed blade. For a ruffled edge finished on both sides, first sew two layers of fabric together, then run them through the ruffler as a single piece. This prevents the top layer from snagging on the blade and ensures even ruffles.
-
Adding Ribbon: You can also sew ribbon onto the top of a ruffle using the ribbon guides in front of the needle, adding a decorative touch to your project.
A Legacy of Innovation
The Ruffler Attachment has stood the test of time, remaining a valuable and efficient tool in sewing. Its ability to create consistent, beautiful ruffles with precision continues to make it a beloved accessory for sewists of all levels.