 Israel
Stitching Up Smiles: Craft Your Own Sesame Street Backpack
.jpg?language_id=1)
Imagine carrying a piece of Sesame Street magic with you wherever you go! From selecting vibrant fabrics to adding delightful character patches, you’ll have the freedom to personalize your backpack to reflect your unique style and love for the iconic show. So, gather your materials, thread your needle, and let’s start stitching up smiles together!
With 30-day Free Trial of mySewnet Embroidery Software you will get to try out the most user-friendly and feature rich digitizing software on the market. It works with all embroidery machine brands and is available for both Windows and Mac.
Materials needed:
Materials needed for stitching out.
This design requires a 360x260mm (about 10.24 in) hoop.
- Embroidery files for the backpack, find them Here
- Tearaway stabilizer four hooping's in the 360x260mm hoop
- Water soluble stabilizer for 120mmx120mm hoop, one hooping
- Embroidery thread.
Materials needed for the backpack - Foam batting 1 piece 28”x28” (70x70cm)
- Fabric for the outside 1 piece 30”x30” (75x75cm)
- Lining fabric 1 ¼ yard x 30” (125x75cm)
- Webbing for straps 1” (2,5cm) wide, 1½ yard (145cm)
- Handle 1 piece 8” (20cm)
- Holder for triglide buckle 2 pieces 4” (10cm)
- Straps 2 pieces 20” (50cm)
- 2 pcs Triglide Slide Buckle for backpack
- Zipper for bags ¼" (6mm) coil, total width1½” (32mm) 28” (70cm).
- It is not necessary to sub cut the zipper pieces yet; it is easier to cut it off later.
- Zipper for pocket 10” (30cm)
- Zipper for backpack opening 16” (40cm)
- Sewing thread
Cutting out the material
From foam batting cut
- Front 16x12” (40x30cm)
- Lower piece Back12x6” (30x15cm)
- Upper piece back 12x9” (30x22cm)
- Side panel 2 pieces, 5x16” (12x40cm)
- Zipper panel 2 pieces, 2x16” (5x40cm)
- Strap padding 2 pieces, 1½”x 10” (4x25cm)
Layout suggestion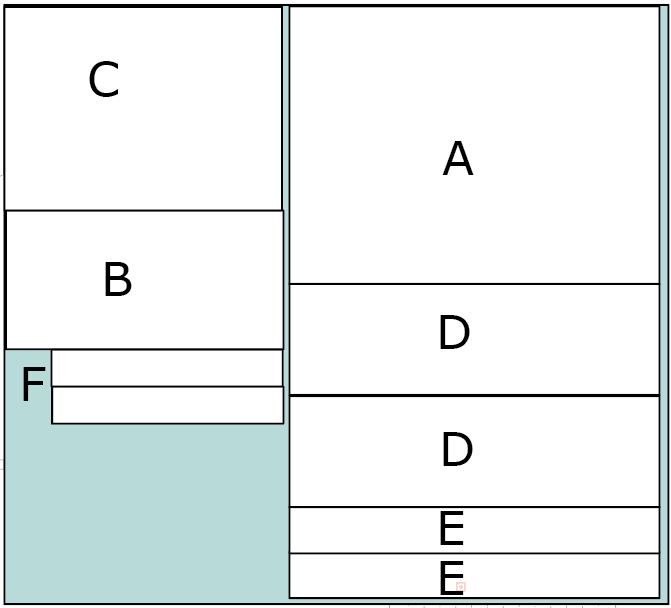
From outside fabric cut
- A: Outside front h 16 x w12” (40x30cm)
- B: Lower Outside back w 12 x h6” 30x15cm)
- C: Upper outside back w 12” x h10” (30x25cm)
- D: Side panels ,2 pieces 16x5” (40x12cm)
- E: Zipper panel, 2 pieces 16 x 2½” (40x6,5 cm)
- F: Padded straps, 2 pieces 12x4” (30x10cm)
- G: Strap holder 6x4” (15x10cm)
Outside fabric layout suggestion (non-directional fabric) allow (10cm) extra and turn piece A and F 90 degrees if needed for directional fabric)
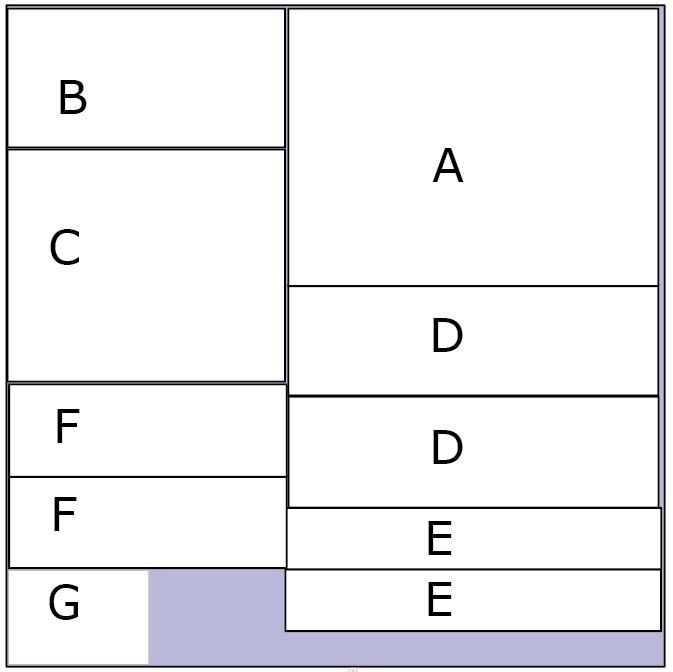
From lining fabric cut:
- A: Inside front 16x12” (35x30cm)
- B: Inside back 16x12” (35x30cm)
- C: Pocket bag back16x6” (30x15cm)
- D: Zipper panel lining 2 pieces 16 x 2½” (40x6,5 cm)
- E: Side panel lining 2 pieces 16x5” (40x12cm)
- F: Binding strips 2½” (6,5cm) wide total length about 2½yard (250cm)
Layout suggestion 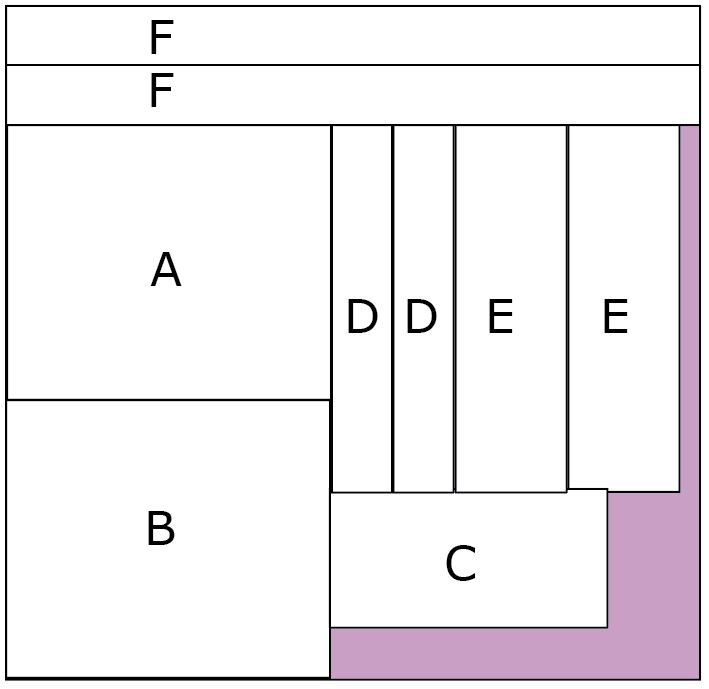
Instructions to build your Backpack:
Start with:
- Cut out all the pieces for the backpack as described above
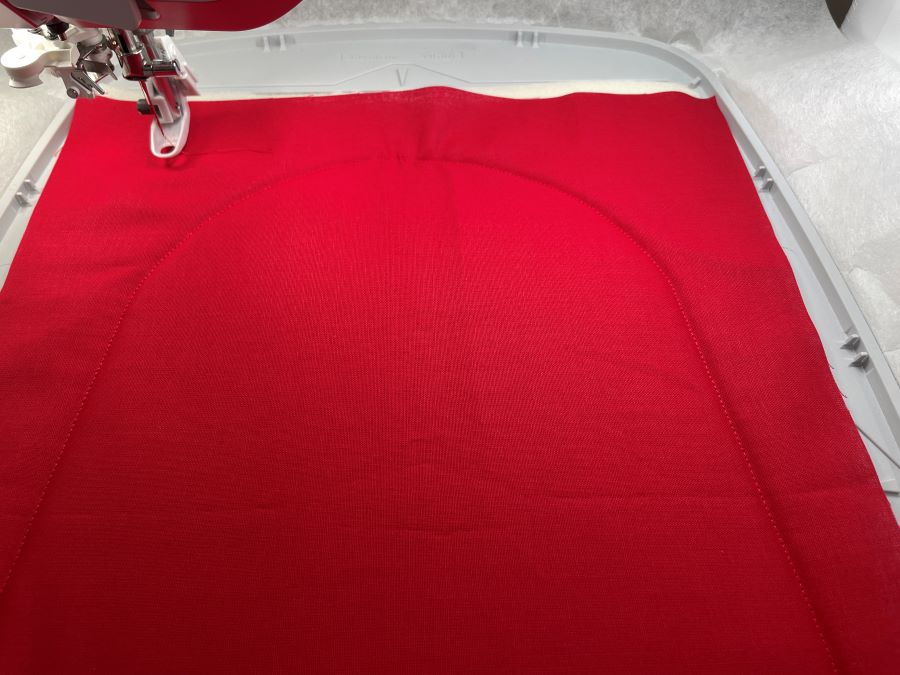
Stitching out the backpack front
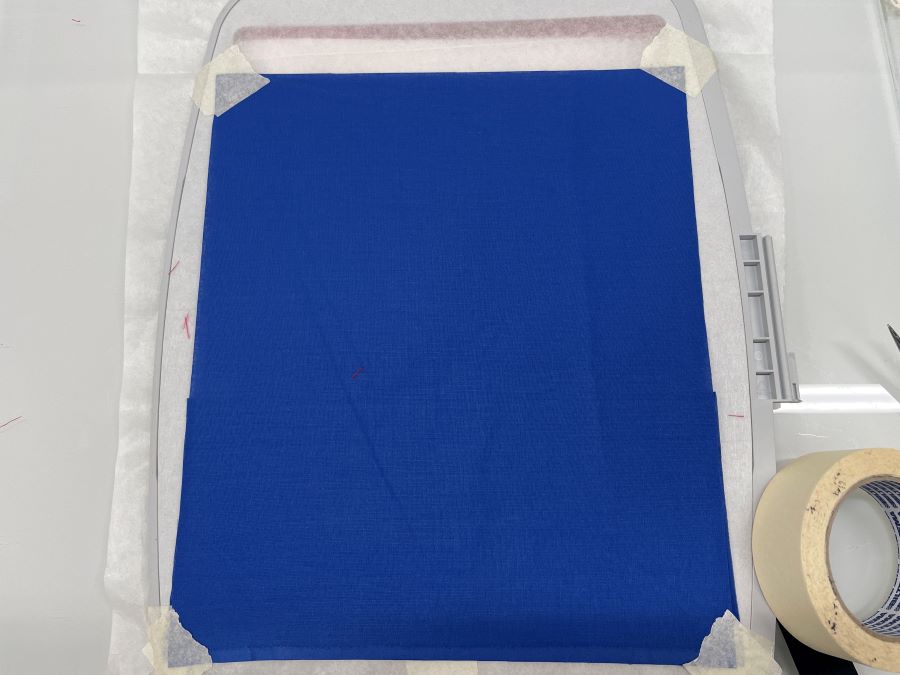
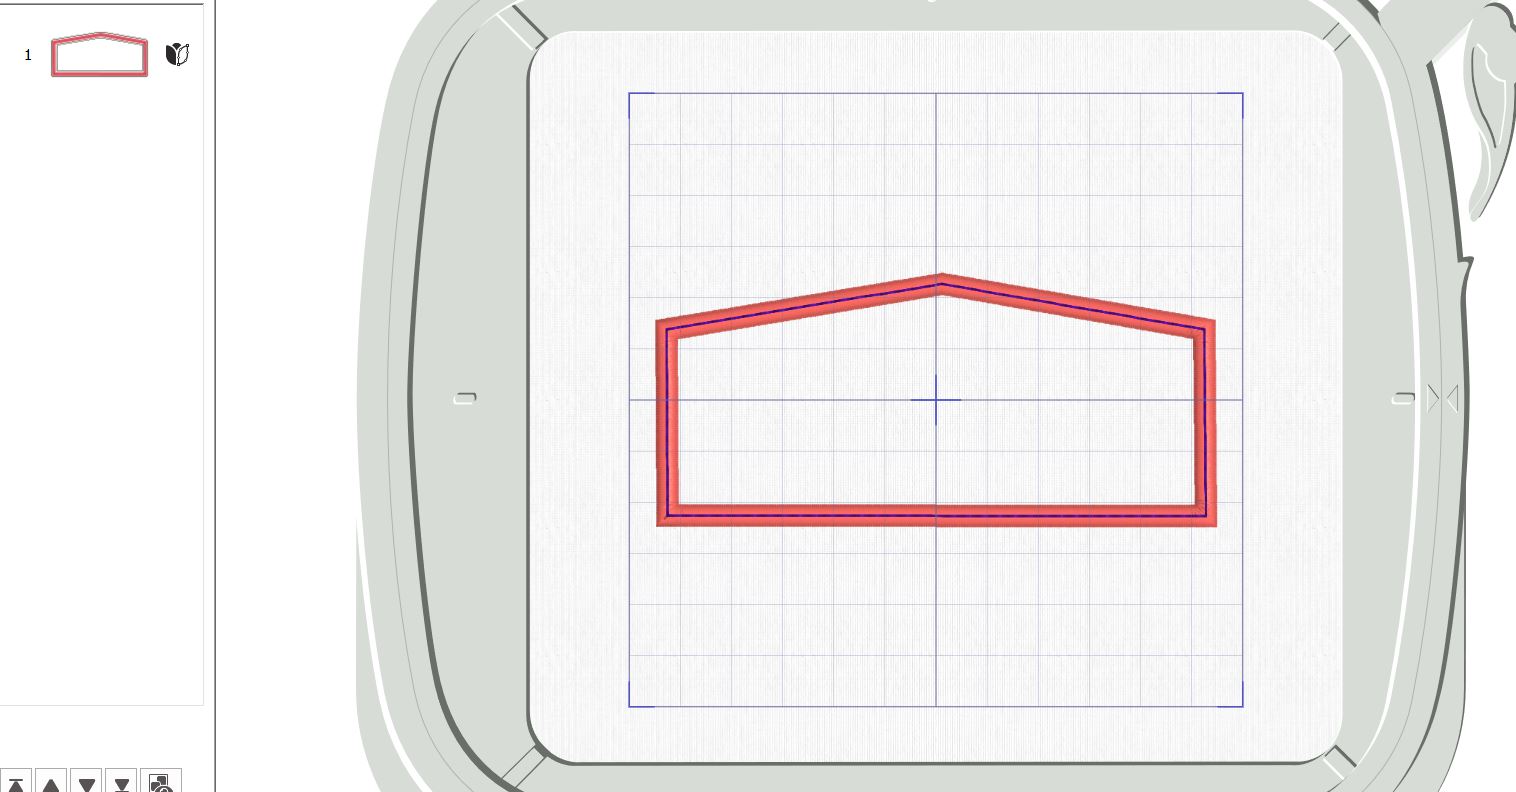
- Hoop Stabilizer in the 360x260mm hoop.
- Load the embroidery file for the back of the backpack in the machine.
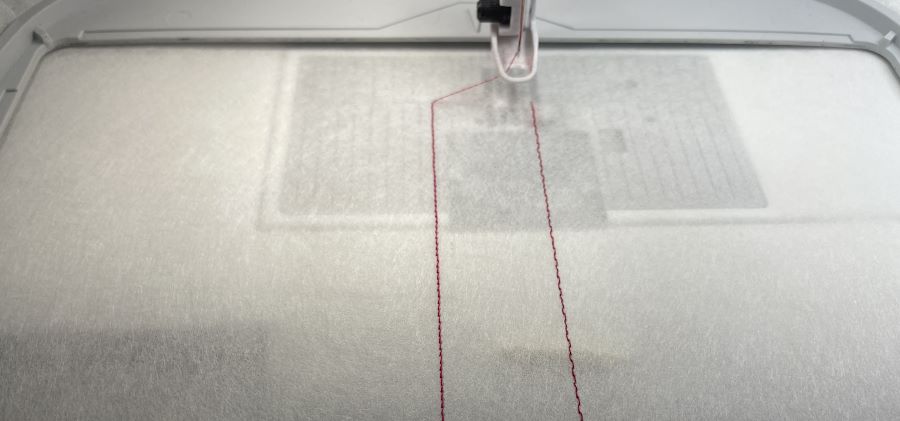
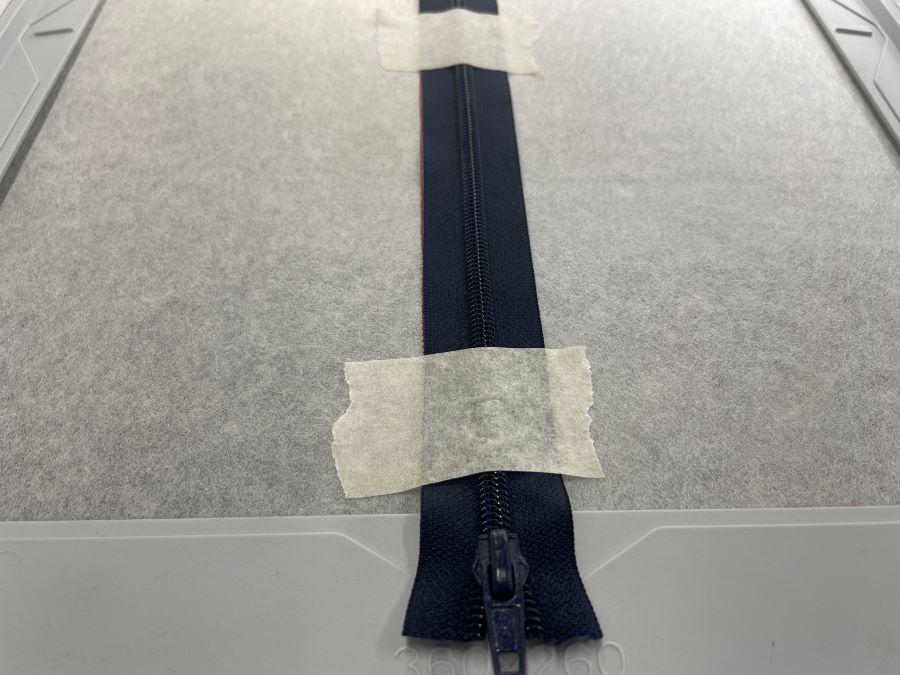
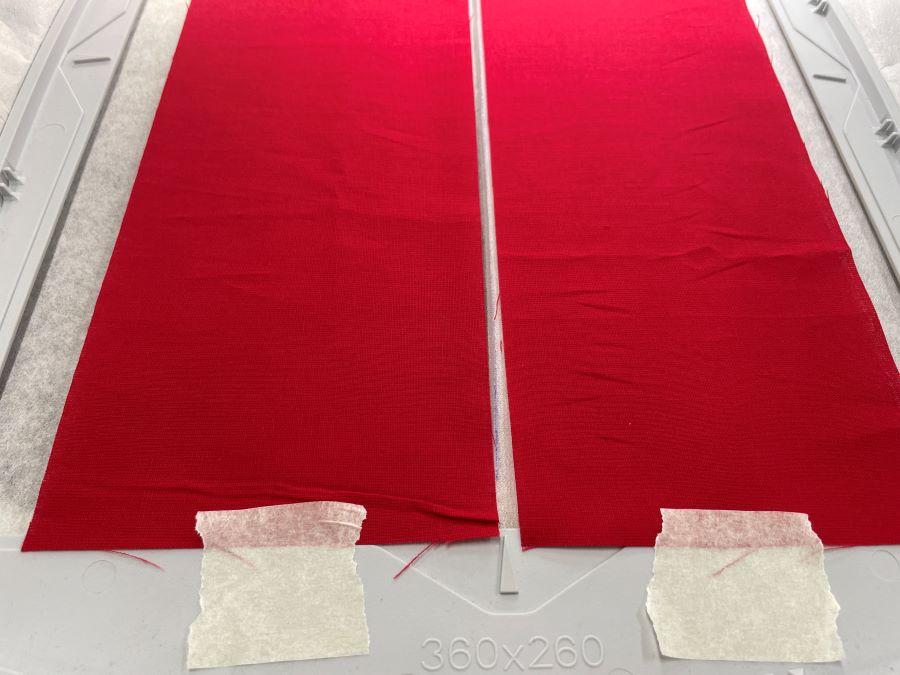
- Stitch out color1, this will make an outline of the backpack and placement line for the zipper.
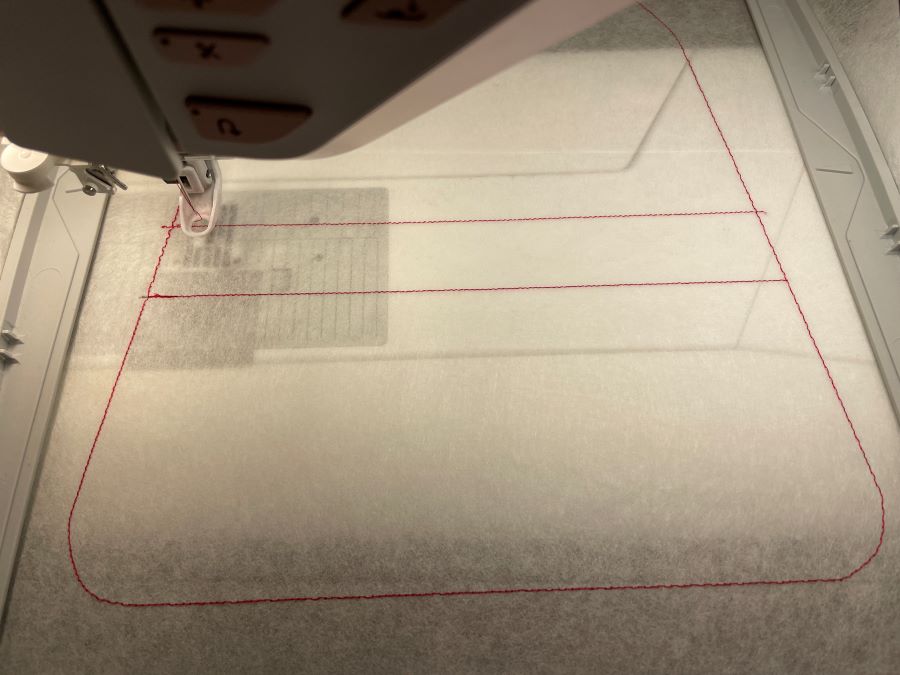
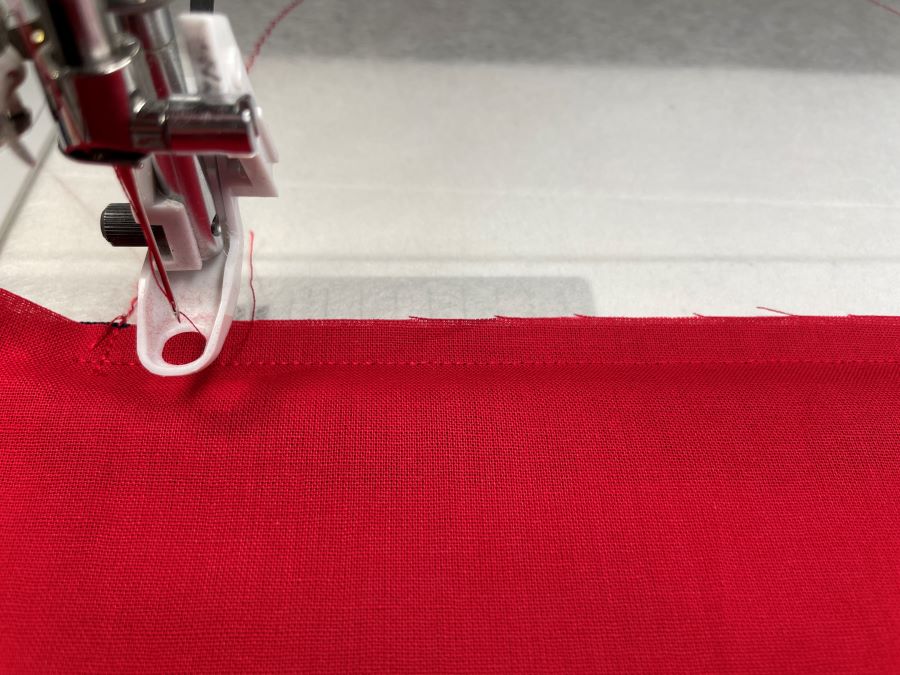
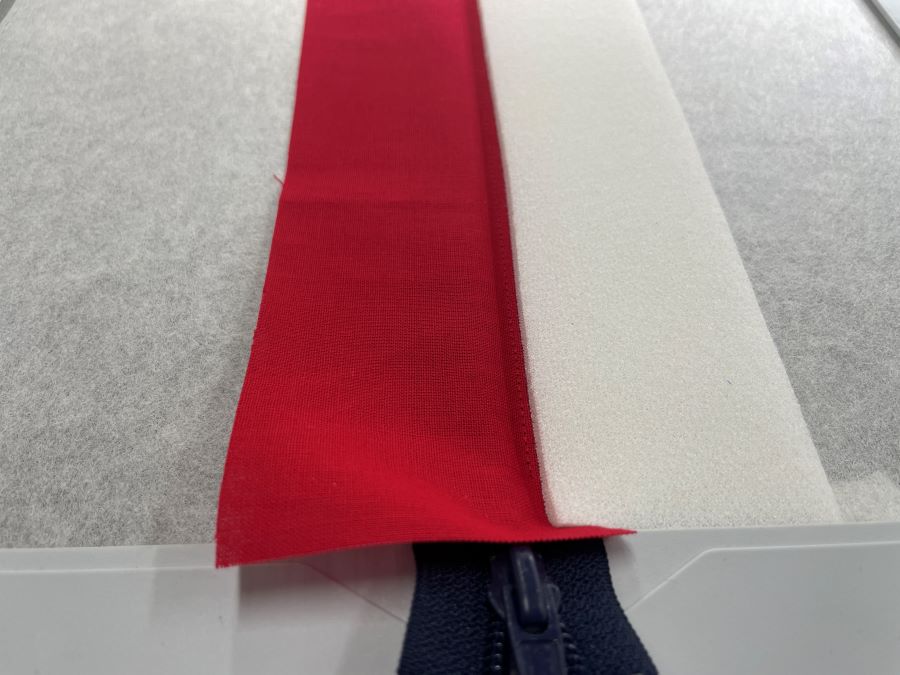
- Place the zipper between the lines and tape in place. Move the zipper tab outside the outline to prevent it getting caught when sewing. You will be told later in the instructions when it should be moved inside the outline.
- Stitch out color 2, this will secure the zipper in place, you can now remove the masking tape.
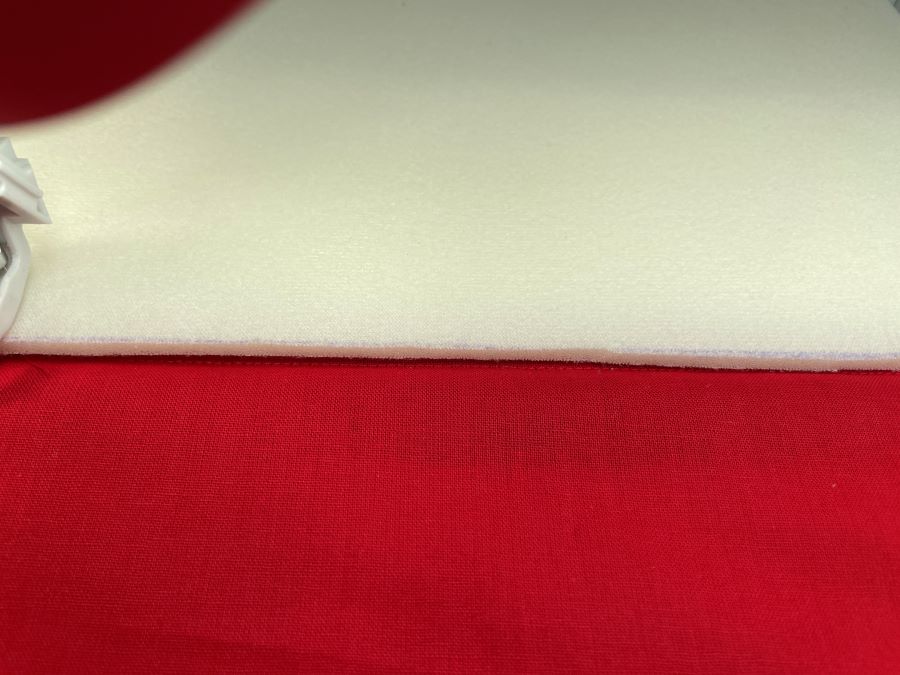
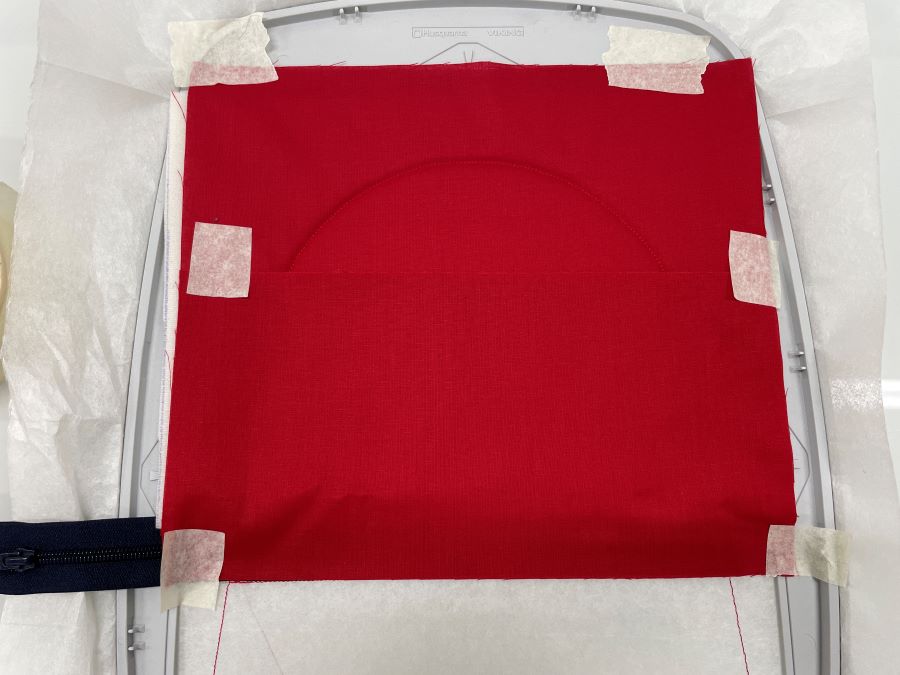
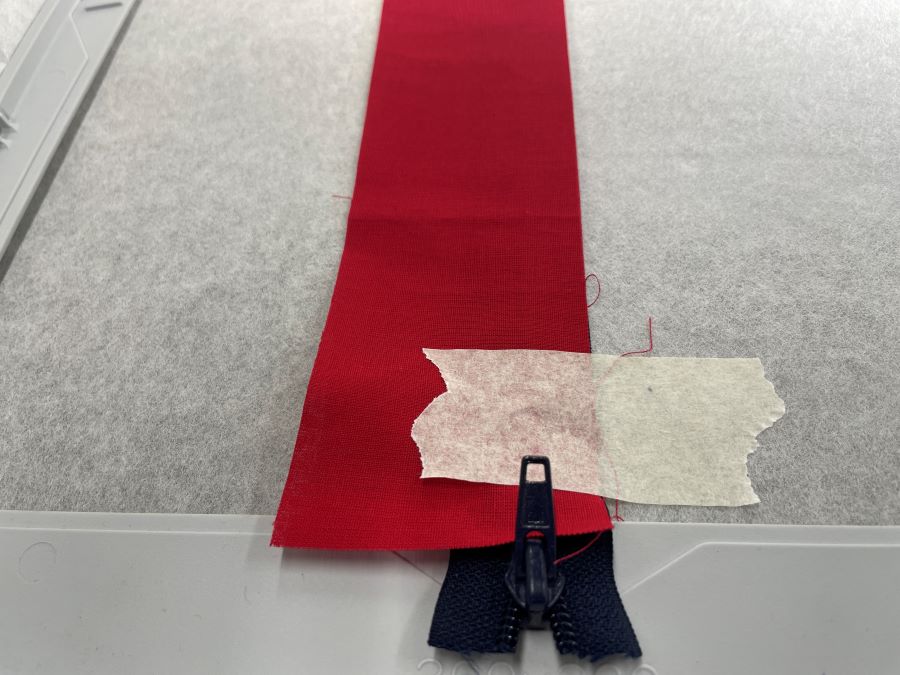
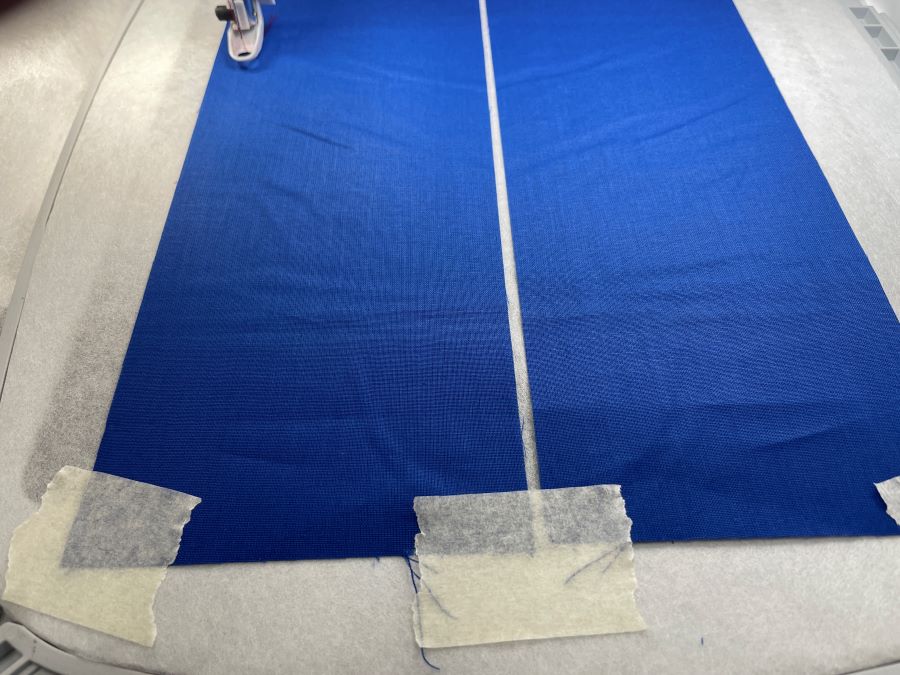
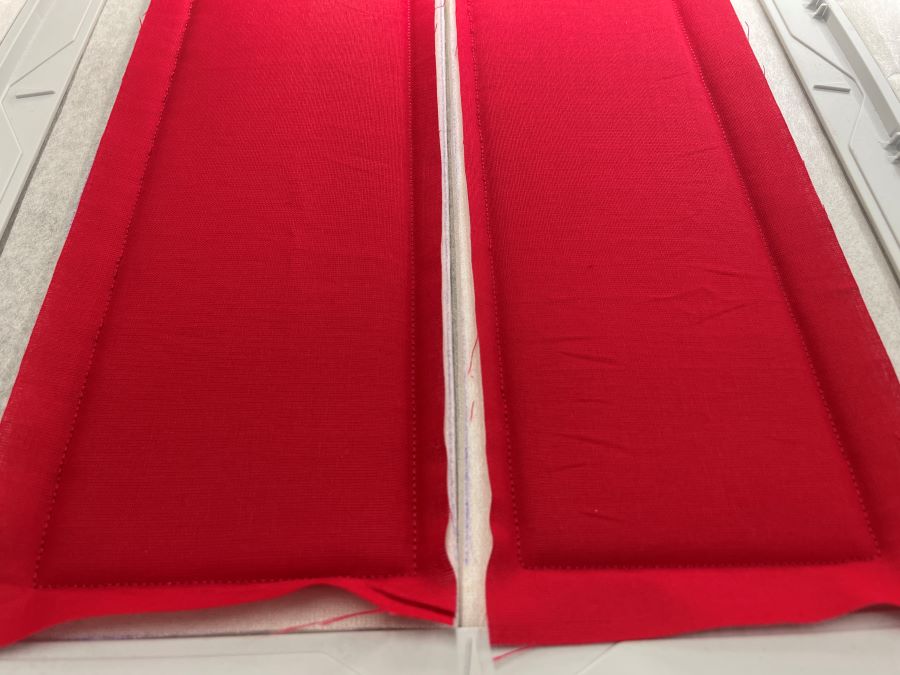
- Place the fabric for the upper piece in the hoop. Align the short raw edge with the upper edge of the zipper tape. Stitch color 3, this will sew the upper piece in place.
- Place the foam batting in the hoop, align it with the stitch line you just did. Fold the fabric piece up over the batting. Tape in place.
- Stitch out color 4 this will stitch the batting and fabric in place.
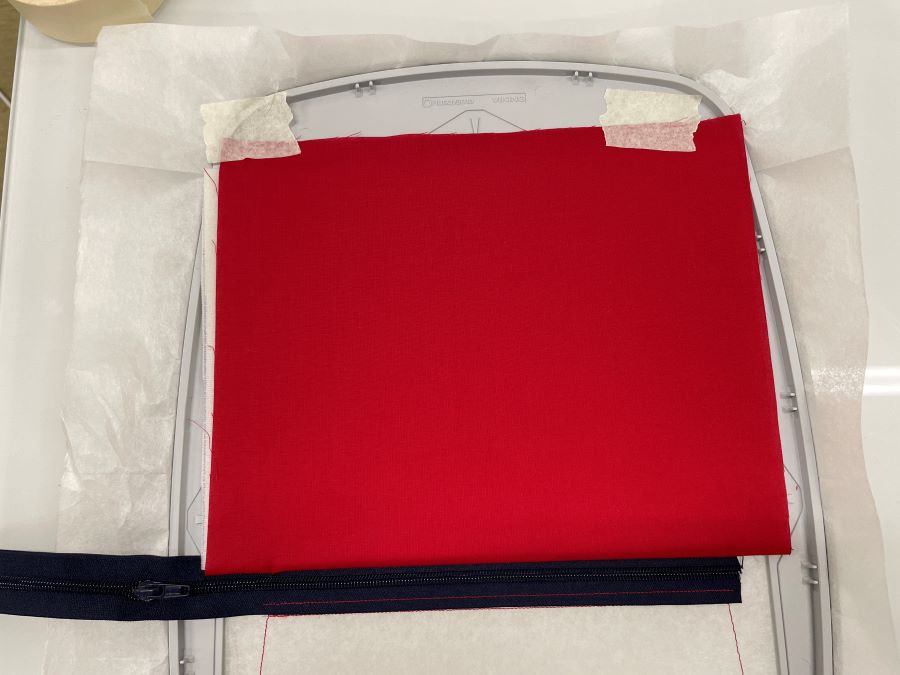
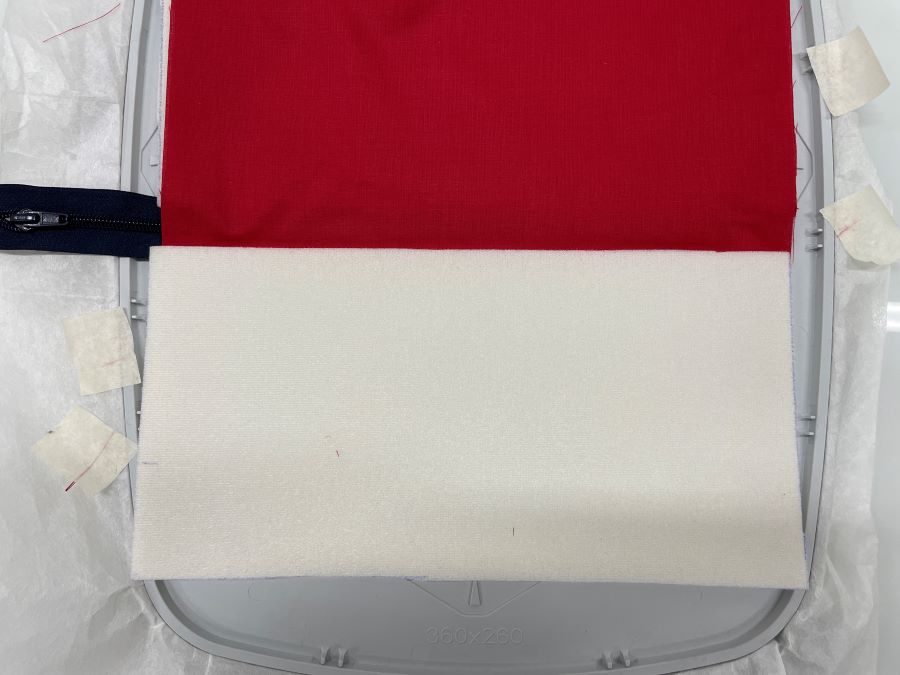
- Remove the hoop from the machine. Place the fabric for the lower piece in the hoop. Align the long raw edge with the lower edge of the zipper tape. Tape in place.
- Turn the hoop upside down and tape the pocket bag fabric in place, just like you did with the lower front piece. Tape in place.
- Return the hoop into the machine and stitch out color 5, this will sew the fabric pieces in place.
- Remove the Hoop from the machine, turn it around and remove the masking tape. Fold the pocket lining pie down and secure it with masking tape.
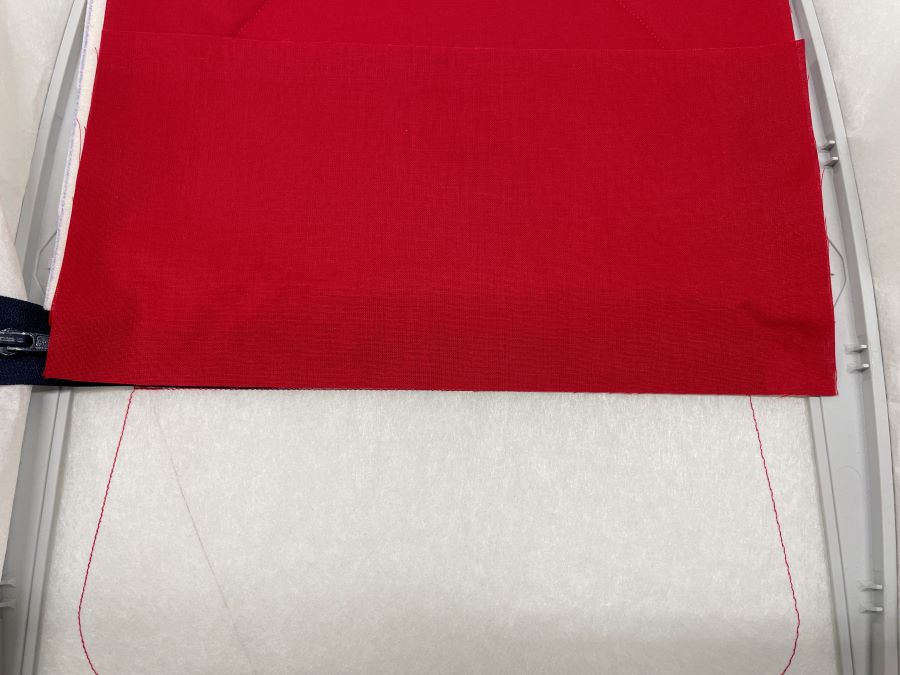
- Turn the hoop right side up again. Place the batting close to the stitching line and fold the fabric piece over, like you did with the upper part earlier. Tape in place.
- Stitch out color 6, this will secure the fabric and batting in the hoop.
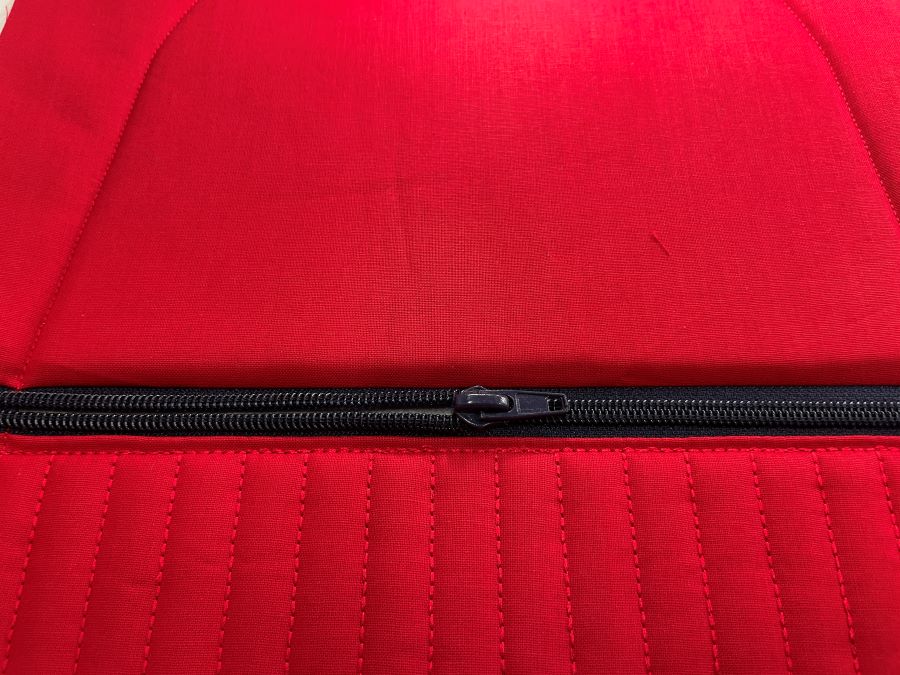
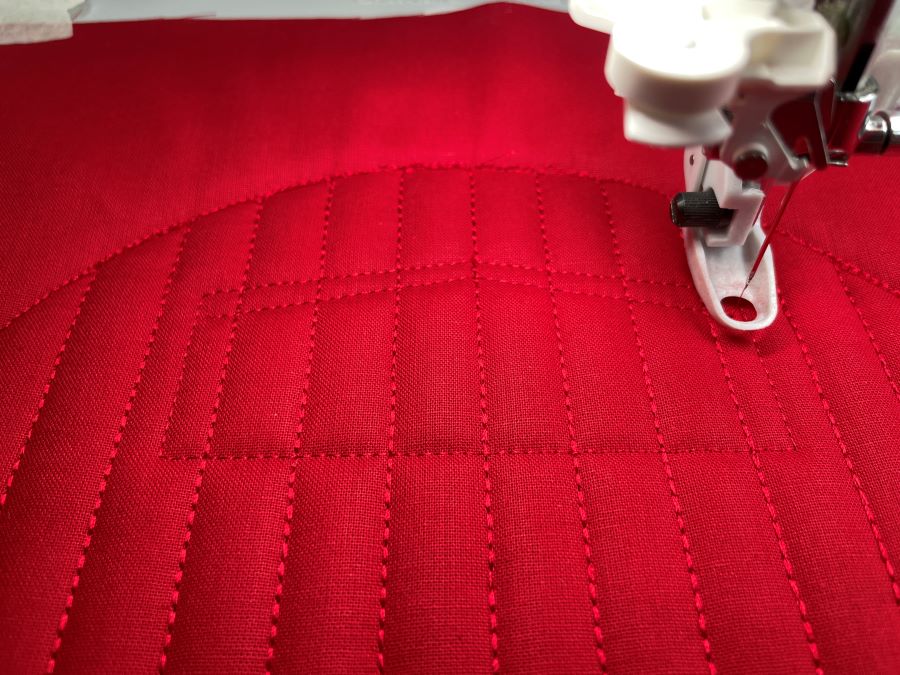
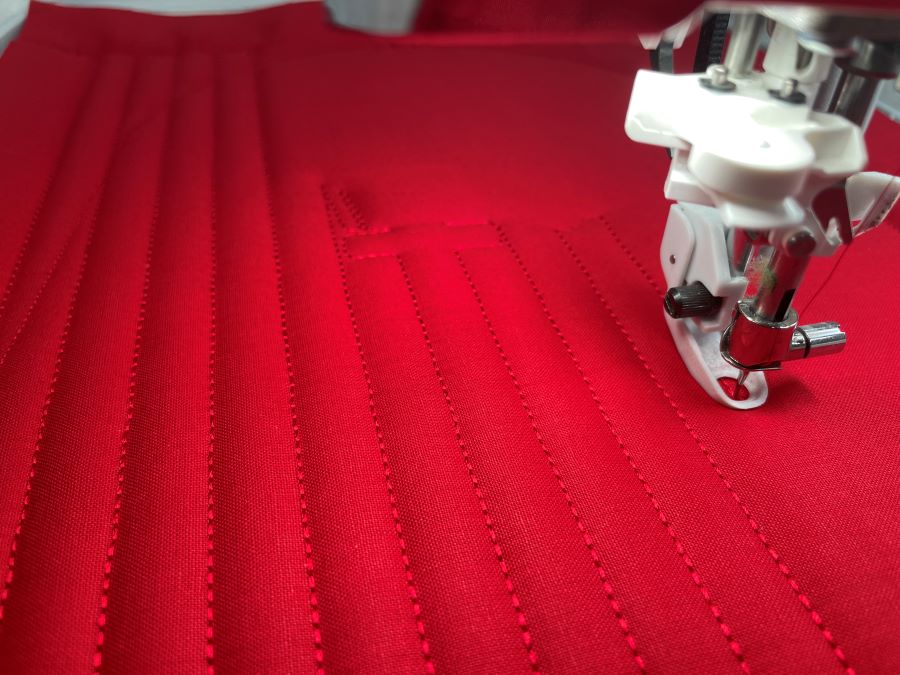
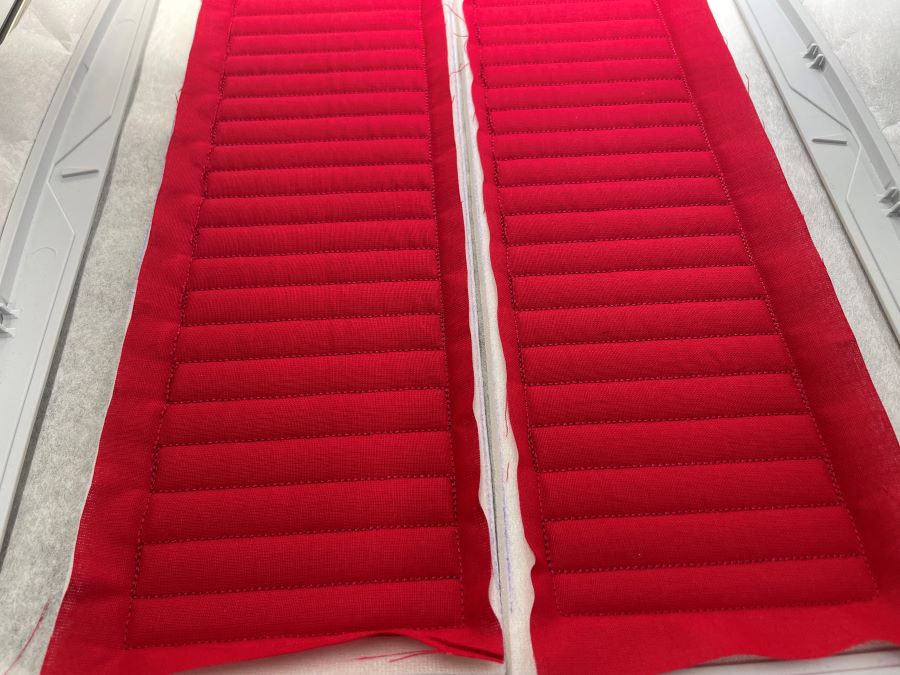
- Stitch out color 7, this will quilt the lower part of the backpack together with triple stitch.
- Stitch out color 8, this will make a topstitch close to the edge of the zipper, covering the top of the quilting stitches at the same time.
- Remove the hoop from the machine. Turn it upside down and place the lining piece on top, right side of fabric facing up. Make sure the lining piece covers the outline on all sides. Tape in place. Move the zipper pull to the middle of the zipper now.
- Stitch out color 9, this will secure the lining piece in the hoop and close the zipper edges at the same time.
- Stitch out color 10, this will make the quilting on the upper part of the backpack. Remember to move the zipper pull during the quilting to avoid it getting caught in the stitching. The bobbin thread will be visible on the inside of the finished backpack, consider changing it to a color that matches the lining.
- Stitch out color 11, this will topstitch close to the upper part of the zipper, covering the top of the quilting stitches at the same time.
- Stitch out color 12, this makes a placement stitch for the strap holder piece.
- Your back piece is now finished. Unhoop and cut just close the outline stitches.

Stitching out the backpack front.
- Hoop stabilizer in the 360x260mm hoop.
- Load the embroidery file for the backpack front.
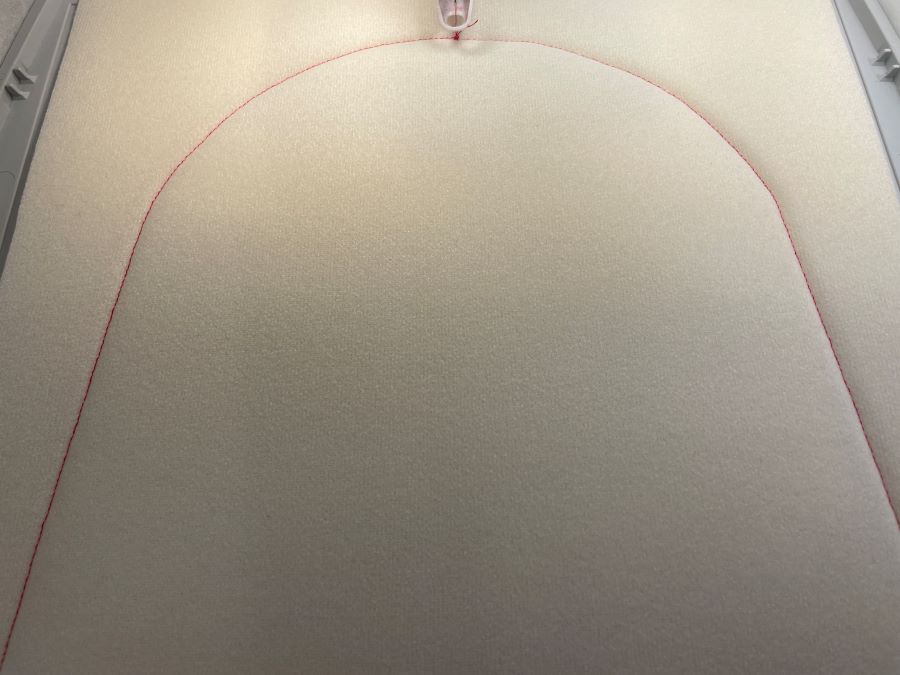
- Stitch out color 1, this is the outline of the backpack.
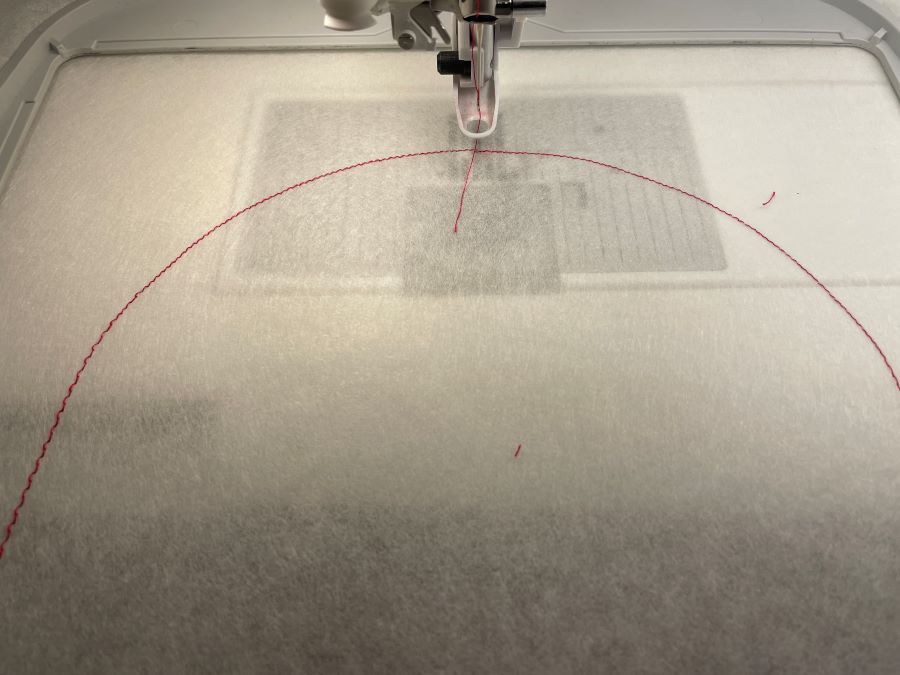
- Place the foam batting on top of the stitch line, make sure it extends outside the stitch line on all sides. Use masking tape to hold in place if needed.
- Stitch out color 2, this will secure the batting.
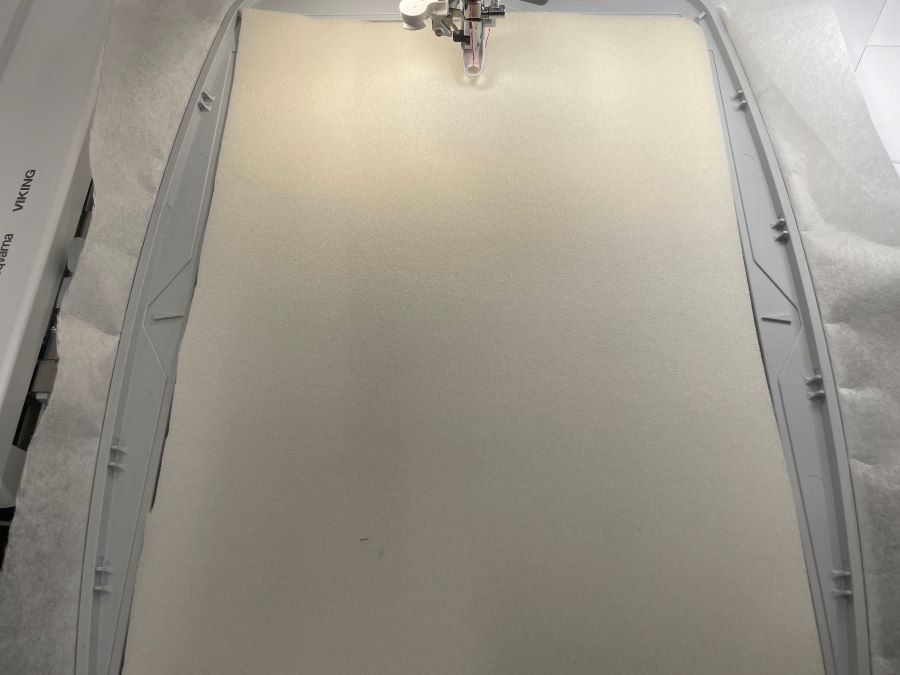
- Place the fabric for the front of the backpack on top of the batting. Tape to hold in place if necessary.
- Stitch out color 3 this will secure the fabric in the hoop.
- Stitch out color 4, this will make the quilting with a triple stitch. The area under the embroidery will not be quilted.
- Stitch out the embroidery with the colors suggested. (In this case, Colors 5 to 39).
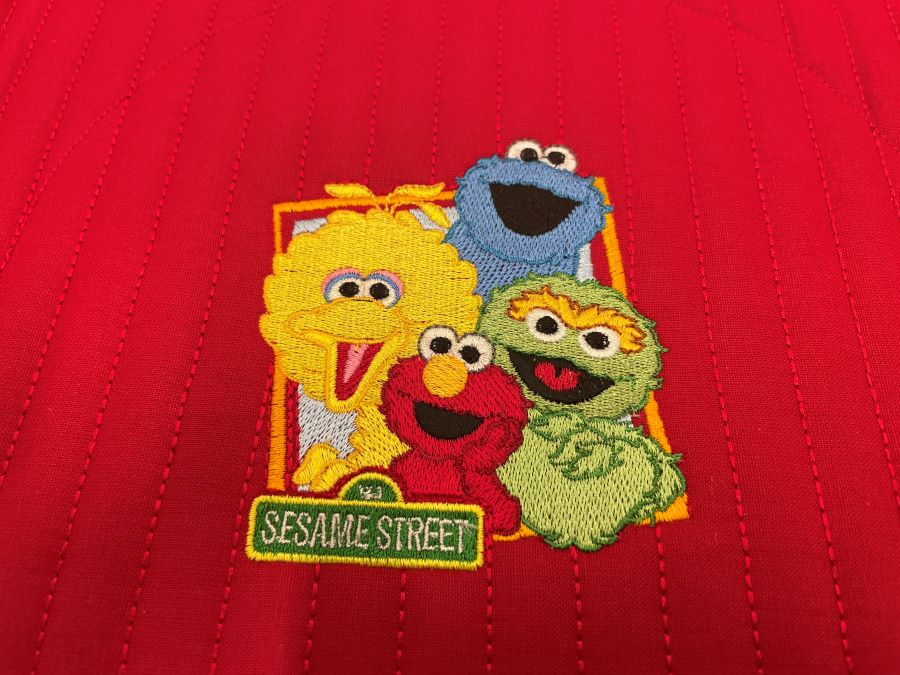
Note: If you have the Gold or Platinum level of mySewnet embroidery software you can change the embroidery on the front of the backpack, Find instructions Here: - Remove the hoop from the machine, turn it upside down. Place the lining fabric on top of the stabilizer, make sure it covers the outline on all sides. Use masking tape to hold it in place. Return the hoop to the machine and stitch out color 40. This will secure the lining to the back and cover the backside of the embroidery.

- The front piece is now ready, set aside for now.
Making the zipper panel
- Hoop stabilizer in the 360x260 hoop (360x200 also works)
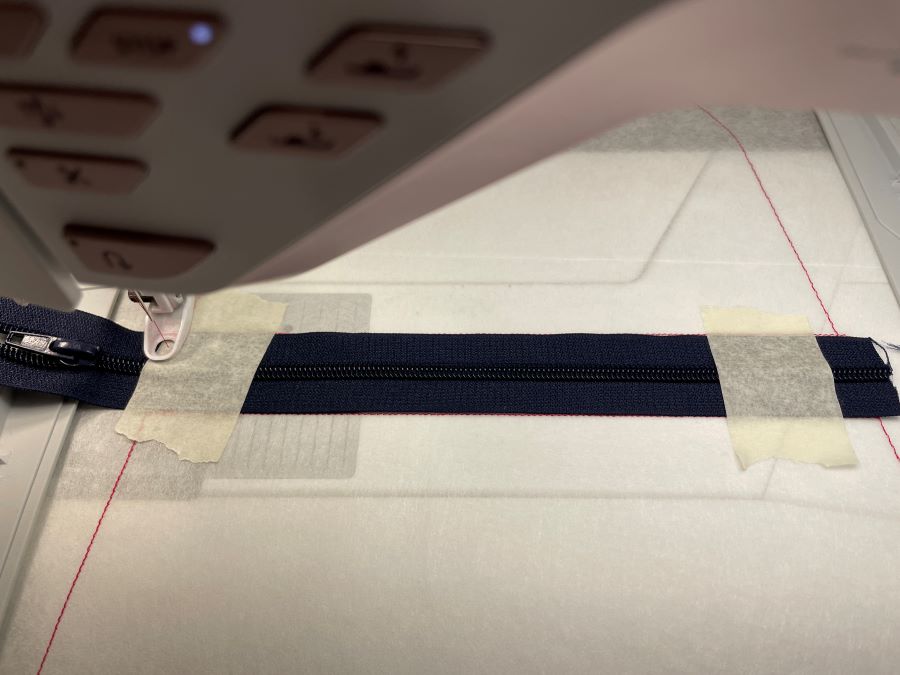
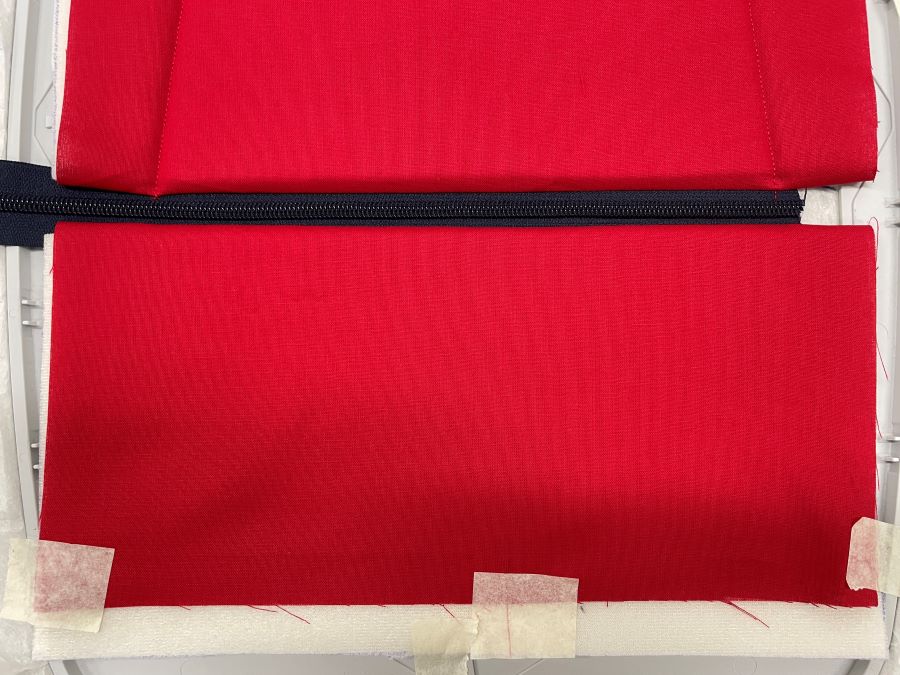
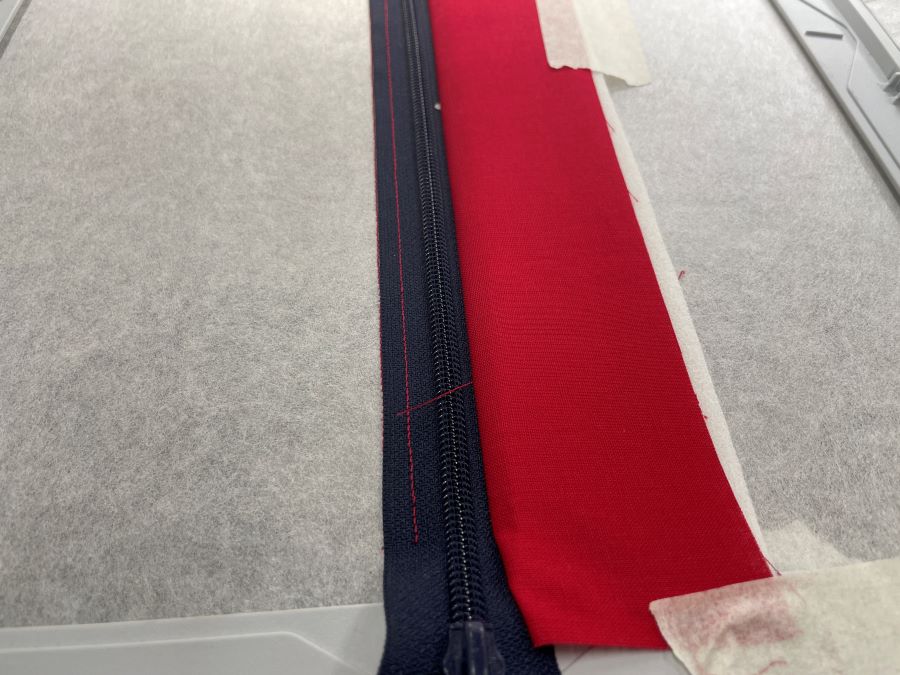
- Load the zipper panel embroidery to your machine and stitch out color 1, this will make a placement line for the zipper.
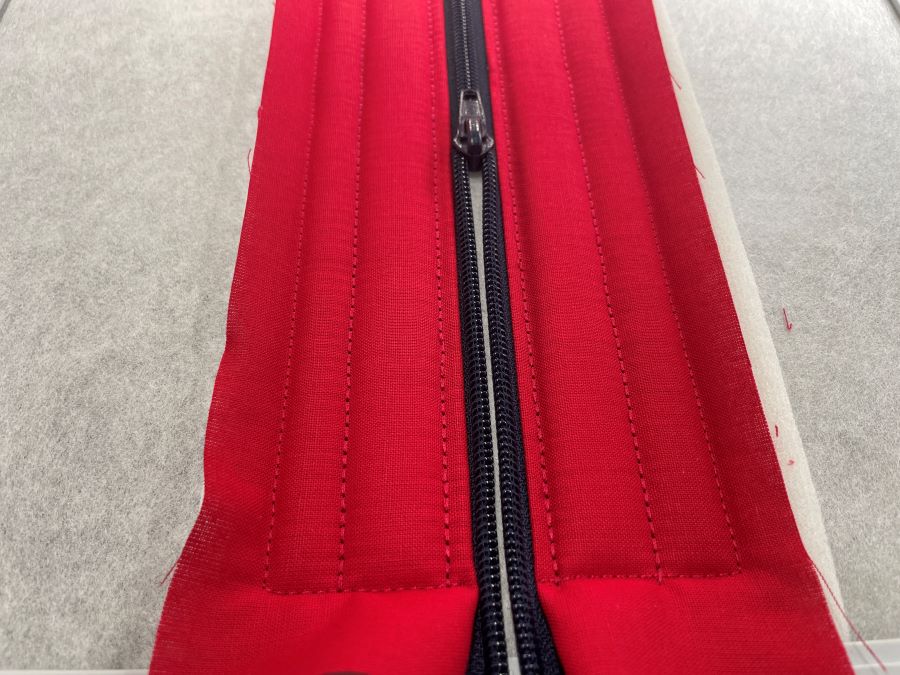
- Tape the zipper in place, make sure the zipper tab is outside the stitching area, see image.
- Stitch out color 2, this will secure the zipper in place. Carefully remove the masking tape.
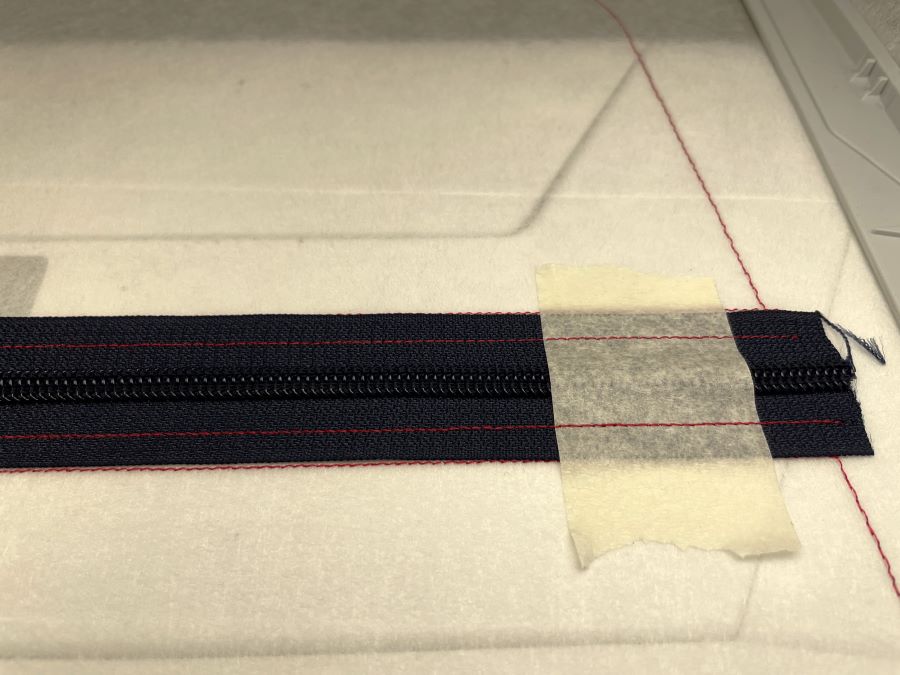
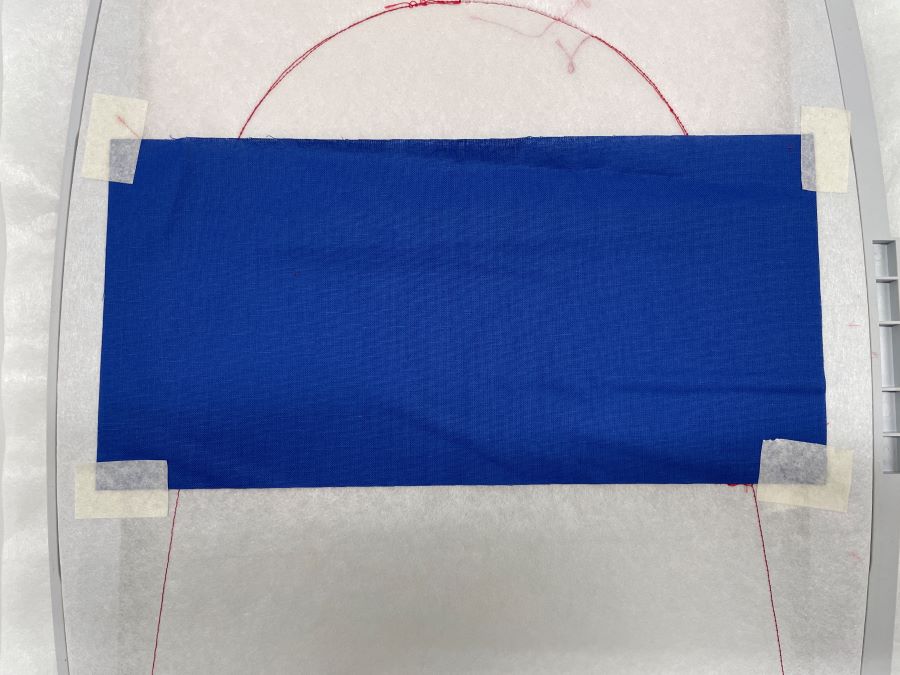
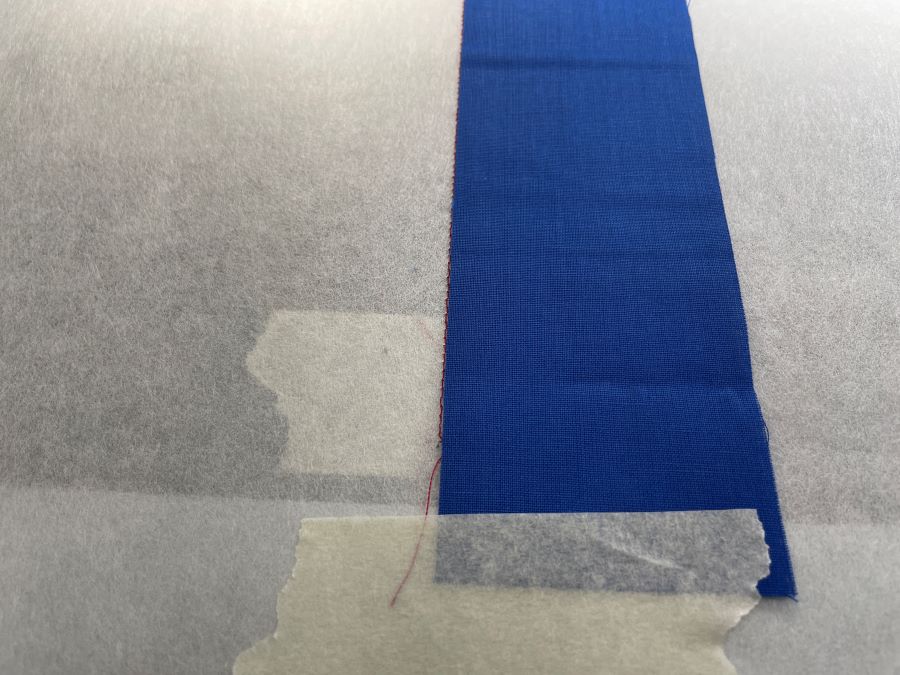
- . Remove the hoop from the machine and place the outer fabric piece for the right side on the right side of the zipper tape, see image for clarity. Tape in place
- Turn the hoop upside down and place the lining piece in the same way. Tape in place. The lining piece will be stitched at the same time as the outer fabric.
- Stitch out color 3, this will sew the layers together.

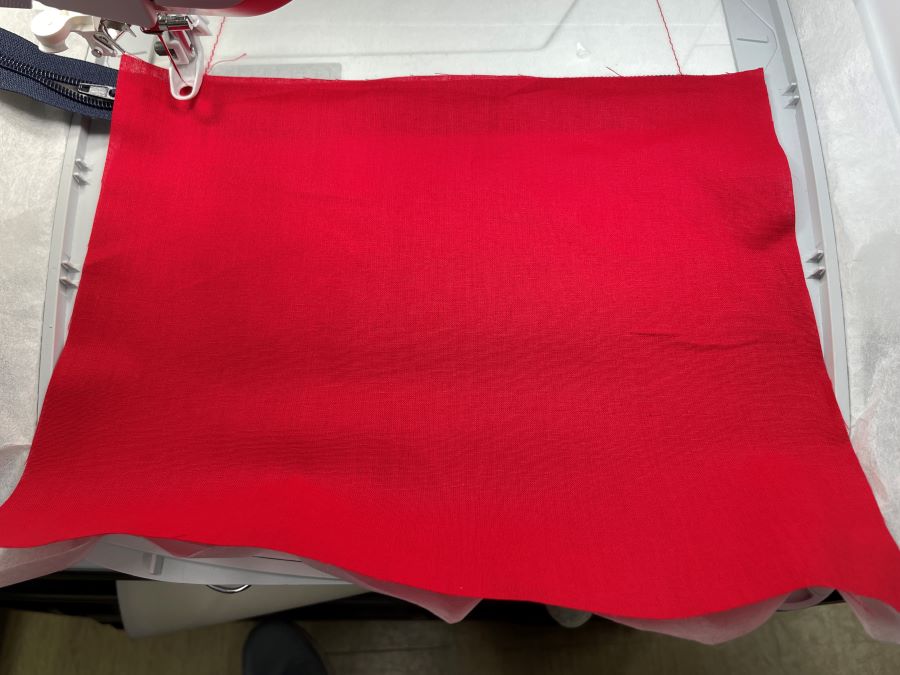
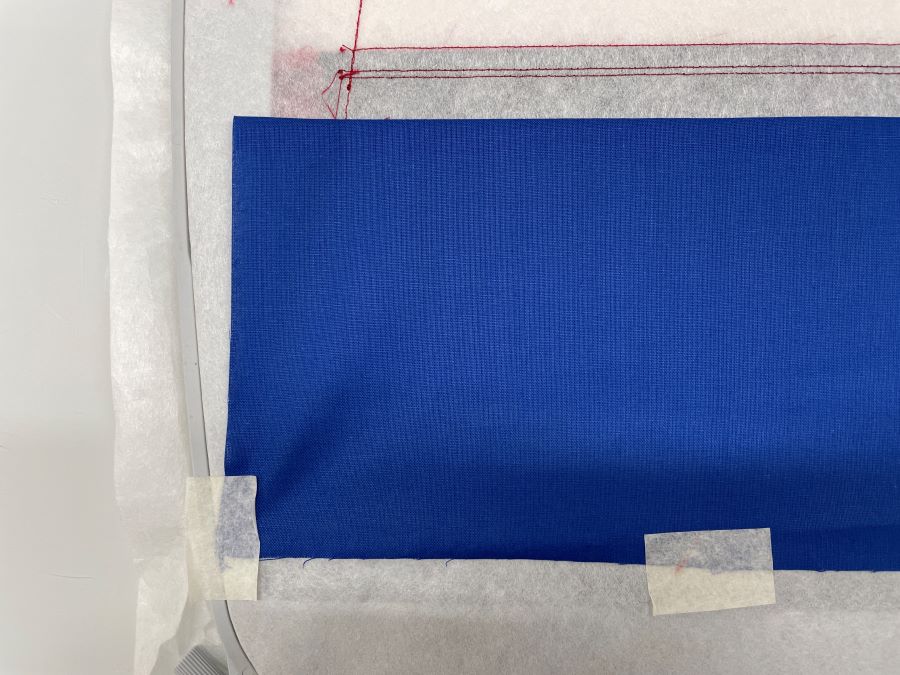
- Take the hoop out of the machine again. Turn upside down and fold out the lining piece. Secure with tape.
- Move it with the right side up again and place the foam batting close to the stitch line. Fold the fabric over it and secure with tape.
- Stitch out color 4, this secures all the layers in the hoop. Remove the tape.
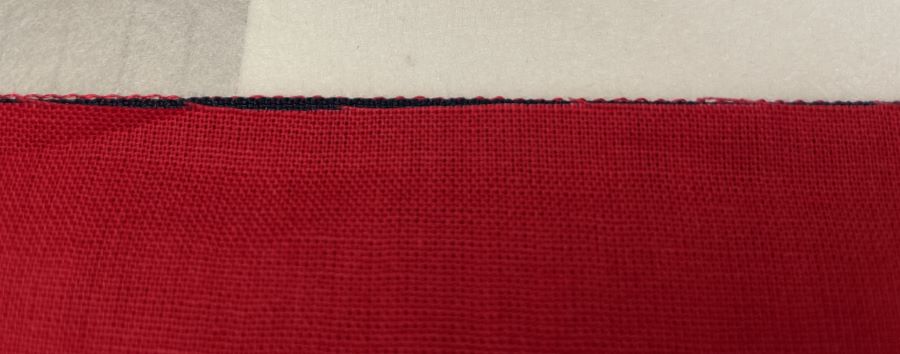
- Repeat once more on the other side of the zipper panel, colors 5 and 6.
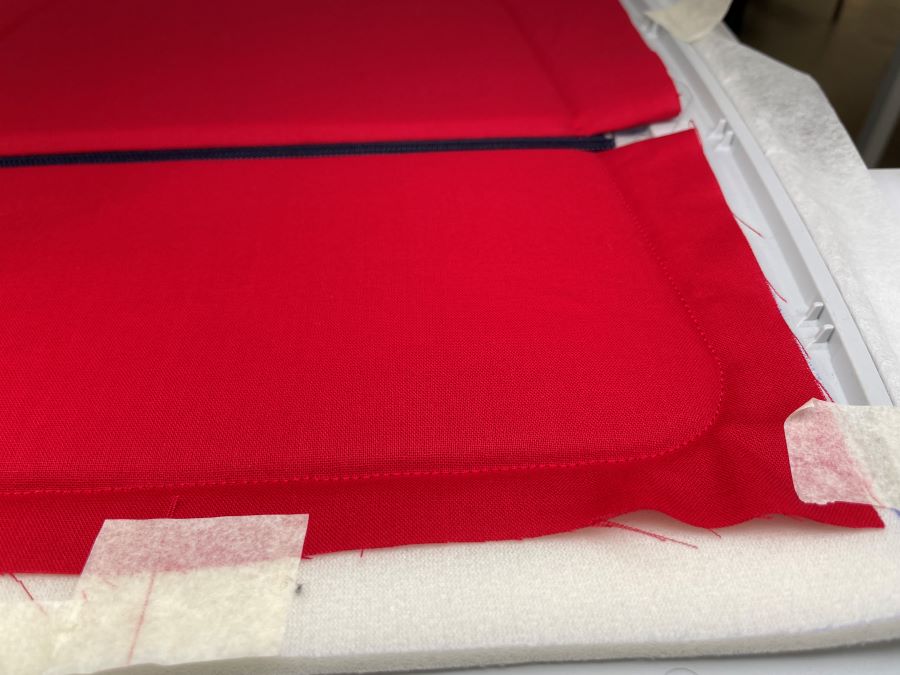
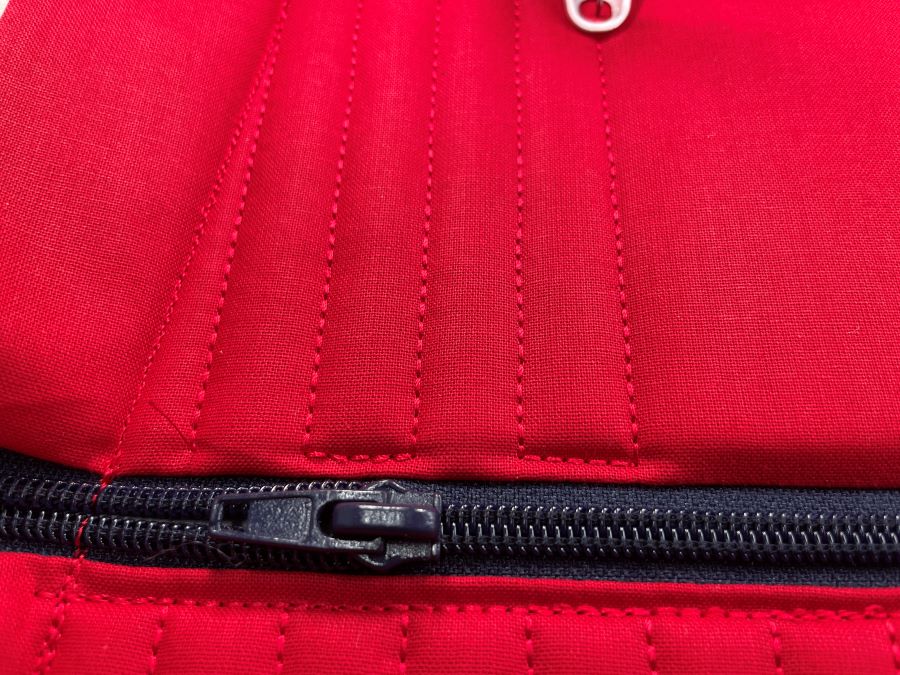
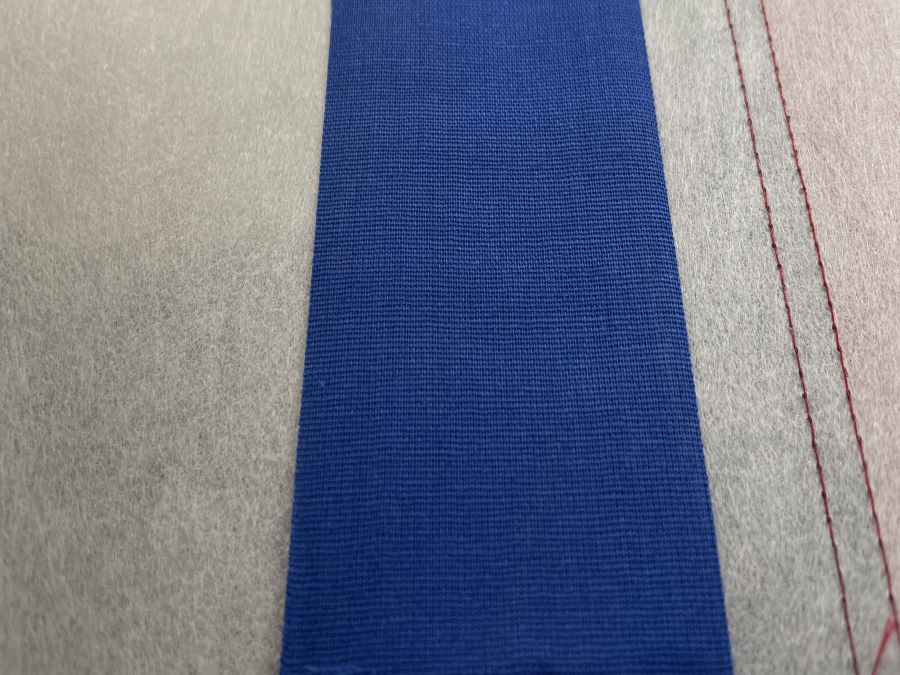
Now it should look like this: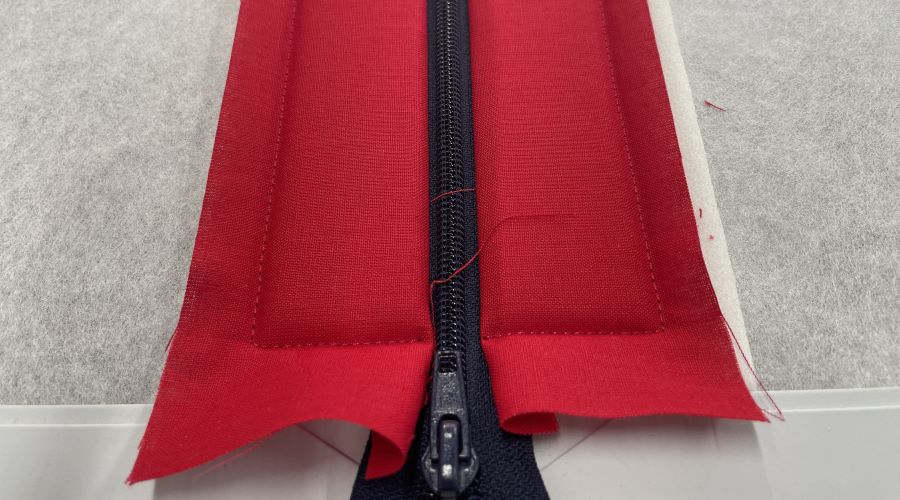
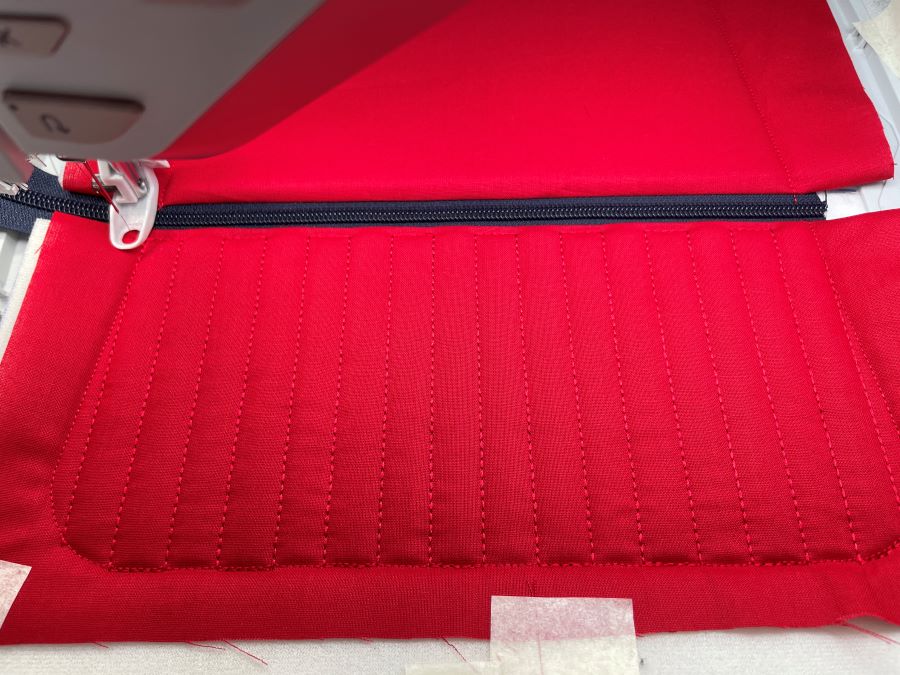
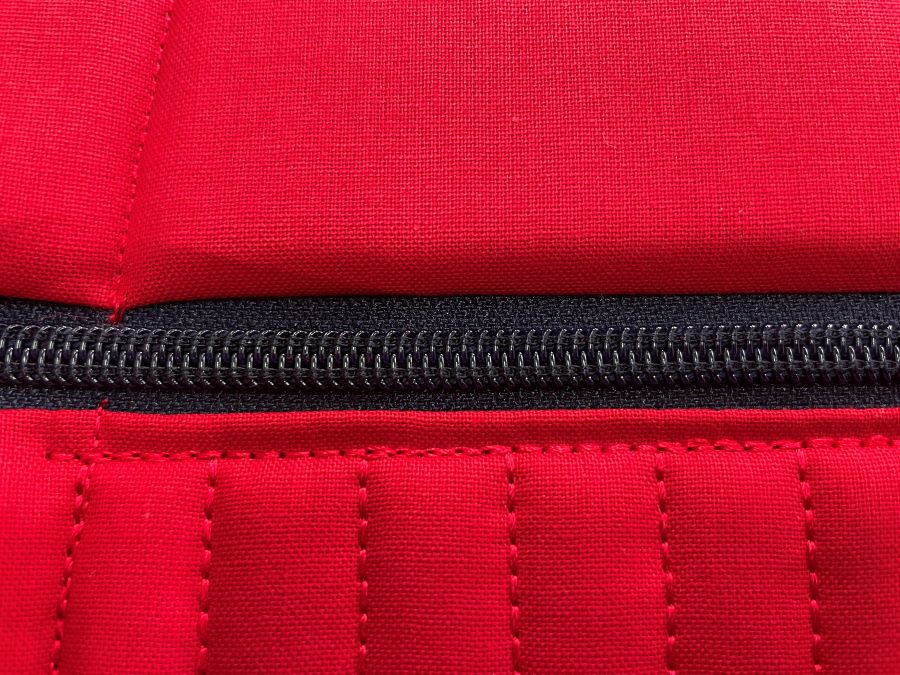
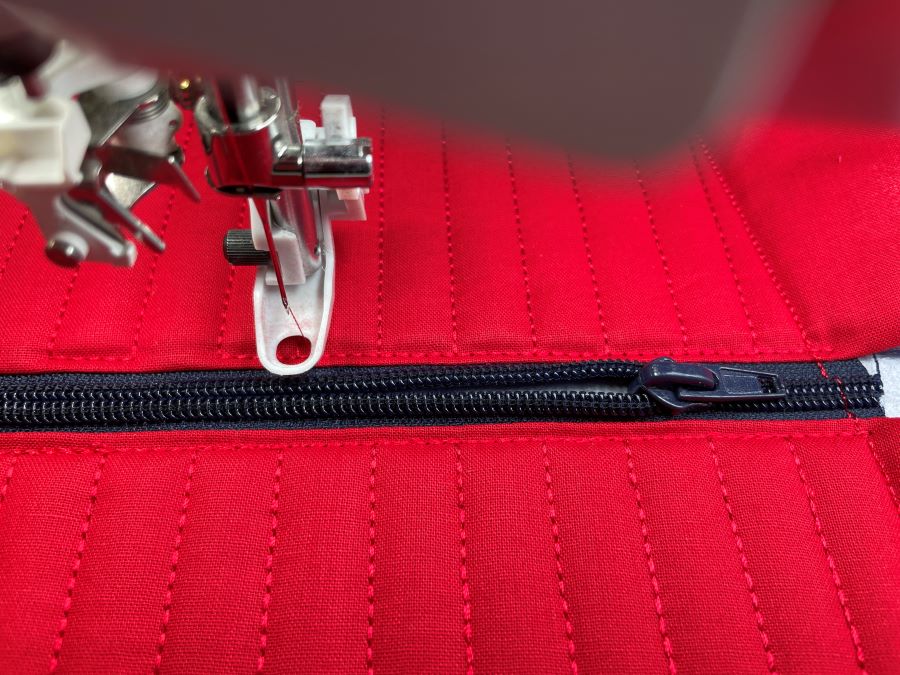
- Stitch out color 7, the topstitching and quilting of the panel.
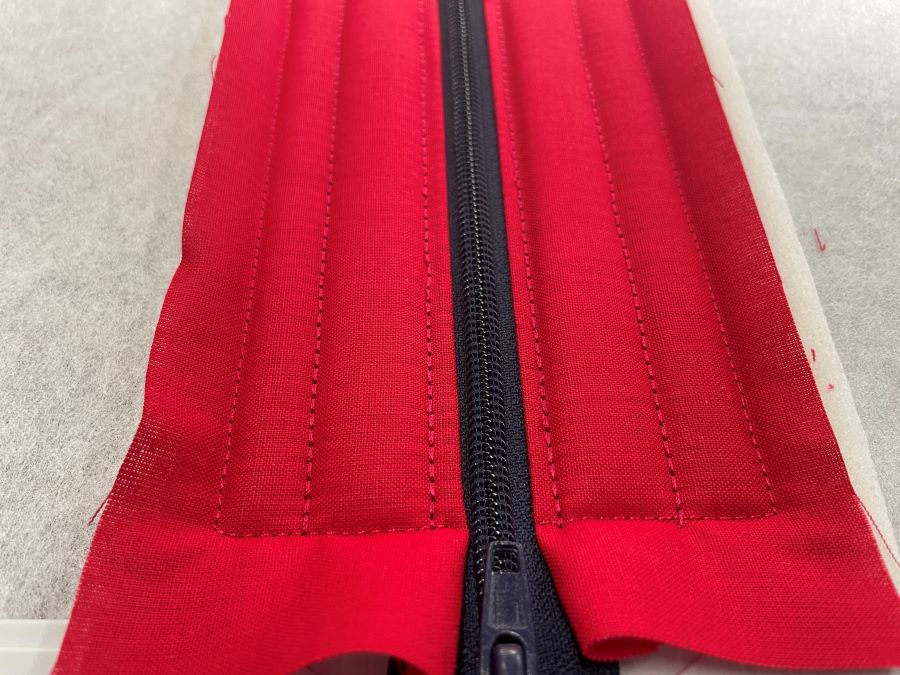
- The panel is now finished move the zipper tab to the middle of the panel.
- Unhoop and cut it out close to the outer edge, just outside the stitching. Leave the stabilizer in the zipper opening for now, it will be much easier to join the side panels later this way. Set aside for now.
Making the side panels:
- The two side panels will be made at the same time in the hoop. Hoop stabilizer in the 360x260mm hoop.
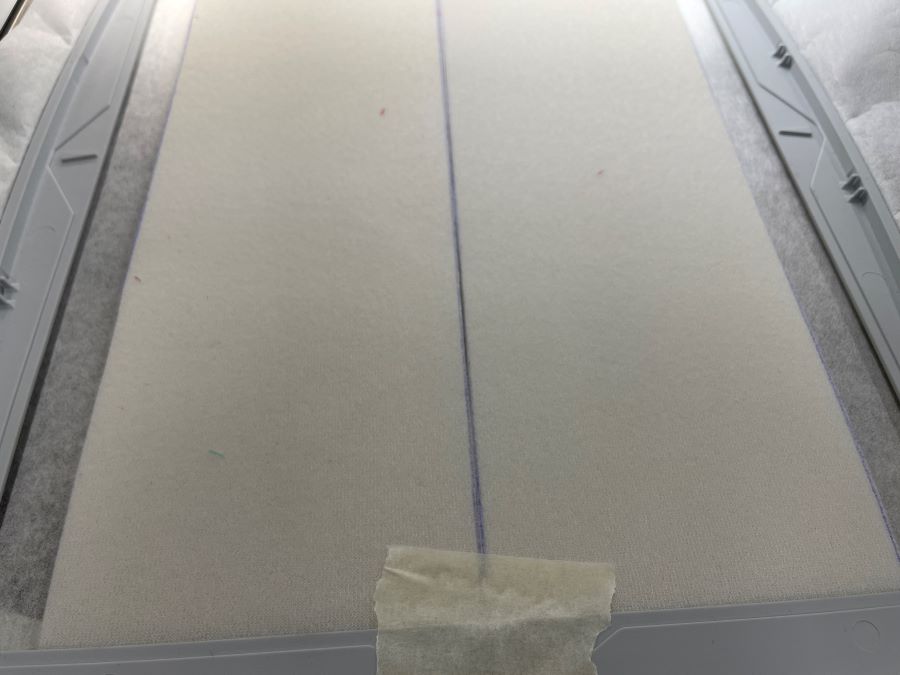
- Stitch out color 1, this will make the placement stitch for both panels.
- Remove the hoop from the machine, turn it upside down and place the lining pieces on top of the stitched outlines. Make sure it covers the outline on all sides. Tape in place.
- Turn the hoop right side up. Place the batting on top of the outlines, making sure it covers the line on all sides. Stitch out color 2, it will secure the batting and lining in the hoop.
- Place the outer fabric on top of the batting, make sure it covers the stitch line on all sides. Tape in place.
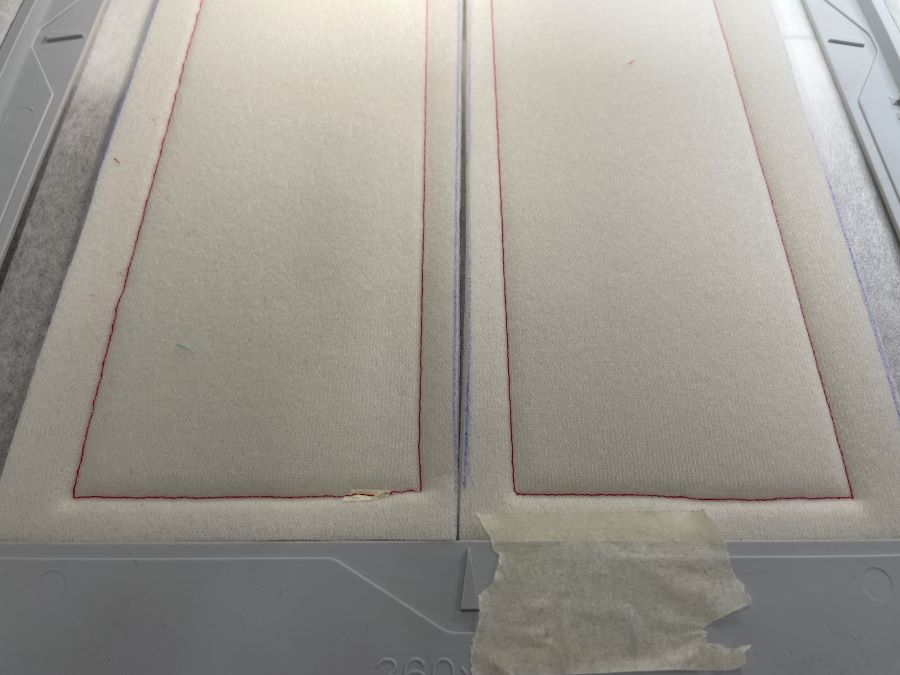
- Stitch out color 3, this will secure the fabric in the hoop.
- Stitch out color 4, the quilting.
- Your side panels are now finished.
- Remove the fabric from the hoop and cut out close to the outer stitch line.
- Set aside for now.
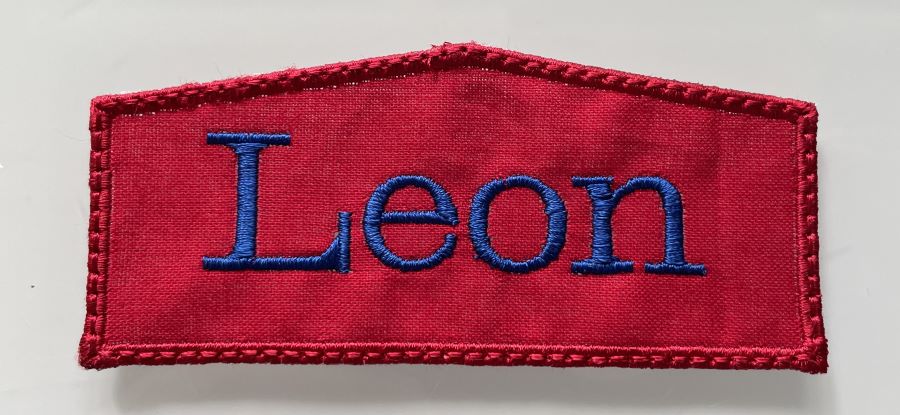
Making the strap holder
- Open the embroidery file for the strap holder in mySewnet embroidery program.
- Add lettering and/or embroidery of your choice.
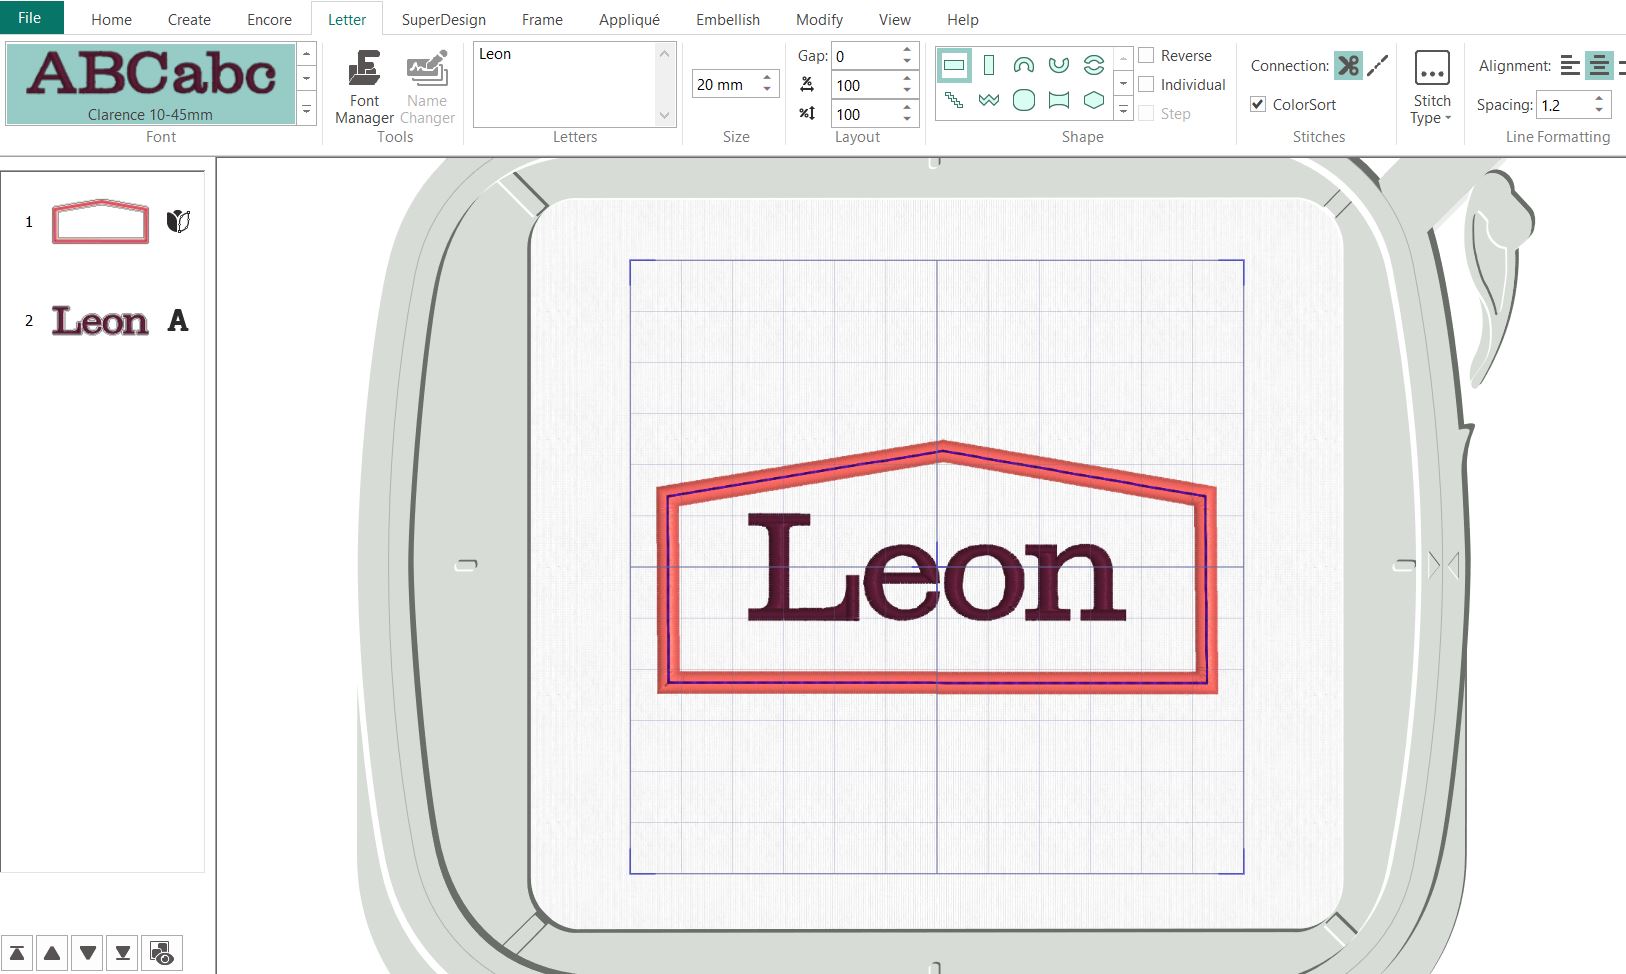
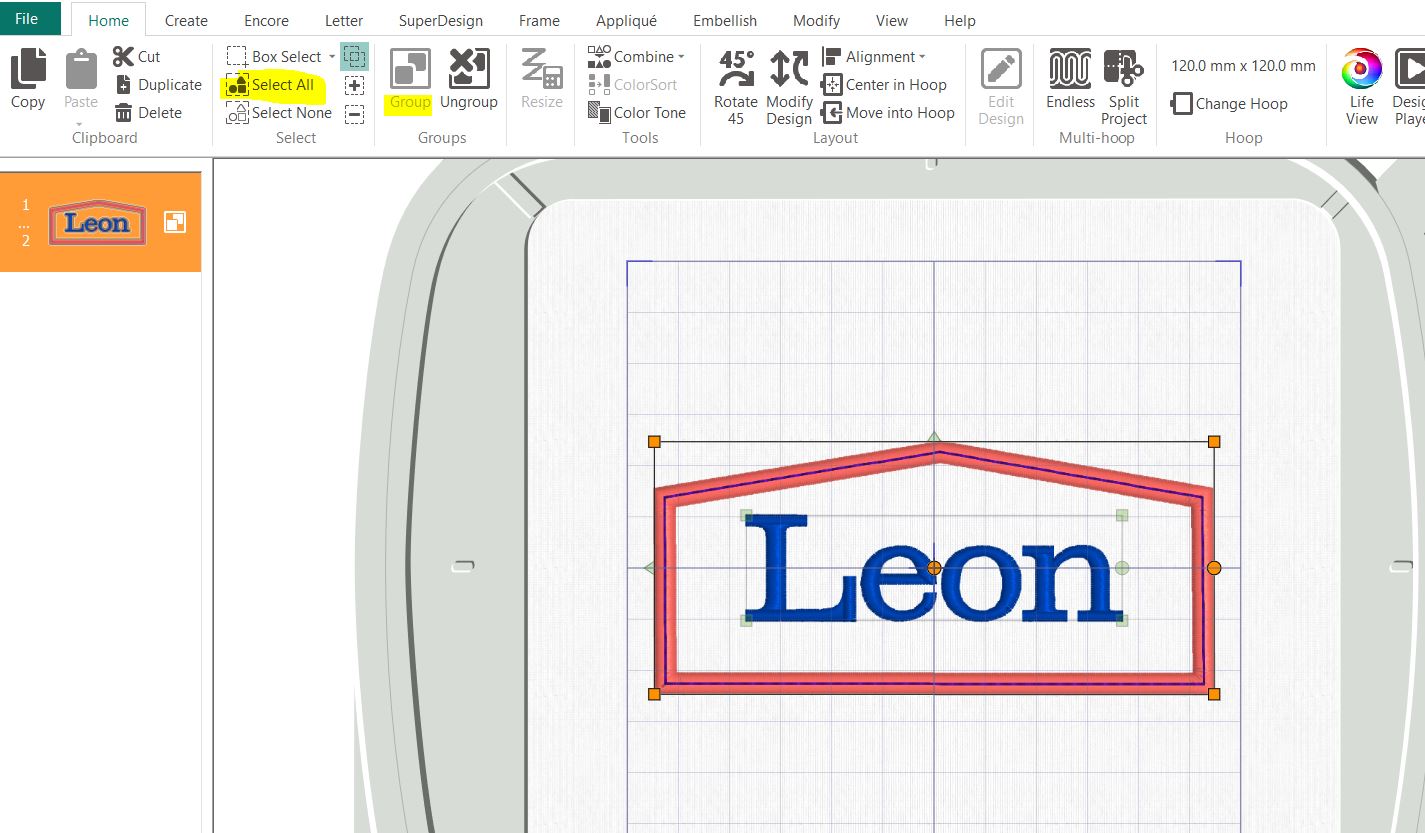
- Go to Home tab and select all, then Group. The advantage of making a group instead of combining is that it is easy to make changes later, like changing the name.
- Export the embroidery in your preferred format and load the embroidery file to your machine.
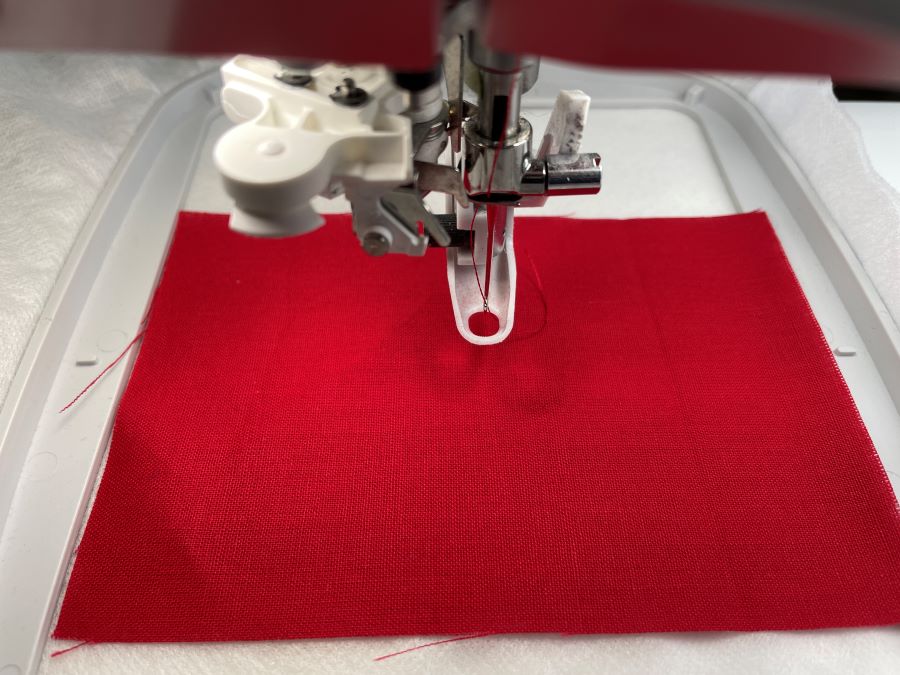
- Hoop Water soluble stabilizer in the 120x120mm hoop.
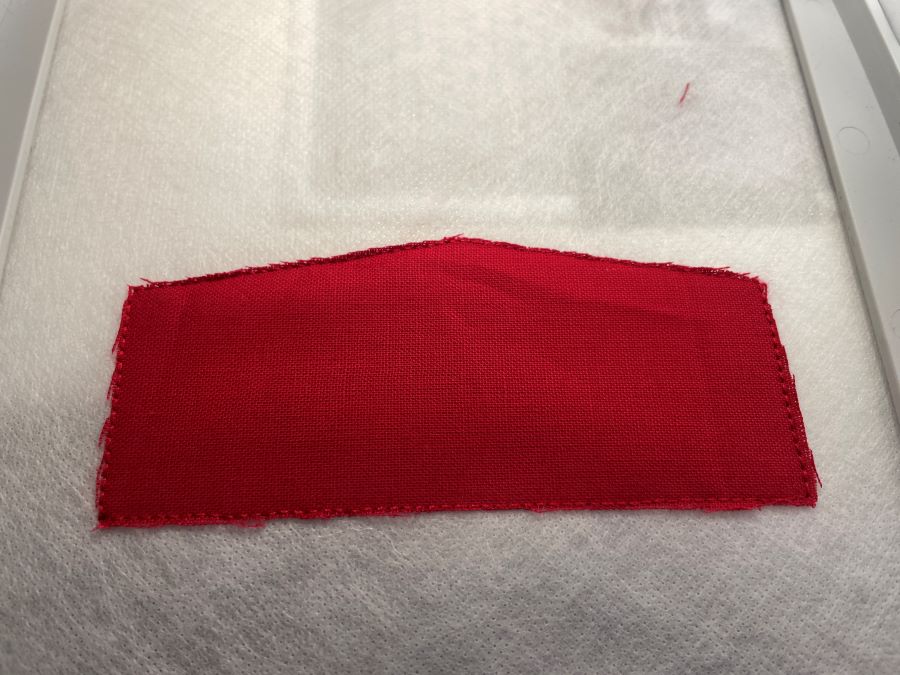
- Stitch out color 1 this will make an outline.

- Place fabric on top of the outline, right side up. Make sure it covers the outline on all sides. Tape down if needed.
- Stitch out color 2, this will secure the fabric in the hoop, Remove the hoop from the machine and cut away excess fabric outside the stitch line.
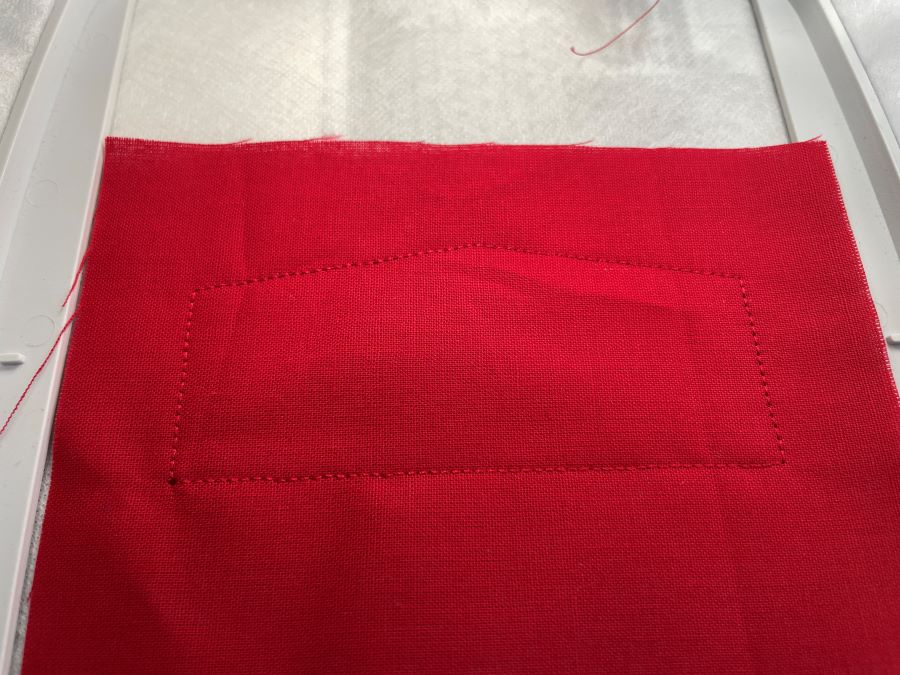
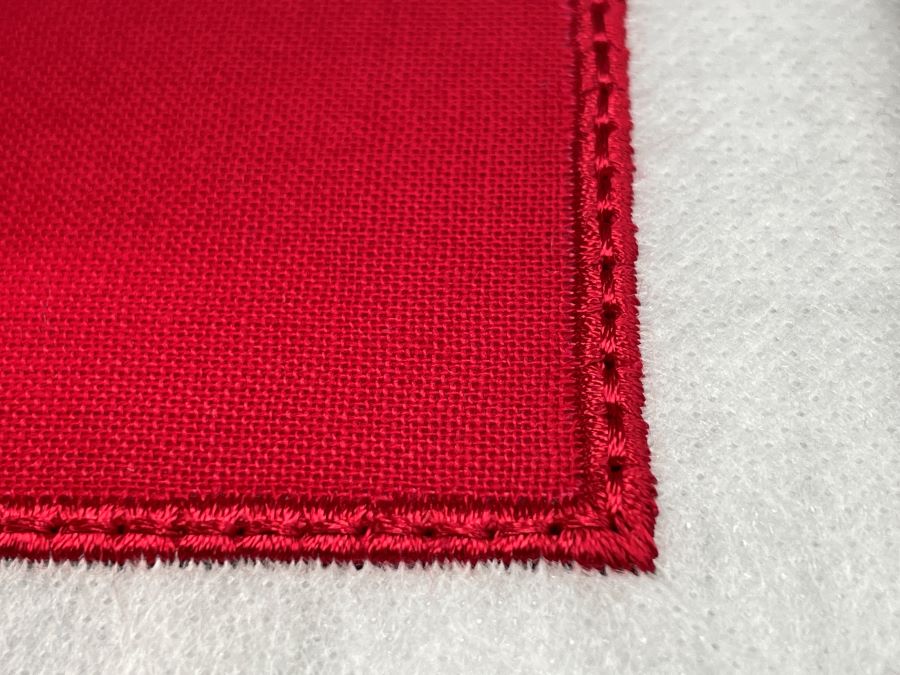
- Stitch out color 3, this will make the satin edge, covering the fabric edges.
- Next color (4) makes a triple stitch line on top of the satin stitch. This is just for decoration and can be omitted.
- The lettering or other embroideries will be stitched out last.
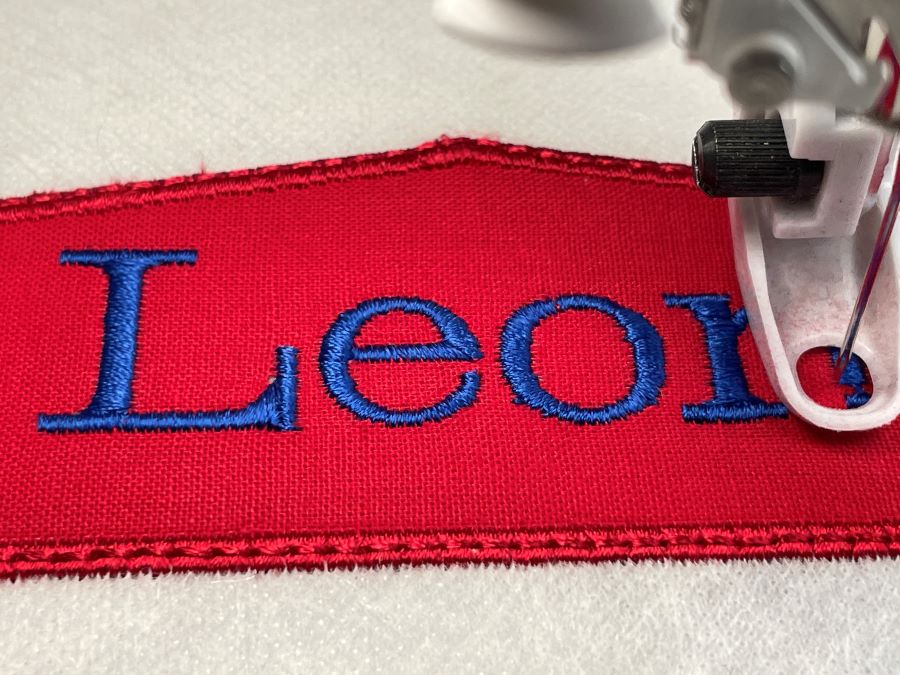
- Your strap holder is now finished. Unhoop and cut away excess batting. Use a wet Q-tip on the edges to remove the remains of the stabilizer.
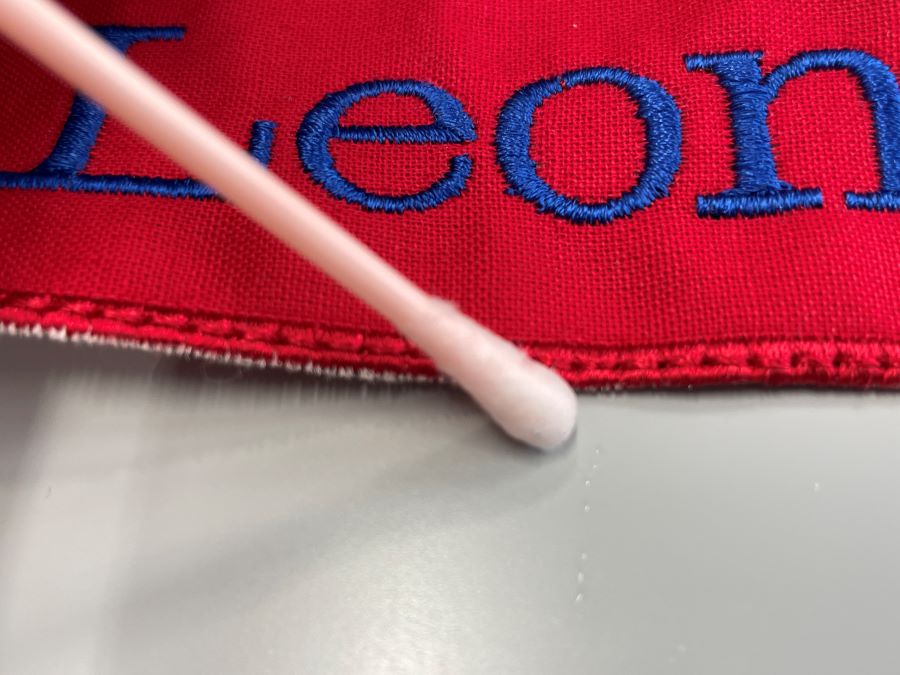
- Your Strap holder is now finished, set aside for now.
- Now you have completed all parts that are done in the embroidery machine.
Next step is putting it all together! The instructions for this can be found HERE