 United Kingdom
Spooky Pumpkin Garland
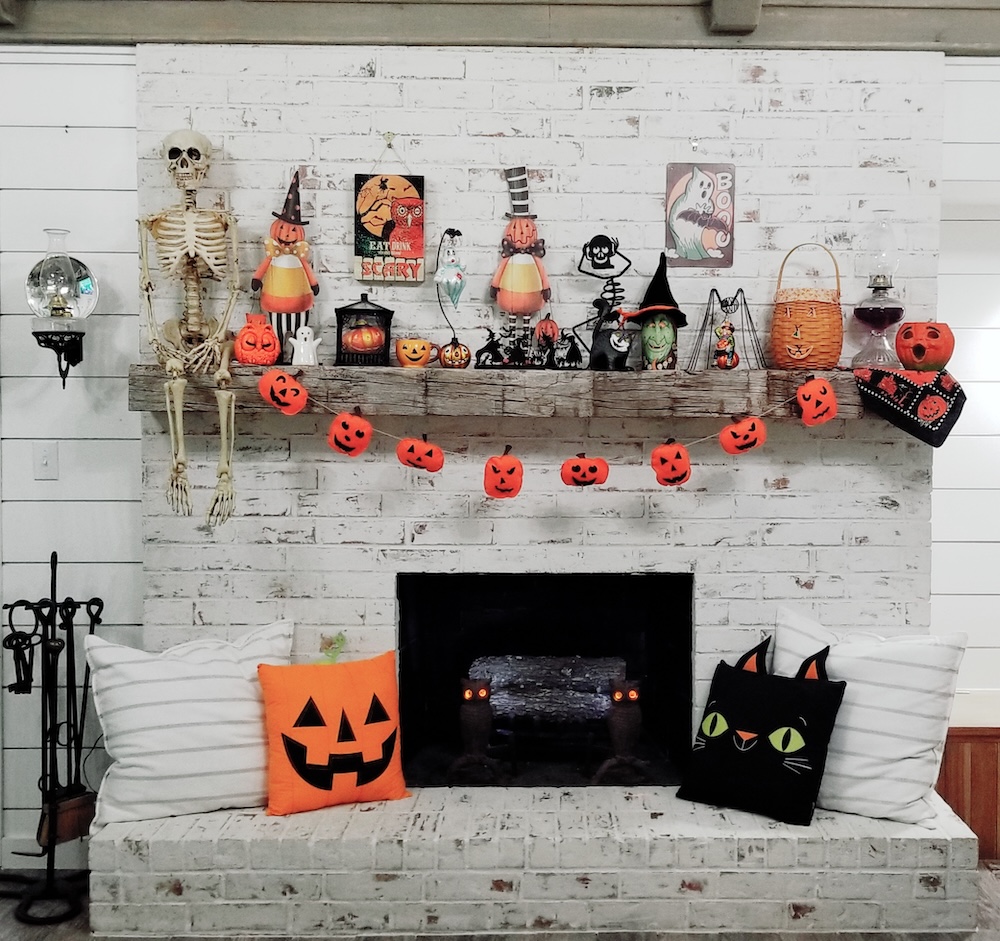
Create this one of a kind Halloween pumpkin garland as an extra to your mantle or entryway! Completely customizable with different size pumpkin shapes & features, this is a great opportunity to get children involved with creating funny & ‘scary’ faces.
What is needed:
- Singer® Quantum Stylist™ 9960
- Singer® Open Toe Foot Presser Foot
- ¼ yd Orange Felt
- x1 Black Felt Sheet
- x1 Brown Felt Sheet
- Poly-Fil Fiberfill
- Coordination Orange & Black Thread
- Provided Pattern Pieces
- Burlap Ribbon/String for Hanging
- Pins & Clips
- Scissors
- Marking Pen
Project Steps
- Print & cut pattern pieces.
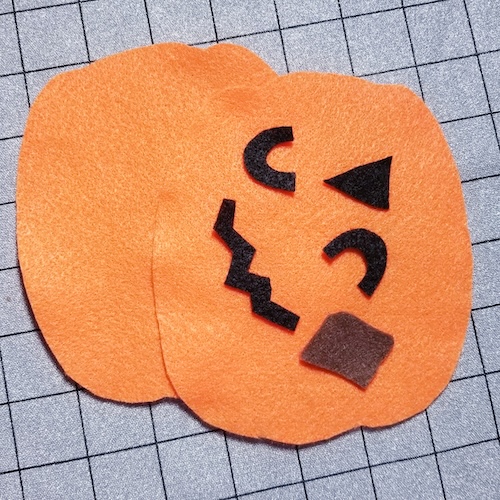
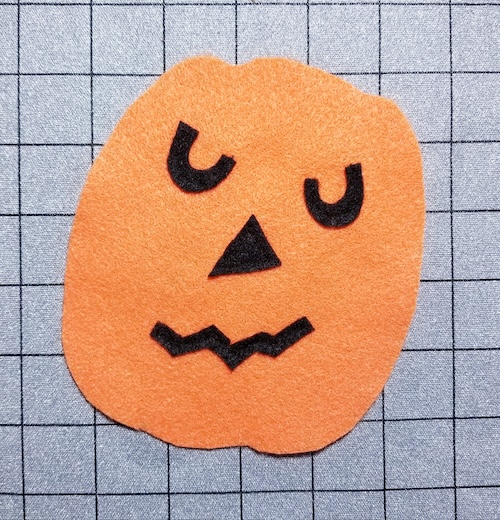
- Cut 8-10 pumpkin shapes.
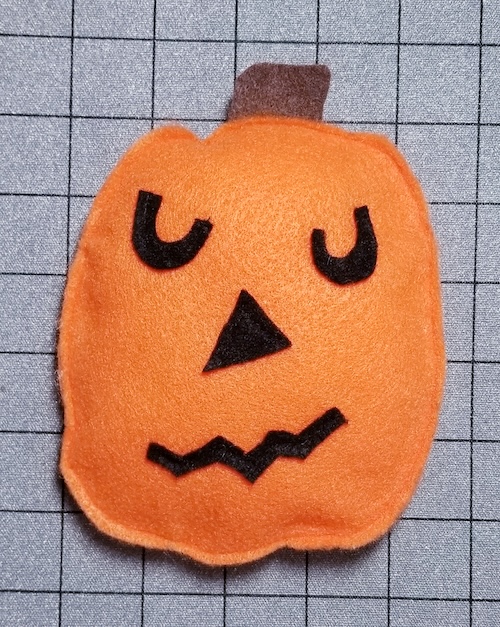
- Cut enough eyes, noses, mouths & stems for each pumpkin. Be creative! (We free hand cut out the stems.)
- Pull out two pumpkin shapes, face features & stem.
- Thread your machine with black thread. Select a straight stitch & shorten the length down to 1.6.
Pro-Tip: It can be easier to sew around the tight small curves of the pumpkin features with the stitch length shortened.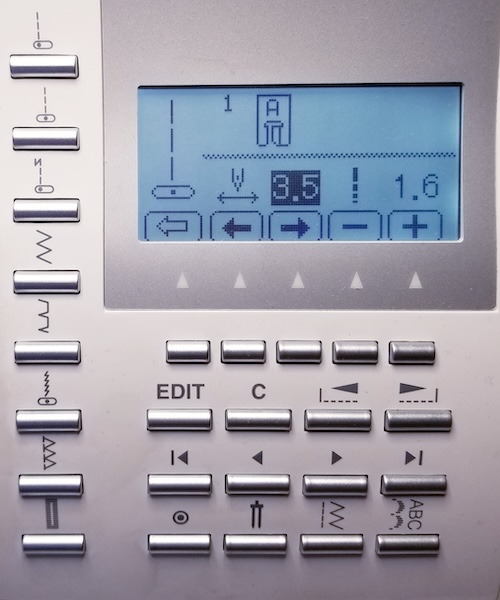
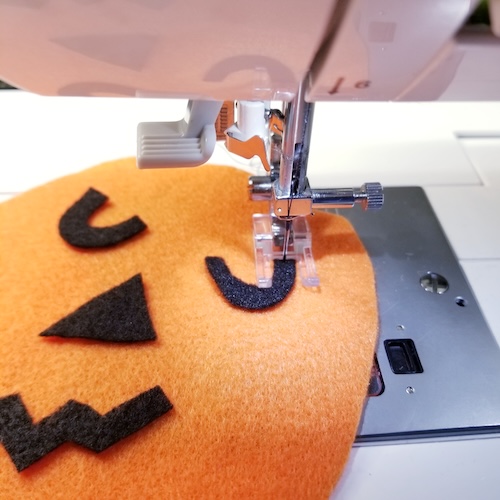
- Using your Singer® Open Toe Foot Presser Foot sew the face features down. Felt is very forgiving so don’t over think sewing down the features.
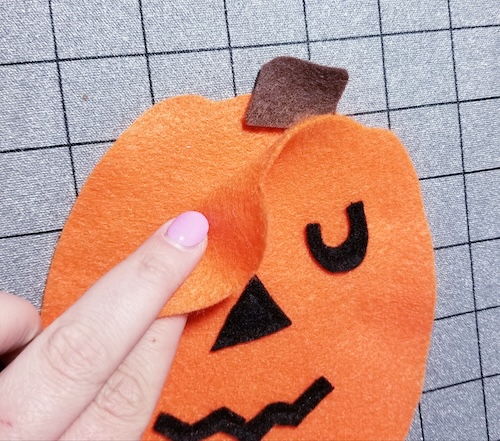
- Take the second pumpkin cut out (without features) & place it right side down.
- Place the pumpkin stem towards the top with a little more than ¼” overlap into the pumpkin. Pin or clip in place.
- Place the first pumpkin piece with the features right side up. Pin or clip in place.
- Sew all the way around the pumpkin with a ¼” seam allowance. Backstitch at the beginning. Stop sewing when there is about 2”-3” left to sew.
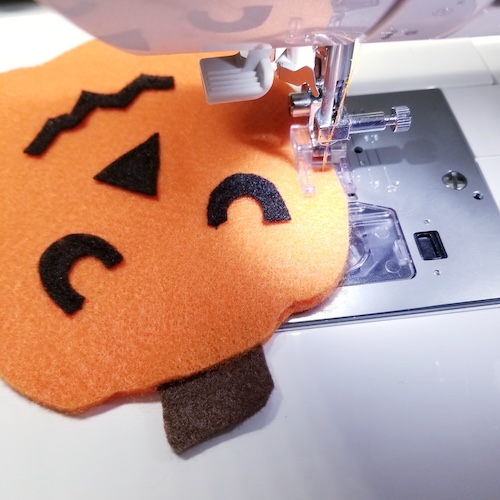
- Place the sewing needle in the down position and raise the presser foot.
- Turn the pumpkin to the side with the opening to you.
- Stuff with a little bit of poly-fil, just enough to give it a little dimension.
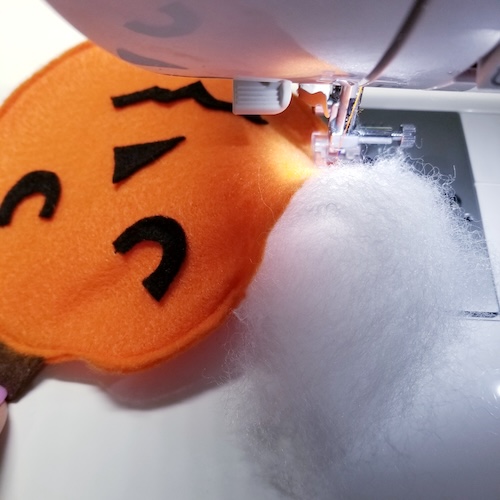
- Once it’s stuffed to your liking, continue sewing the opening closed.
- Repeat steps 4-14 until all the pumpkins are complete.
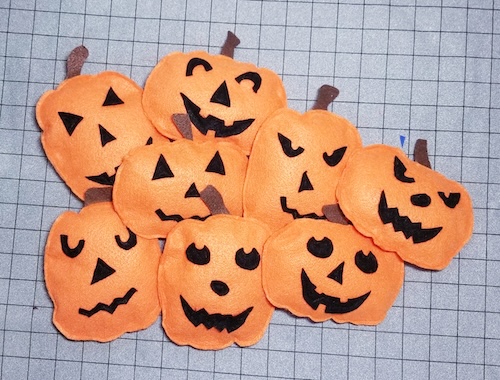
- Sting with a burlap ribbon or string.
- Tie loops at each end to hang.
- Decorate your mantle or entryway with festive fall decor alongside your one of a kind garland.