United Kingdom
Create Your Own Applique Pencil and Accessory Pouch: Stylish Organization for Students
Create Your Own Applique Pencil and Accessory Pouch: Stylish Organization for Students
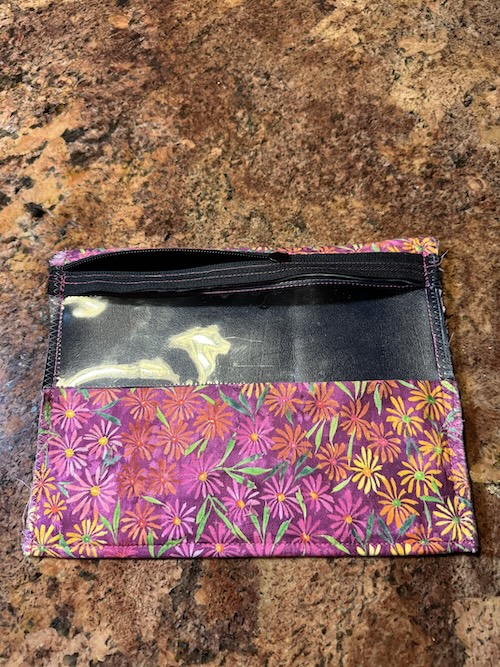
Ready to add a touch of creativity and personalization to your school supplies? Our DIY Applique Pencil and Accessory Pouch project is just what you need! Using the HUSQVARNA VIKING® DESIGNER EPIC™ 3, you can embroider and create stunning appliques on a durable vinyl pouch. This school supply bag features a clear window for easy viewing of contents and a secure zipper closure. Measuring 9.5” x 7.5”, it’s perfectly sized to fit in the front pocket of a backpack while holding all the essentials—pens, pencils, a large calculator, chargers, cell phone, markers, and more. This project not only offers practicality but also allows you to showcase your unique style. Get ready to craft a pouch that’s as functional as it is fashionable, and make every school day a little more organized and fun!
What you need:
- HUSQVARNA VIKING® DESIGNER EPIC™ 3
- HUSQVARNA VIKING® DESIGNER™ Designer Jewel Hoop II (240x150) (included with machine)
- Sensor Q Foot, A Foot, Zipper Foot
- Marine Vinyl 12” x 16”
- 12” x 3” clear vinyl
- Applique fabric for letters, 2.5” x 12”
- Tear Away stabilizer to fit the DESIGNER™ Designer Jewel Hoop II (240x150)
- 10” -12” nylon zipper or longer
- Embroidery thread in colors needed for the embroidery design
- Sewing thread to match fabrics
- Basic sewing supplies
Cut:
Marine Vinyl from a 10” x 12” piece
- (1) 10” x 4” (embroidered bag front, cut down AFTER embroidery is finished)
- (1) 10” x 8.5” (bag back)
- (1) 10” x 1.5” (bag front top)
Clear Vinyl
- (1) 10” x 3” (bag front)
Lining Fabric
- (1) 14” x 10”)
Prepare:
- Hoop the marine vinyl in the DESIGNER™ Designer Jewel Hoop II (240x150). If using fabric instead of vinyl or choosing to float the marine vinyl, use Tear Away stabilizer in the hoop and painter’s tape to secure the vinyl onto the hoop and stabilizer.
- Install a new embroidery needle and the Sensor Q Foot.
- Thread the bobbin with 60wt. embroidery bobbin thread and the needle with 40wt. embroidery thread.
Embroider:
- On the Home Screen, select Embroidery.
- Select 240x150 under the Hoop Options.
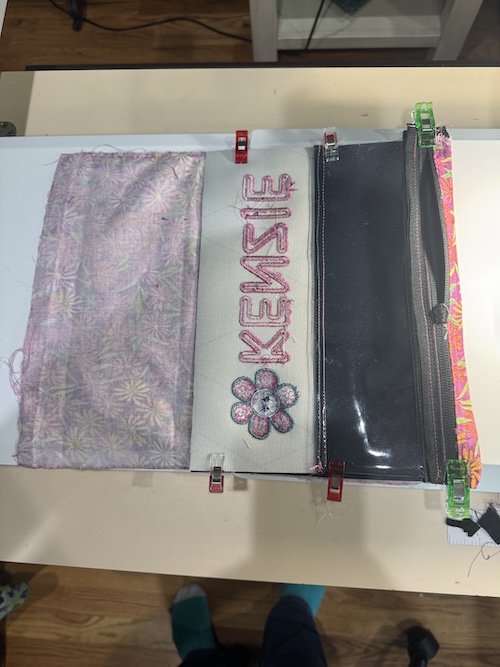
- Select the embroidery Design icon and go to the Children tab. Select design 11, the yellow daisy with face.
- Rotate the design 90o. Position it at -36.4 horizontally and 88.5 vertically.
- Touch Create Applique.
- Select the T icon and select from the Letter Shapes the first letter of the name you will applique. Touch the T icon again to close the screen.
- Select the Autofill Stitch icon and then select stitch 4, Satin Stitch (narrow).
- Rotate the design 90o
- In Scaling, change the Design Height to 25, which will result in a 1.5” tall letter. Since the Scale is locked, the letter will be scaled proportionally.
- Touch the green check mark at the top of the screen.
- Position the letter horizontally at -36.4 and 45.8 vertically, which will position the bottom of the letter approximately 1.25” from the left edge of the hoop (the side the clip is on) and next to the flower.
- Repeat steps 5-11 adding applique letters one at a time, spelling out the desired name. Space the letters appropriately across the hoop vertically, aligning all the bottoms of the letters at -36.4 horizontally.
- Save the design.
- Select Stitch Out. Use Sensor Q Foot. Do not choose to baste around hoop or design as it will puncture the marine vinyl. Select Apply.
- Turn on the Projector to check positioning of the design. Adjust as needed. Stitch out, using chosen colors for your flower and applique.
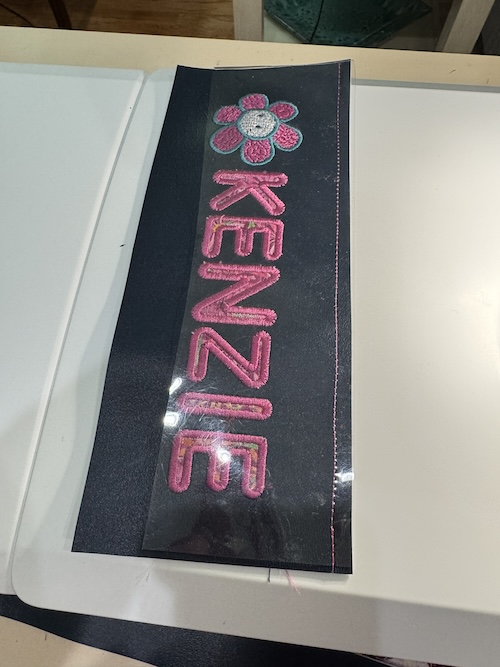
- When the embroidery is complete, remove the marine vinyl from the hoop, removing stabilizer if used.
- Cut embroidery down to 10” x 4”, centering the design. Use pieces cut off to prepare the other vinyl cuts.
Prepare:
- Replace the Sensor Q foot with the ankle and attach the ¼” foot.
- Thread the needle and bobbin with sewing thread.
- Touch the Home button and select Sewing. Select Vinyl from the fabric selection.
- From the Stitch Menu, Select A.1 Utility Stitches and stitch 2.
Sew:
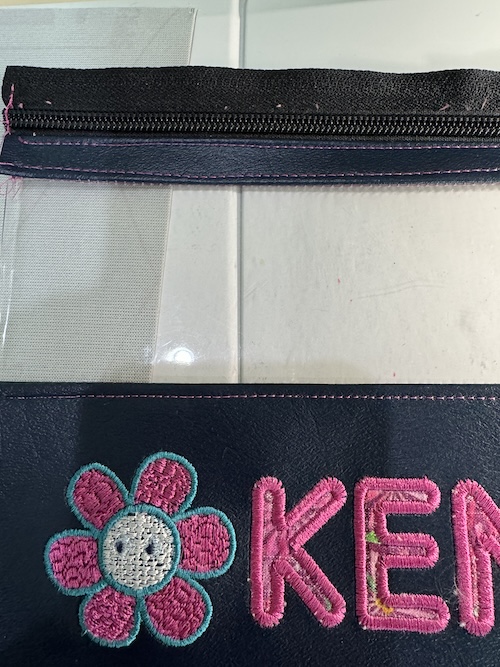
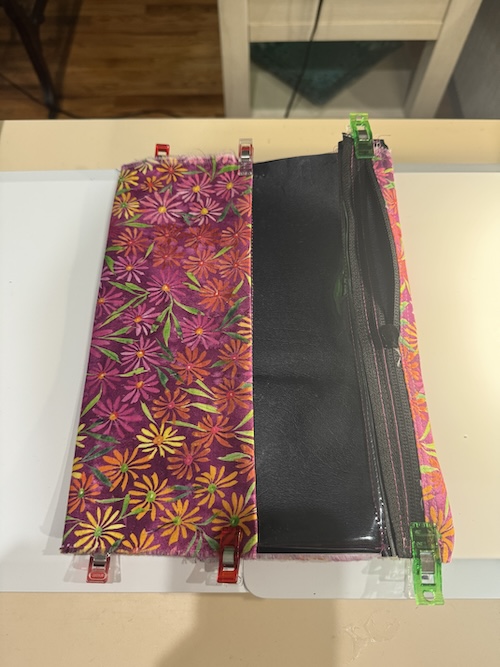
- Stitch the Embroidered Vinyl piece to the 2.5” x 10” clear vinyl, right sides together with a ¼” seam allowance. Finger press the seam towards the vinyl. Do not top stitch this yet as it will be done when the lining is sewn in.
- With right sides together, sew the 1.5” x 10” piece of marine vinyl to the top of the clear vinyl. Sewing with the marine vinyl on the underside allows the IDT system to move the vinyl across the feed dogs evenly. Finger press towards the marine vinyl and top stitch only this top piece. Using a piece of tearaway stabilizer under the clear vinyl will help move the piece across the feed dogs using the ¼” foot.
- Attach the zipper foot.
- Open the Stitch Menu and select Utility A and stitch number 1.
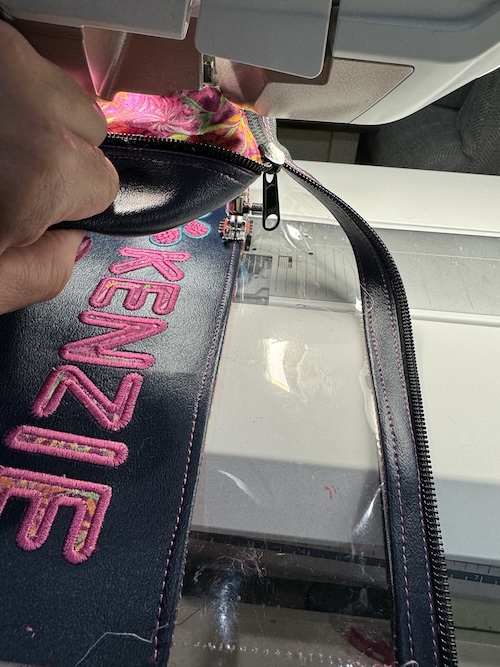
- Lay the zipper on the bag front, right side down so the right side of the zipper is facing the right side of the marine vinyl.
- Stitch close to the zipper teeth but not through them using A.1.1. Stitch ¼” away from the zipper teeth using A.1.2.
- Fold back seam just shown and top stitch the marine vinyl.
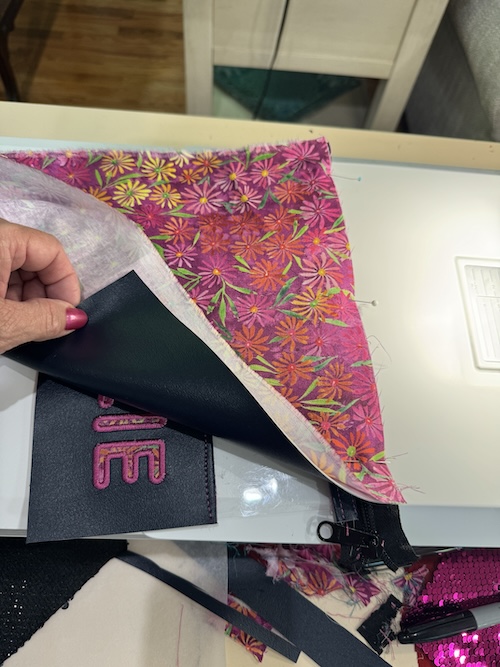
- Place the marine vinyl 10” edge on the other side of the zipper, right sides together. Place the right side of the lining fabric on the marine vinyl wrong sides bag front, creating a “sandwich’ on both sides of the zipper to be sewn. The lining will be longer than the vinyl. Pin or clip these layers. Sew close to the zipper and ¼” away from that stitch line. Turn out and top stitch through vinyl and lining.

- Remove the zipper foot and attach the ¼” foot.
- Open the zipper halfway and fold the bag so that the bag front and back are right sides together, lining up the bottom 10” edges. The lining will wrap around the outside. Fold the upper edge of the lining under at the edged where the embroidered vinyl is sewn to the clear vinyl. Pin or clip in place.
- Using a ¼” seam, stitch up the left and right sides of the bag. Stitch across the bottom edge.
- Remove the ¼” foot and attach the IDT foot A. Using A.1.6, zigzag stitch the raw edges of the side seams.
- Trim off the extra zipper and all the corners.
- Top stitch the marine vinyl to secure the lining to the underside of the vinyl inside the bag. Alternatively, a strip of heat bond can be used. Be careful to only iron from the fabric side as the iron will melt the vinyl.
- Turn out right and push out the corners with a point turner.
Fill the zipper pouch with all the school essentials for a great school year: pens, pencils, calculator, markers, lip balm, cell phone, pencil sharpener and more!