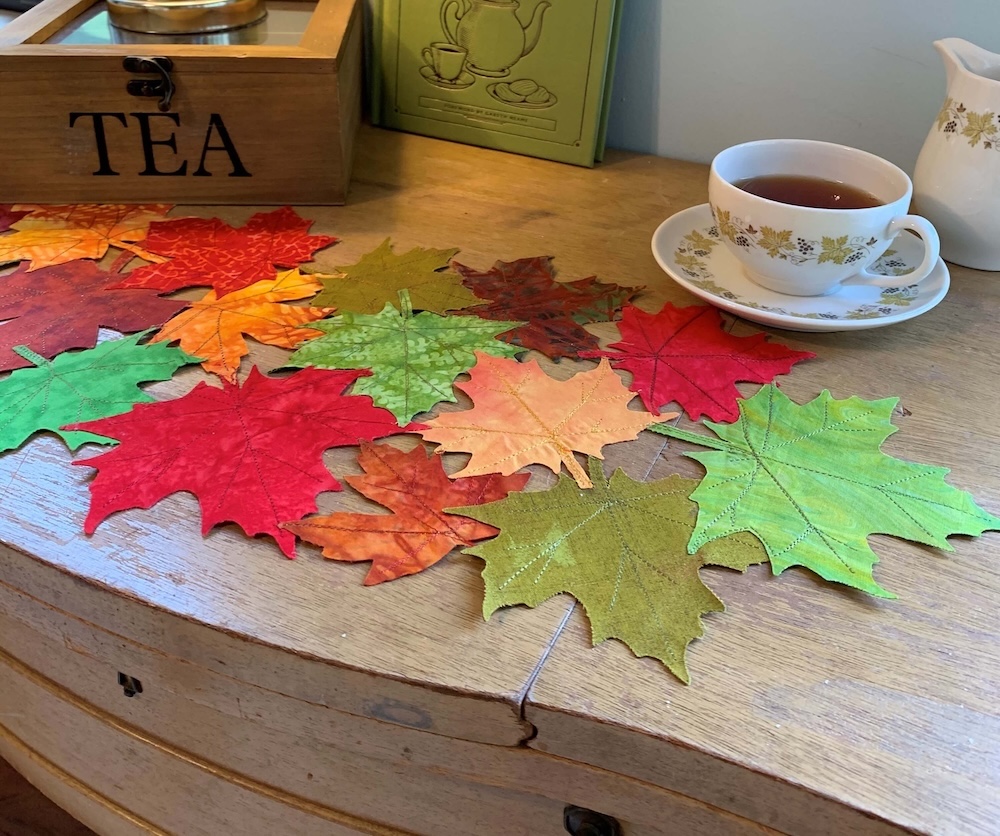
Create a Stunning Thanksgiving Table Setting with Easy DIY Decor!
- By mySewnetTeam
 Bring a stylish flair to your Thanksgiving table with unique, creative touches that your guests will love. From personalized place cards to a festive table runner, this DIY decor project adds warmth and personality to any Thanksgiving table setting. Perfect for family fun, this project requires no prior experience—just gather your loved ones and get ready to create a memorable holiday table!
What you'll need:
- 4--6 fat quarters fall color batiks o
- 1 roll (9ft) ⅛” wide ribbon for place cards
- Double Sided Iron on Fusible, (Inspria™ Stitch-N-Fuse 2 or Pellon™ Steam-A Seam 2)
- Decorative thread, colors to coordinate with fabrics
- 80/12 Universal Sewing Machine needle
- Fabric Marking pen or writing pen
- Leaves or pictures of leaves
- Cardstock heavier paper or pre-purchase tags (for place cards)
- Fabric glue (optional)
- Spray Starch (optional)
- Paper or fabric markers (optional)
Project Steps
Preparation:
- Gather a variety of maple leaves or a combination of different types of leaves from trees in your neighborhood. If you don’t have any trees near you, google maple leaves and print a few different leaves to use as a template. Trace the leaf pattern on paper, and cut out leaf shapes.
Press and Fuse
- Open and iron fat quarters to remove wrinkles.
- Cut fat quarters in half, so they measure approximately 11 x 18”. 3.
- Lay one fabric, right (pretty) side down on your ironing surface.
- Remove one side of the paper on the double-sided fusible product you are using.
- Lay the fusible (rough) side face down on the half piece of batik (the paper side will be face up.)
- Iron fusible material to the batik fabric. (Follow the instructions for the fusible product.)
- Let cool.
- Pin the fabric to the ironing board if possible so it won’t move as you pull the paper away.
- Remove paper from the fused fabric, starting on one corner, lift the paper away. If the paper pulls the fusible with it, lay the paper back down and iron again.
- After the paper has been pulled away, lay the other half of the fat quarter right (pretty) side up on top of the fabric with the fusible. Iron the fabrics to fuse both pieces together.
- Repeat the process for the other fat quarters. The fabrics can be mixed and matched so the top and bottom look different
Mark Fabric:
- Trace leaf designs on fabric with a marking pen, or a regular pen if you don’t have a fabric marking pen. Arrange leaf placement to get the most leaves from your fabric.
- Cut leaves out on the line or just inside the line.
- Mark vein lines on leaf with a washaway or iron away fabric pen if possible.
Stitch:
- Thread machine with the same decorative thread on the top and in the bobbin.
- Start with a new needle.
- Thread machine with thread color close to the fabric color.
- Choose straight stitch, length 2.5
- Stitch vein lines to add interest. After stitching the first leaf, you can continue stitching without marking the lines if you are comfortable.
- Layout leaves on a flat surface in the shape you would like to make the table runner the best size to fit your table. To make a rectangle, plan on three leaves for every row. To make placemats, arrange leaves to form a shape that is approximately 12” x 18”.
- Pin or put a drop of fabric glue to hold the first two leaves together where they overlap. Stitch together along the edge where they overlap or along a vien that overlaps.
- Lay the stitched leaves back in place and check that it is stitched the way you want it.
- Pick up the third leaf. Pin in place, and stitch together where they overlap.
- Continue to stitch leaves together until you are happy with the size. Press as you go.
Place Cards
- To make place cards cut two small holes in the leaf close to the stem, along the vein line.
- Cut cardstock shape approx.1” x 1½” or use pre-cut tags. For added interest, add a larger tag below using a different color cardstock. Get creative: use markers to color paper if you only have white card stock.
- Write your guest’s names on card tags.
- Decide if you want to use one or two leaves. If you use two, stack a larger leaf on the bottom and a smaller leaf on top and stitch them together on the center vein.
- To make the edge of the leaves curl, spray with spray starch, which also adds body to the leaves. If you don’t have spray starch, spray with water.
- Cut one small hole in the tag to the left of the name.
- Cut ribbon into 6” pieces.
- Pull one end of the ribbon up from the back into the first hole in the leaf and the other end through the second hole on the back.
- Lace the tag through one end of the ribbon. Tie a bow. Repeat to make a tag for all your guests. Make a couple extra with no name just in case you have unexpected guests. You can add the names on Thanksgiving Day!


 United Kingdom