 Algeria
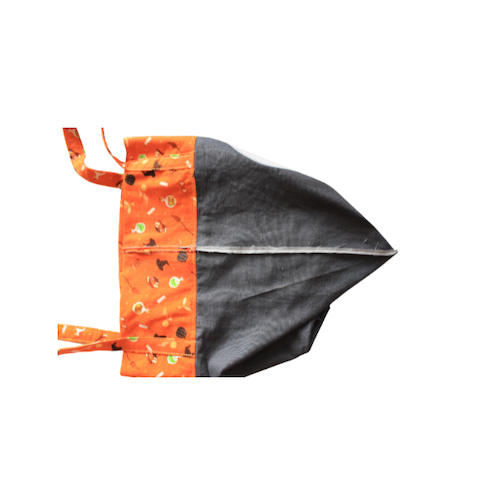
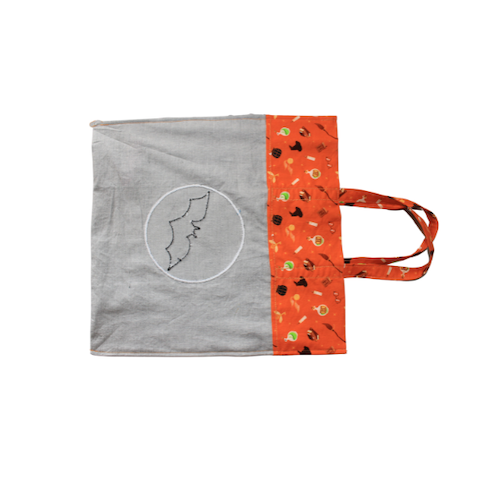
Halloween Trick or Treat Bag
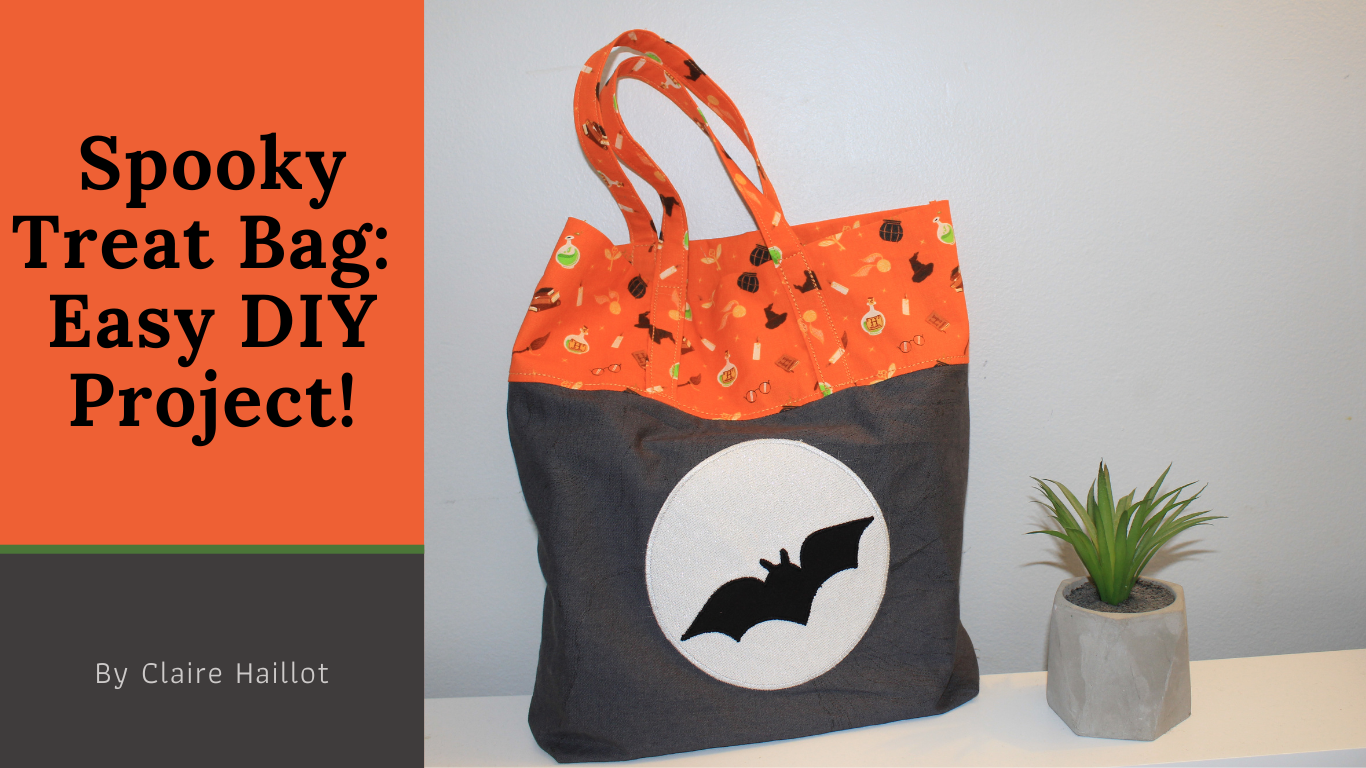
Welcome to this beginner-friendly Halloween bag project!
Perfect for trick-or-treating or as a festive tote, this project combines basic sewing techniques with fun appliqué designs. Whether you're new to sewing or looking for a simple and enjoyable craft, this guide will walk you through each step to create a spooky and stylish bag. We'll cover everything from preparing the fabric and creating appliqué shapes to assembling the bag using the "hot dog" technique and finishing it with a neat French seam. By the end, you'll have a charming Halloween bag that's as practical as it is eye-catching. Let's get started on crafting your perfect Halloween accessory!
What you need:
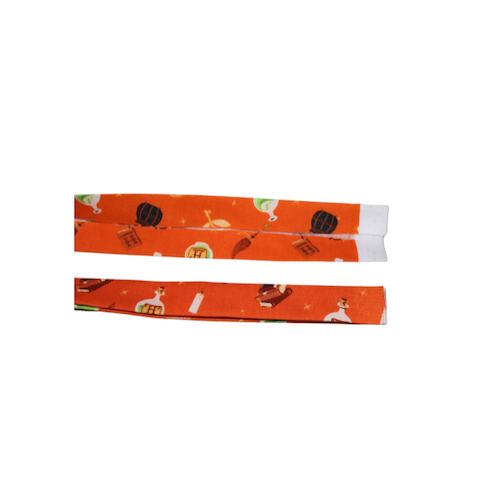
- Fabric:
- Body of bag: 14’’x20’’ rectangle
- Top edge of bag: 2 rectangles sized 8½’’x14’’
- Handles: 3’’x42’’ (WOF) rectangle
- Moon: 6’’ square
- Bat: 3’’x5’’ rectangle
- Fusible web:
- Moon: 6’’ square
- Bat: 3’’x5’’ rectangle
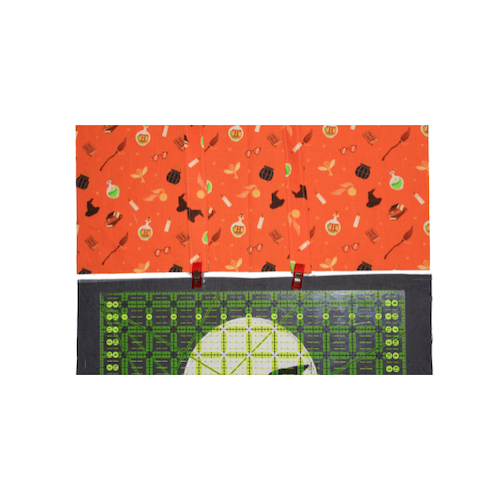
- Tear-away stabilizer (one 10’’ square, two 1’’x14’’ rectangles and four 2’’x5’’ rectangles)
- Threads:
- Decorative thread for appliqué of moon and bat (can be two different colors)
- 60wt bobbin thread for appliqué
- 50wt cotton thread in a color that will blend with top edge of bag
- Appliqué or Open Toe foot
- Quarter inch foot
- 5/8’’ quilt binder attachment
- Cutting mat, ruler and rotary cutter
- Iron and Ironing surface
- 6-inch scissors
- Pins or wonder clips
Preparing the appliqué
Follow directions indicated on the fusible web you have purchased for temperature settings and time.
Note that the bat and moon shapes are on the last page of this document. However, you could prepare your pieces with the SINGER® MOMENTO™ cutting machine. The Halloween bat is part of the mySewnet™ designs and the moon was created by inserting a 5½” circle in the mySewnet™ crafting software.
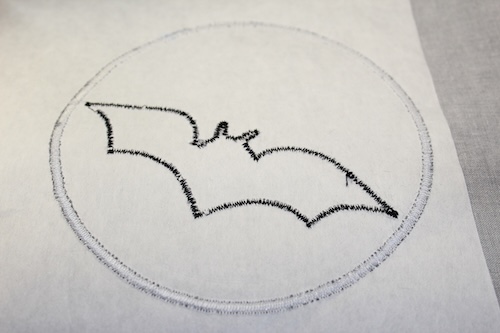
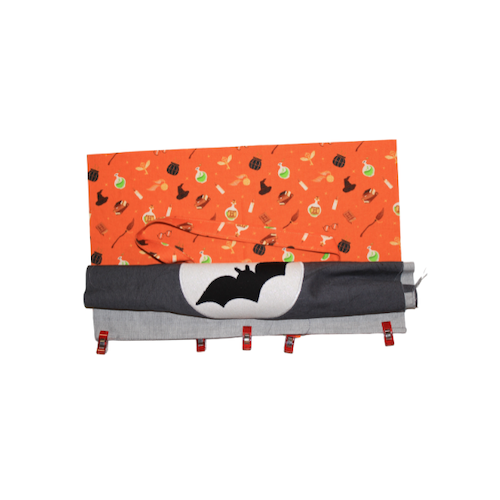
Bat
- Find the non-peelable paper side of your 3’’x5’’ fusible web rectangle.
- Draw the shape of the bat on that paper.
- Remove the peelable paper from the fusible web.
- Apply the sticky side of the fusible web to the wrong side of your 3’’x5’’ rectangle of bat fabric.
- Fuse in place according to the instructions on the fusible web.
- Cut out the shape of the bat.
Moon
- Find the non-peelable paper side of your 6’’ square of fusible web.
- Draw shape of moon on that paper.
- Remove the peelable paper from the fusible web.
- Apply the sticky side of the fusible web to the wrong side of your 6’’ square of moon fabric.
- Fuse in place according to the instructions on the fusible web.
- Cut out the shape of the moon.
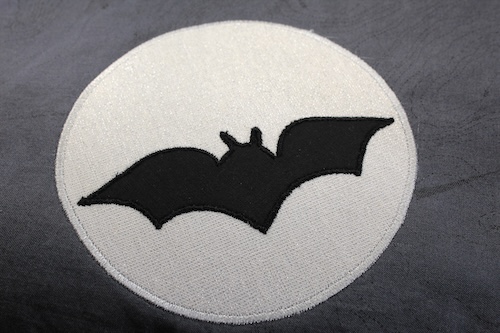
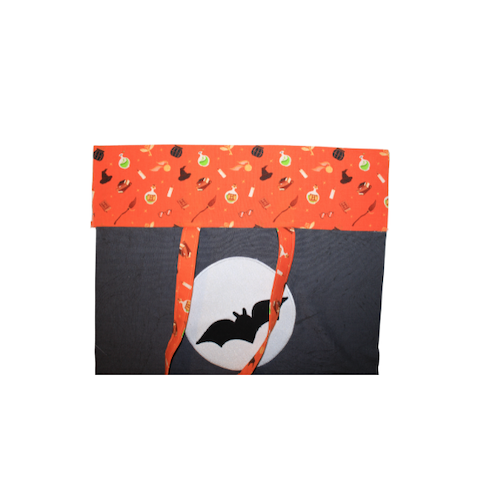
Positioning, fusing and stitching appliqués into place 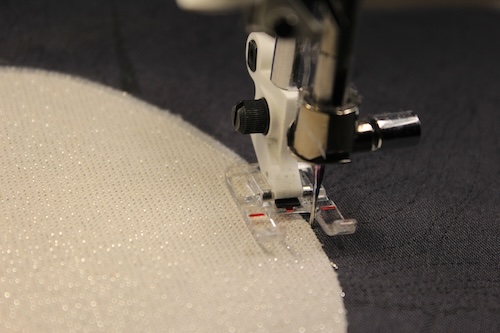
- Peel off the paper behind the moon and position on one edge of your 14’’x20’’ rectangle of bag fabric, about one inch below the edge and centered.
- Fuse in place according to the instructions on the fusible web.
- Place your stabilizer underneath your bag fabric to cover all the appliqué.
- Using the Appliqué or Open Toe foot, satin stitch the moon. We used the zig zag stitch with the stitch width at 4mm and stitch length at 1.0 with the needle position as far right as possible.
- Peel off the paper behind the bat and position over the moon, ensuring that it is well inside the circle. Keep in mind that the head of the bat should be towards the top edge of the fabric.
- Fuse in place according to the instructions on the fusible web.
- Using the Appliqué or Open Toe foot, satin stitch the bat. We used the zig zag stitch with the stitch width at 2mm and stitch length at 1.0 with the needle position as far right as possible. If you have the tapering feature on your sewing machine, this is a great time to use it.
- Remove the stabilizer.
The trick to remember when stitching the bat into place is to reposition only when your needle is in the moon fabric (right side needle position) as the gaps in your stitching will not show on the black fabric.
Preparing the handles
With the 5/8’’ quilt binder
- Fold your 3’’ strip of fabric in half lengthwise.
- Follow the instructions that came with the attachment to position the 5/8’’ quilt binder onto your sewing machine.
- Feed your fabric through the attachment and, once folded properly, position the binding right by the edge of the binding foot. Stitch the binding into place.
- Stitch the other side of the binding for a symmetrical look.
- Cut the binding in half. You should have two handle strips approximately 20’’ long.
Without the 5/8’’ quilt binder
- Fold your 3’’ strip of fabric in half lengthwise.
- Fold the edges of the strip towards the middle and press.
- Stitch the folded edge of the fabric together. I like using a straight stitch at 1/8’’ from the edge.
- You can stitch the other side of the binding for a symmetrical look.
- Cut the binding in half. You should have two handle strips approximately 20’’ long.
Assembling the body of the Bag to the Top Edges with Handles Using the "Hot Dog" Technique
- Place your top edge rectangle fabric on your table, right side facing up.
- Find your center on the 14" edge of the fabric, and position one end of the handle 2 inches away on the left and the other end 2 inches away on the right. Pin the ends in place.
- Lay the rectangle of fabric for the body of the bag, wrong side facing up, on top of the 14" edge where you positioned the handle. Align the edges and pin together using three pins: one at each end and one in the middle.
- Fold or roll the body of the bag fabric so that it fits inside the top edge rectangle. It will look like a hot dog inside a bun, with the body of the bag being the hot dog and the top edge fabric the bun. Ensure the handle is safely tucked under and not twisted.
- Wrap the top edge fabric over the body of the bag and handle, and align the edge to the pinned section. Pin the layers together.
- Stitch along the pinned edge using a ¼’’ seam allowance, following the ¼’’ foot with guide. Use the tie-off feature at the beginning and end of your stitch if available. (If you have a serger, this is a great time to use it!)
- Carefully pull the body of the bag and handle out from one side of your roll.
- Press seams for a nice smooth finish.
- Repeat the process on the other edge of the body of the bag with the second top edge rectangle and handle.
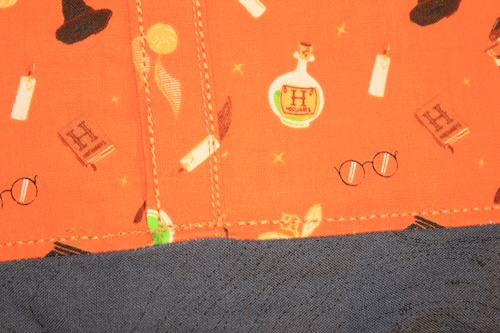
- Using tear-away stabilizer under your project, stitch the section of the handles on the top edge fabric. We recommend using a triple stitch for added strength. Remove the stabilizer.
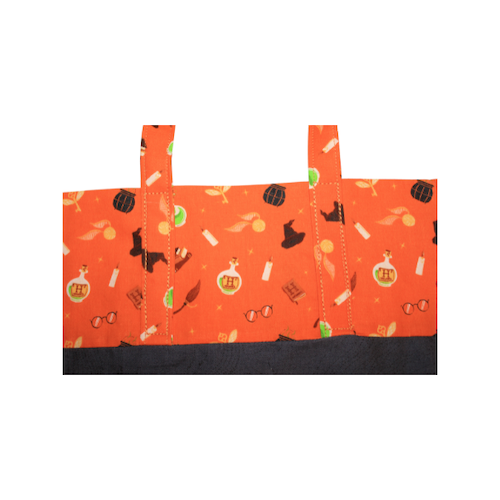
- For a decorative touch, add a decorative stitch along the top edge of the fabric near the body of the bag. You should also use a stabilizer for this and removing it once done.
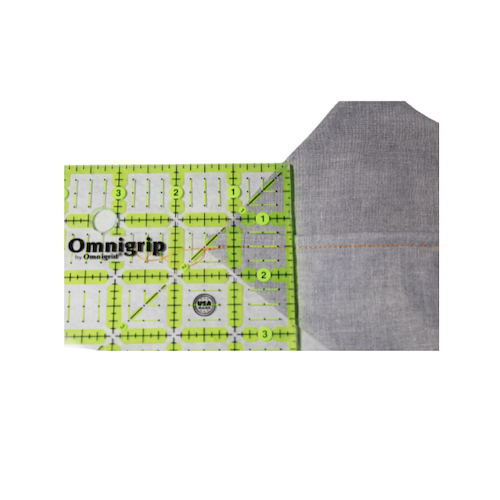
Finishing the Bag Using the French Seam Technique
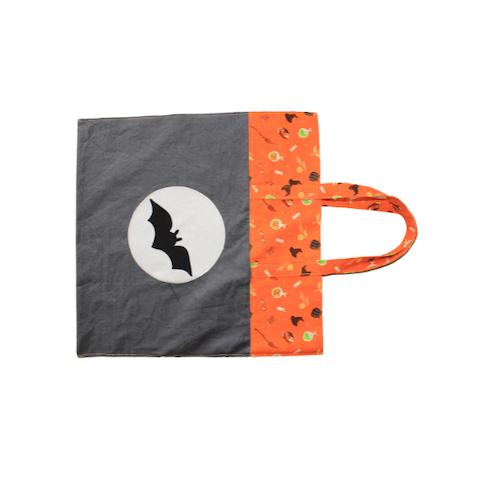
- With the inside sides of the bag facing each other, align the edges of the bag. Pin the sides together, ensuring that the edges are aligned.
- Stitch a ¼’’ seam along both sides of the bag.
- Trim the seam allowance to 1/8’’ to reduce bulk.
- Press the seam open.
- Turn the bag inside out so that the right sides are facing each other. Press the edges to create a crisp fold.
- Stitch a ⅜’’ seam along the sides of the bag, encasing the raw edges within the seam.
- Turn the bag right side out and press the final seams.
Your bag now has a clean, professional finish on the inside. This French seam technique will ensure that the inside of your bag looks neat and tidy, with no raw edges exposed.
Boxing the bottom of the Bag
- Lay the bag flat and press the bottom of the bag to create a crease.
- Turn the bag inside out.
- Lay a bottom corner flat, matching the side seam with the crease to create a triangle.
- Draw a line perpendicular to the side seam, where the width of the fabric is about 3’’.
- Triple stitch along the marked line.
- Repeat on the other bottom corner.
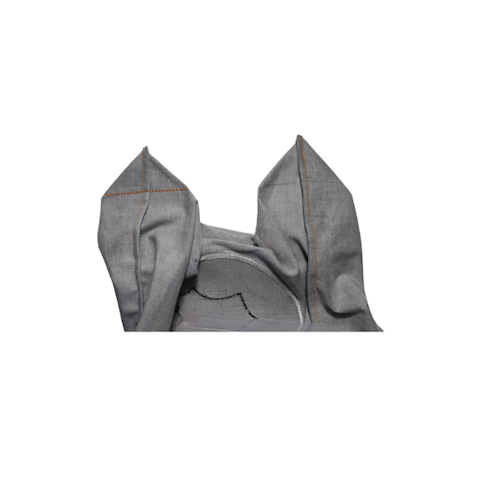
- You can hand stitch the triangles to the bottom of the bag or leave them as is.
These steps will give your bag a boxed bottom, adding structure and a professional finish.
Congratulations on completing your beginner Halloween bag!
You've successfully combined fabric, appliqué, and sewing techniques to create a functional and festive accessory. This project not only gave you the opportunity to practice essential sewing skills but also allowed you to add your creative touch with the bat and moon appliqué. The "hot dog" technique and French seam finish ensure your bag is durable and professionally crafted. Whether you use it for trick-or-treating, carrying festive goodies, or as a Halloween-themed tote, your new bag is sure to impress.
Happy Halloween, and happy sewing!