Canada
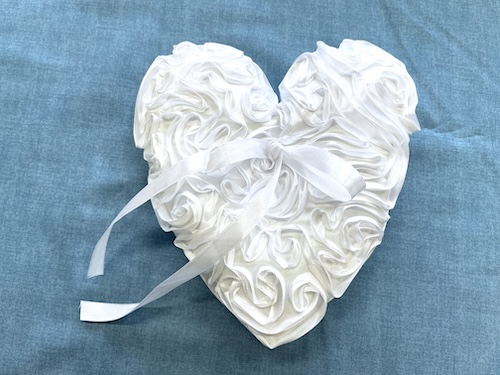
Timeless Elegance: Ring Bearer Pillow with Ribbon Embroidery
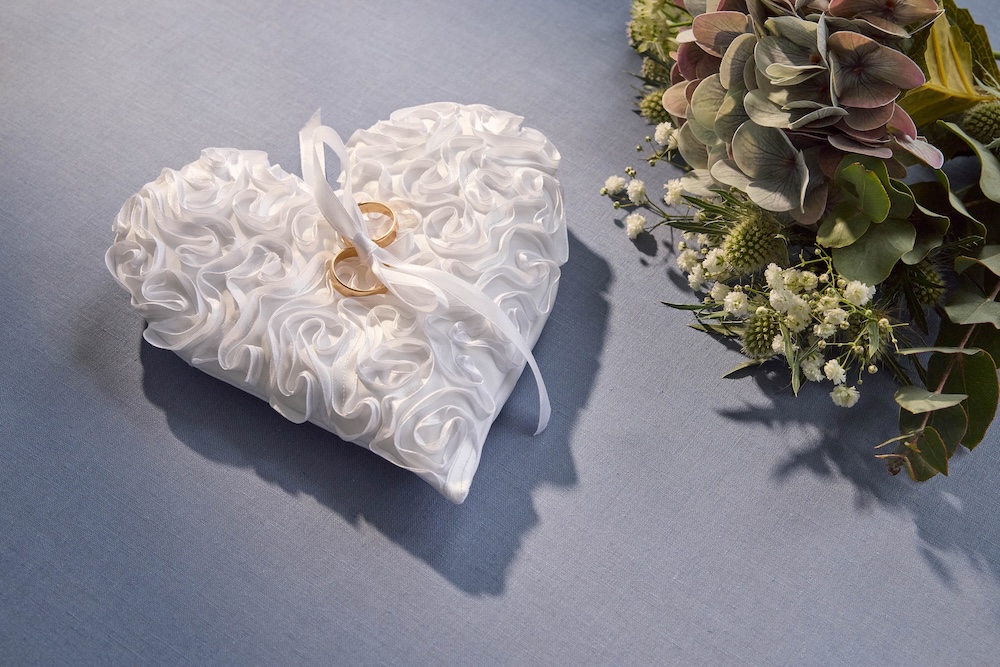
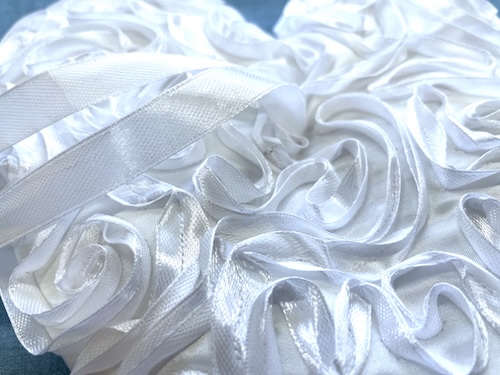
Add a touch of romance to the wedding ceremony with this beautifully handcrafted Ring Bearer Pillow featuring delicate ribbon embroidery. This charming pillow not only provides a stylish way to present the rings but also becomes a treasured keepsake, capturing the magic of the special day for years to come. Stitch your love into every detail and create an heirloom-worthy piece! 💍✨
What you need:
- Ribbon embellishment attachment:
- Embroidery file- You can find it Here
- If you want to learn how to digitize the embroidery file you can find instructions Here
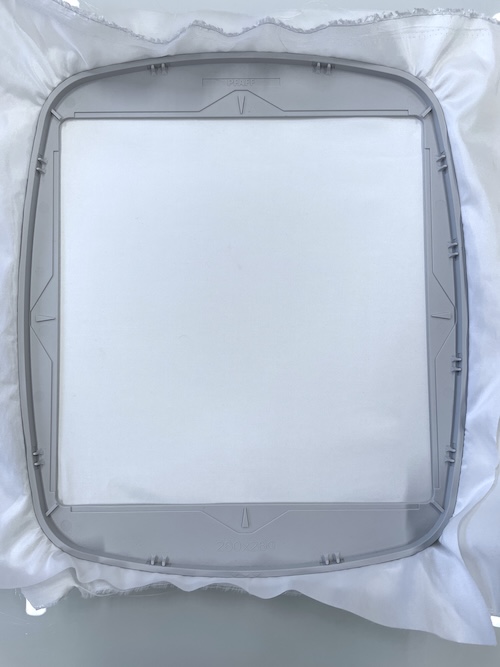
- Embroidery hoop 260x260mm (360x260mm hoop can also be used but requires more stabilizer and satin)
Materials needed
- Fabric for the background 1 piece 18x20”(45x50cm) of white satin
- Cut away stabilizer (an old bedsheet works also and gives a softer look)
- Fabrick for the back of the pillow 2 pieces
- Sewing thread
- White ribbon 3/8” (10mm) wide. 9yds (9m)
- 1 piece of white ribbon 3/8” (10mm) wide for the handle 10” (25cm)
- Polyester batting for filling
How to make the project
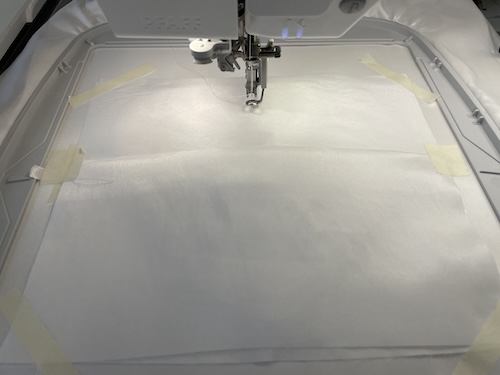
- Hoop the stabilizer and the white satin in the 260x260mm hoop. (a 360x260mm hoop can also be used, but requires a larger piece of stabilizer and batting)
- Select the embroidery file on your machine and attach the hoop
- Wind the bobbin on the creative embellishment attachment with ribbon.
- Attach the Creative Embellishment attachment to your embroidery machine following the instructions provided with the accessory.
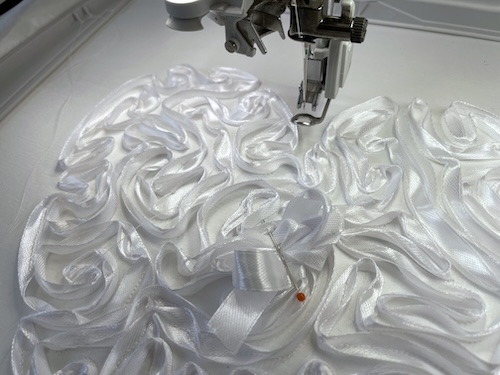
- Pull out the tail of white ribbon about 12” (30cm) before stitching out the ribbon embroidery.
- Start embroidering. After a few stitches you will be asked to cut off the ribbon end. Do NOT do this, the ribbon is needed to tie the rings on the pillow!
- Continue stitching to the end of the embroidery. Take care to keep the long ribbon end out of the way to avoid it getting caught in the stitch line.
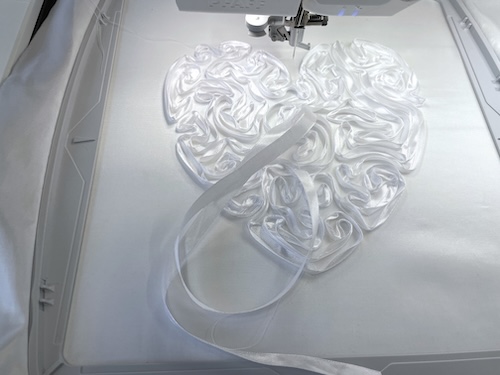
- When finished, pull out about 12” (30cm) of ribbon before cutting it off. This is the other end to be tied to the ribbons.
Finishing the project: - Remove the Creative Embellishment attachment from the machine and add the embroidery foot instead (6D)
- Fold the white ribbon ends together and pin or tape them in the center.
- Fold the two fabric pieces for the back in half and press.
- Lay the ribbon piece for the handle across the ribbon embroidery. Secure with tape outside the embroidery.
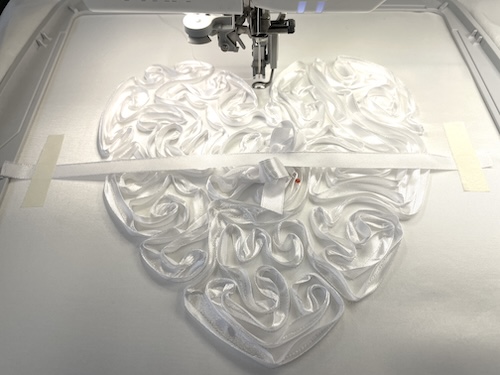
- Place the two fabric pieces on top, they should overlap about 2” (5cm) in the center. Use masking tape to hold them down.
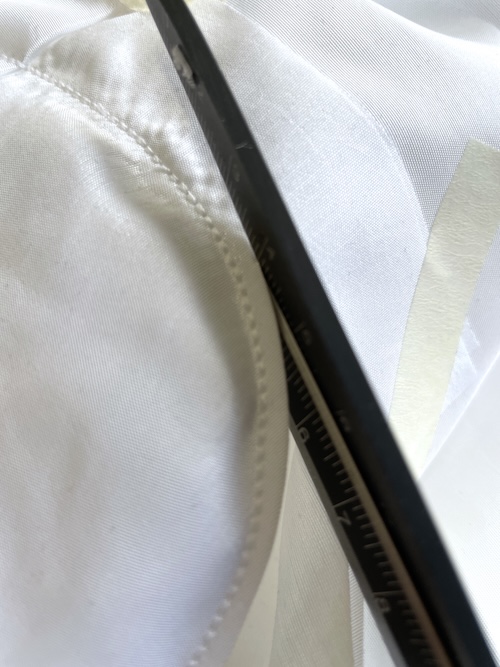
- Stitch next color, The outline. Go slowly and hold down the edges if needed.
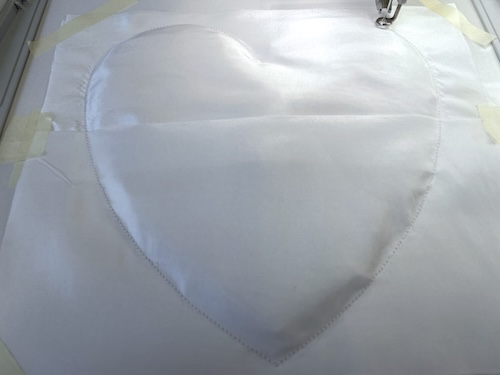
- Remove the hoop and unhoop the project. Cut close to the edge, all around. Make a clip into the seam at the inward curve.
- Fold right side out, fill with fiberfill, do not overfill.
- In the center where the ribbons meet, take a hand stitch through the pillow, and secure the folded edges on the back. Tie a knot pulling the center and back together, forming a “nest” for the rings.
Your ring pillow is now finished, On the big day, tie the rings together, make a nice bow and cut off the edges of the ribbon if needed.