Designing your Quilt
This instruction will help you to make your first quilt. At the same time, you can test some of the features included in this program. Quilting is fun and has never been easier. This program will allow you to play with design like never before, let us start!
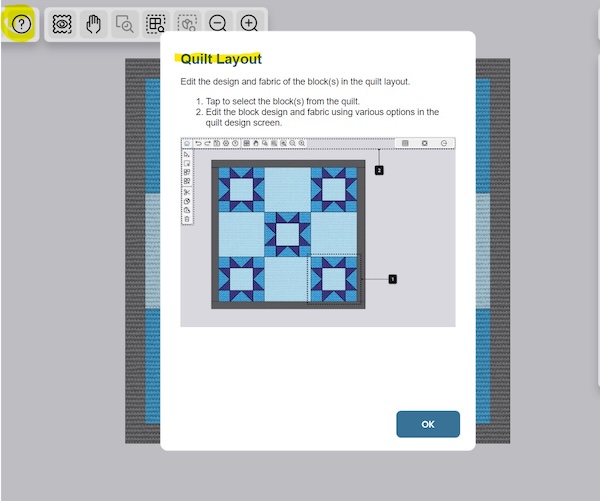
If you want more help, just click on the Question Mark, and then click anywhere on the screen for more information about that specific function.

Designing the Quilt:
- Click on Load a Preset Quilt Layout.
- A new window will open. Here you will see all the presets you can choose from Click on the 3x3 option and then click on the OK button.
- The Canvas will open with your selected empty quilt layout. Here you can see the size of the finished quilt with 2” borders. You can change the size but let us leave it as it is now.
- Click on the Quilt Blocks Icon on the right panel. The blocks will now appear on the panel.
- The blocks are numbered from one to nine in this case, three rows with three blocks in every row. As you can see the quilt layout is filled with one-patch blocks in alternating colors.
Every block can be changed by clicking on it or clicking on the block in the right-side panel. When a block is selected it gets a black frame around it and the background in the panel turns blue. - Let us start by selecting the top left block: Click on the Edit Block Icon (the diamond shaped icon with a pen) .
- The quilt block library will open in a separate dialog box.
- Select the block you want (in this case select the Road to Oklahoma block) and click OK.
- There are several ways to add blocks to your quilt. If you would like to use the same block on several places on the quilt you can use the Multiple Select Tool on the left side panel. Click on it and it turns blue when selected.
- Select the remaining three dark corner blocks on the quilt. The blocks will turn blue on the right panel when selected.
(Block 3,7 and 9) - Click on the Edit Block Design icon on one of them and select your block. The block will appear on all places you have selected.
- Another way to select blocks is to use the Select All Instances button: Click on a Block (in this case a light blue block), then click on select all instances. All blocks with the same color will now be selected,
(in this case 2,4,6 and 8) - Now you can click on the Edit Block Design icon on the right-side panel and select your block (in this case Diamond) and click OK. Now it looks like this:
- To get the right layout we need to rotate some of the blocks: click on the lower right corner block once to select it.
- Click on the Multiple Select Tool, then click on the top right corner block to select it too. Block 1and 9have now been selected. You can see that they have a dark blue background in the right panel:
- Click on the Block Design icon on top of the right panel.
- At the lower left corner of the panel, you have an Icon with a 90 degree turn symbol. There are also icons to flip the blocks horizontally and vertically.
- Click on the 90degree icon once to rotate the two blocks simultaneously 90 degrees. Now it will look like this:
- We need a block in the center: First click on the Quilt Blocks icon on the right-side panel. All the blocks will be shown on the panel. As you can see block 5 is a One-patch block.
- Click on block 5.
- Click on the Edit Block Design icon and select the Ohio Star Block.
- Click Ok. Now it should look like this:
- The diamond blocks are in another blue shade than the other blocks. Let us change that: Click on the Multiple Select Tool and select the diamond blocks.
(block 2,4,6,8) - Click on the Quilt Block Panel icon on top of the right-side panel to change the colors. Let us start with the dark blue color: Click on Edit Block Design icon (The icon with the pen symbol).
- In the fabric stash panel, select Navy and click OK.
- Now it should look like this:
- Repeat with the center block and select navy instead of the dark blue. Your quilt is now finished. The border is set to 2” at this level but of course you can cut it in any size you like later. The color of the border is preset to gray and cannot be changed.
Next step on your journey is to cut out all the pieces. Go to the next instruction to learn more. You can find it Here


 Canada